Google Play Package Name (e.g. Com.Sirius) or Apple Bundle (e.g. 317951436).
NOTE: Note Text
NOTE: If you are using our pixel tracking option to track something other than an app on a landing page (such as registrations, searches, or offer accepts), you can create an “app” that is your landing page. The process is the same.
NOTE: The following procedures are for all app platforms. Where differences exist between platforms, specific instructions have been provided.
Required Settings
- Log in to Free App Analytics.
- Select the desired Account.
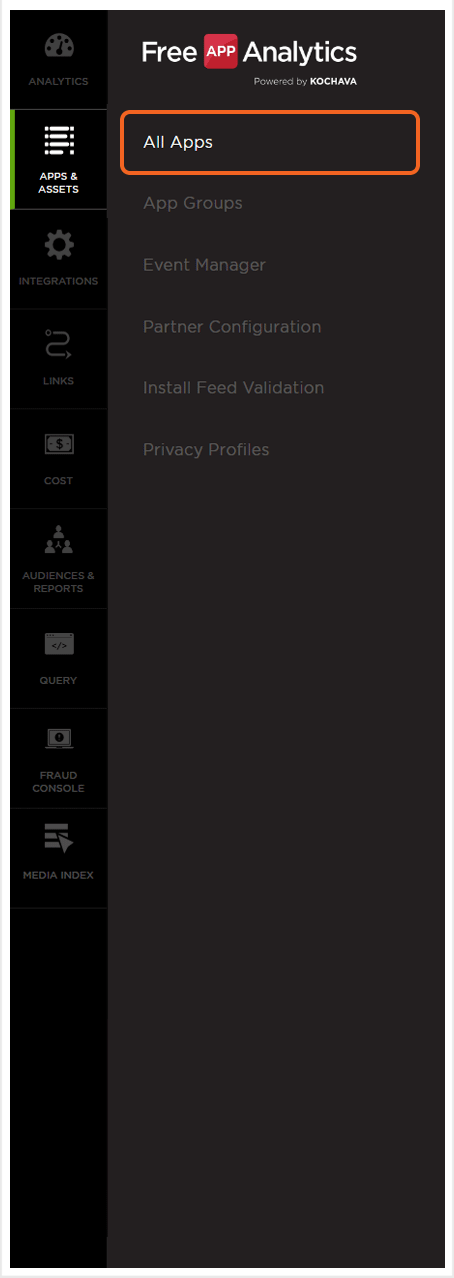
- Select Apps & Assets > All Apps.
- Click Add an App.
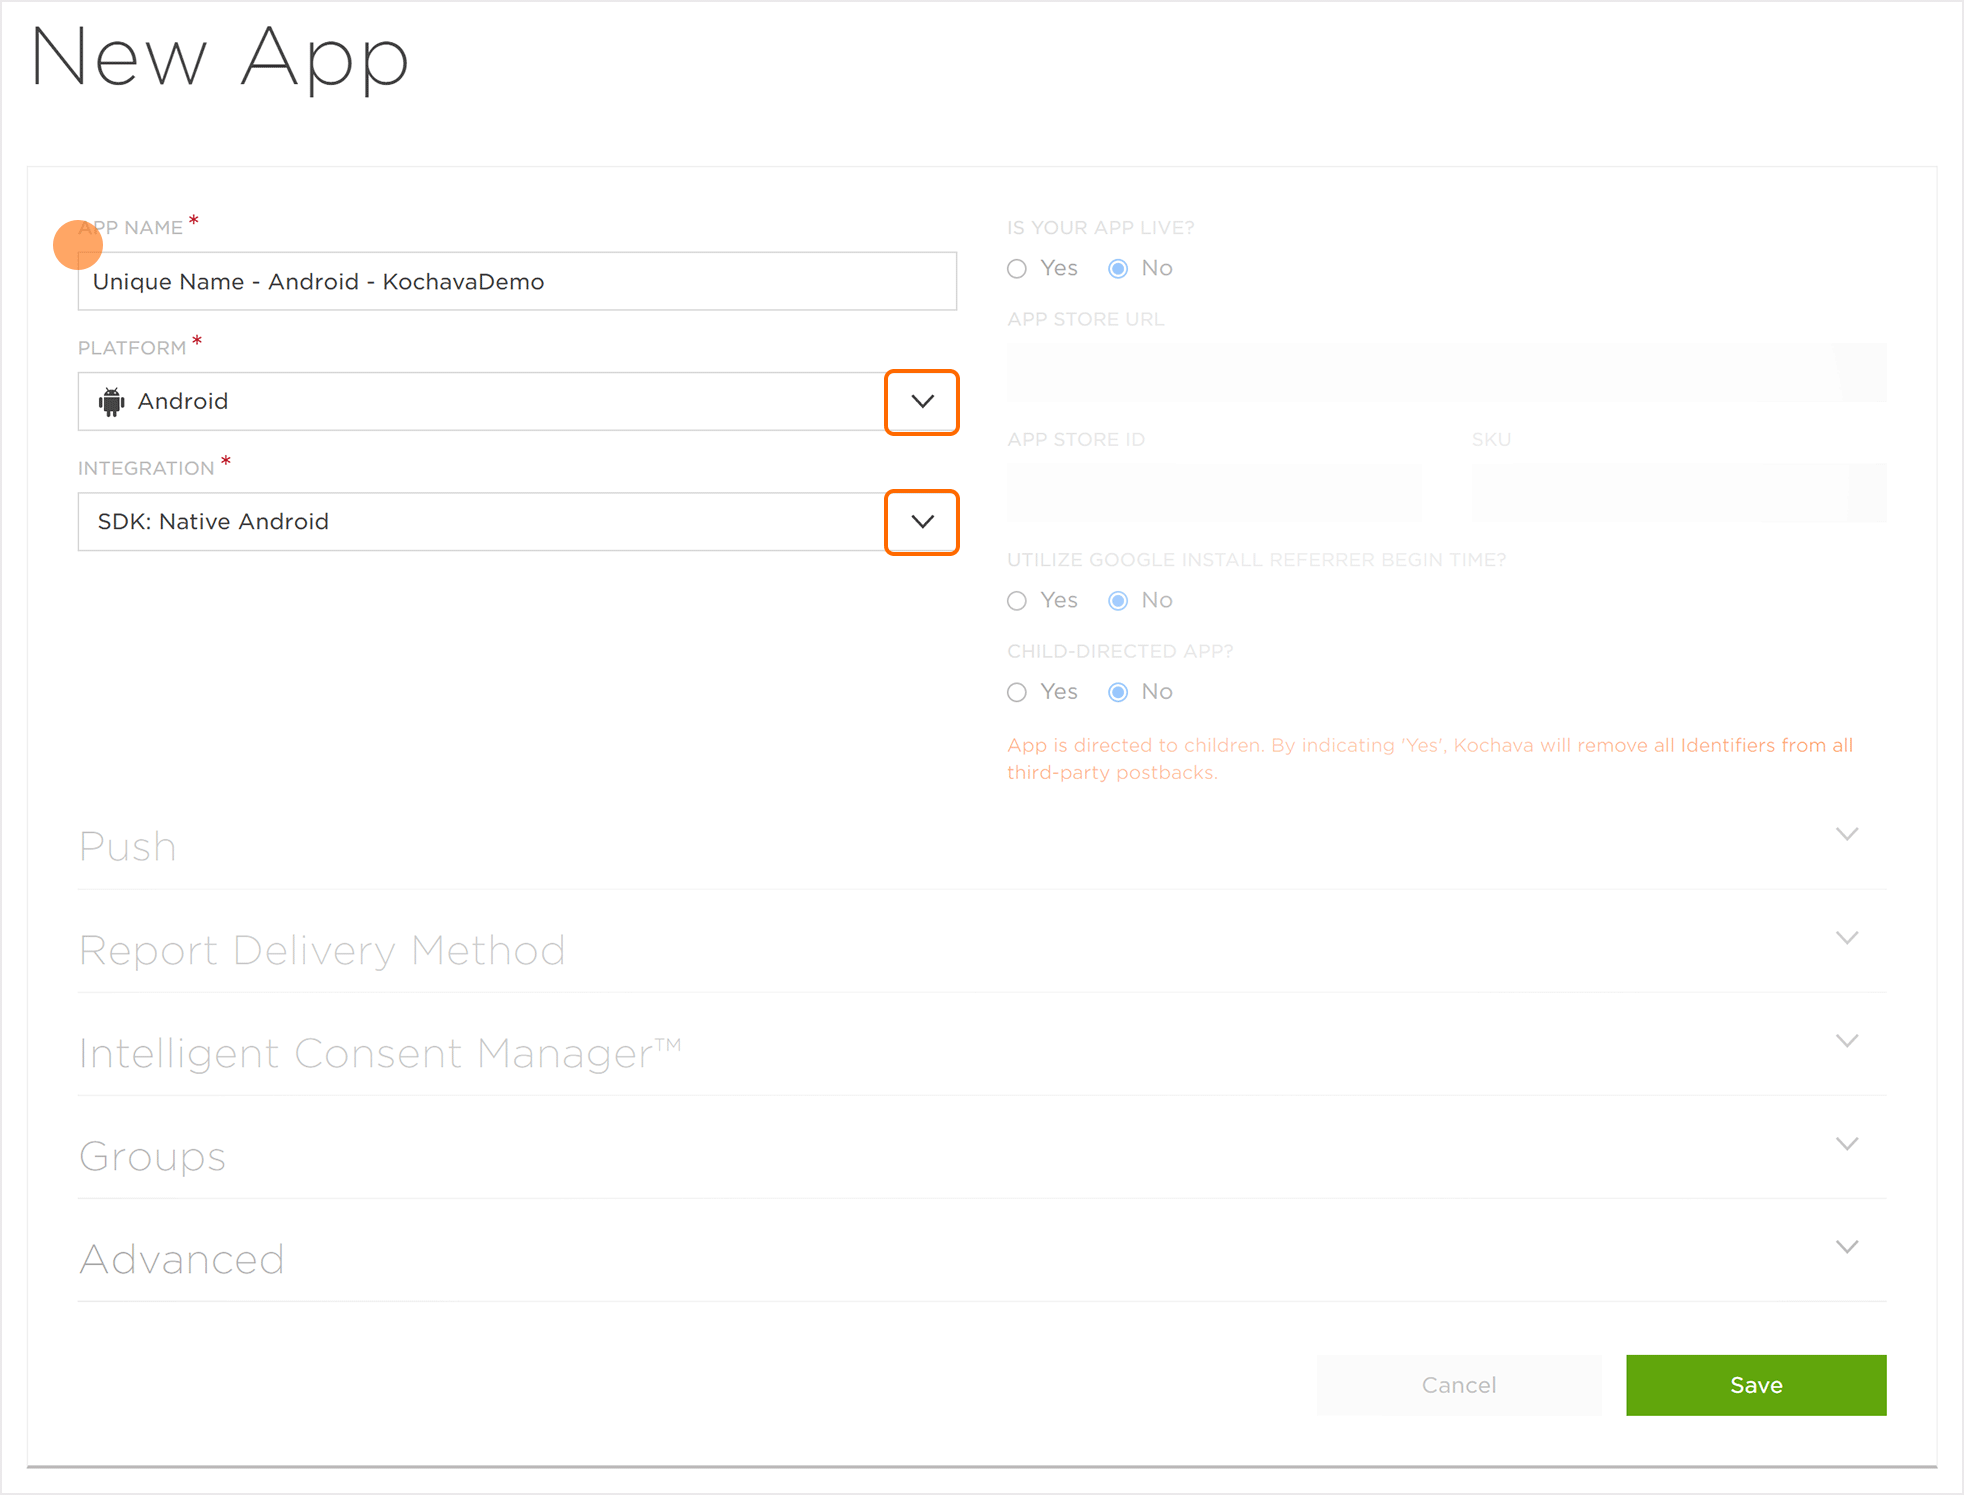
- Enter the App Name.
- Select a Platform:
- Android
- Android TV
- Chromecast
- Daydream
- Fire OS
- HTC Vive
- iOS
- LGWebOS
- Linux
- macOS
- Nintendo Switch
- Nintendo WiiU
- Oculus Rift
- Oculus GO
- Playstation
- Roku
- Samsung Gear VR
- Tizen OS
- tvOS (TV)
- Vizio Smartcast OS
- Web
- WebGL
- Windows
- Windows Xbox
- Select an Integration:
- SDK: Adobe Air
- SDK: Cordova (PhoneGap)
- SDK: Cordova
- SDK: Native iOS
- SDK: ReactNative
- SDK: Unity
- SDK: Xamarin
- Server to Server
- If no additional settings need to be modified, Click Save.
- If additional settings need to be modified, proceed to the Optional Settings section of this document.
Optional Settings
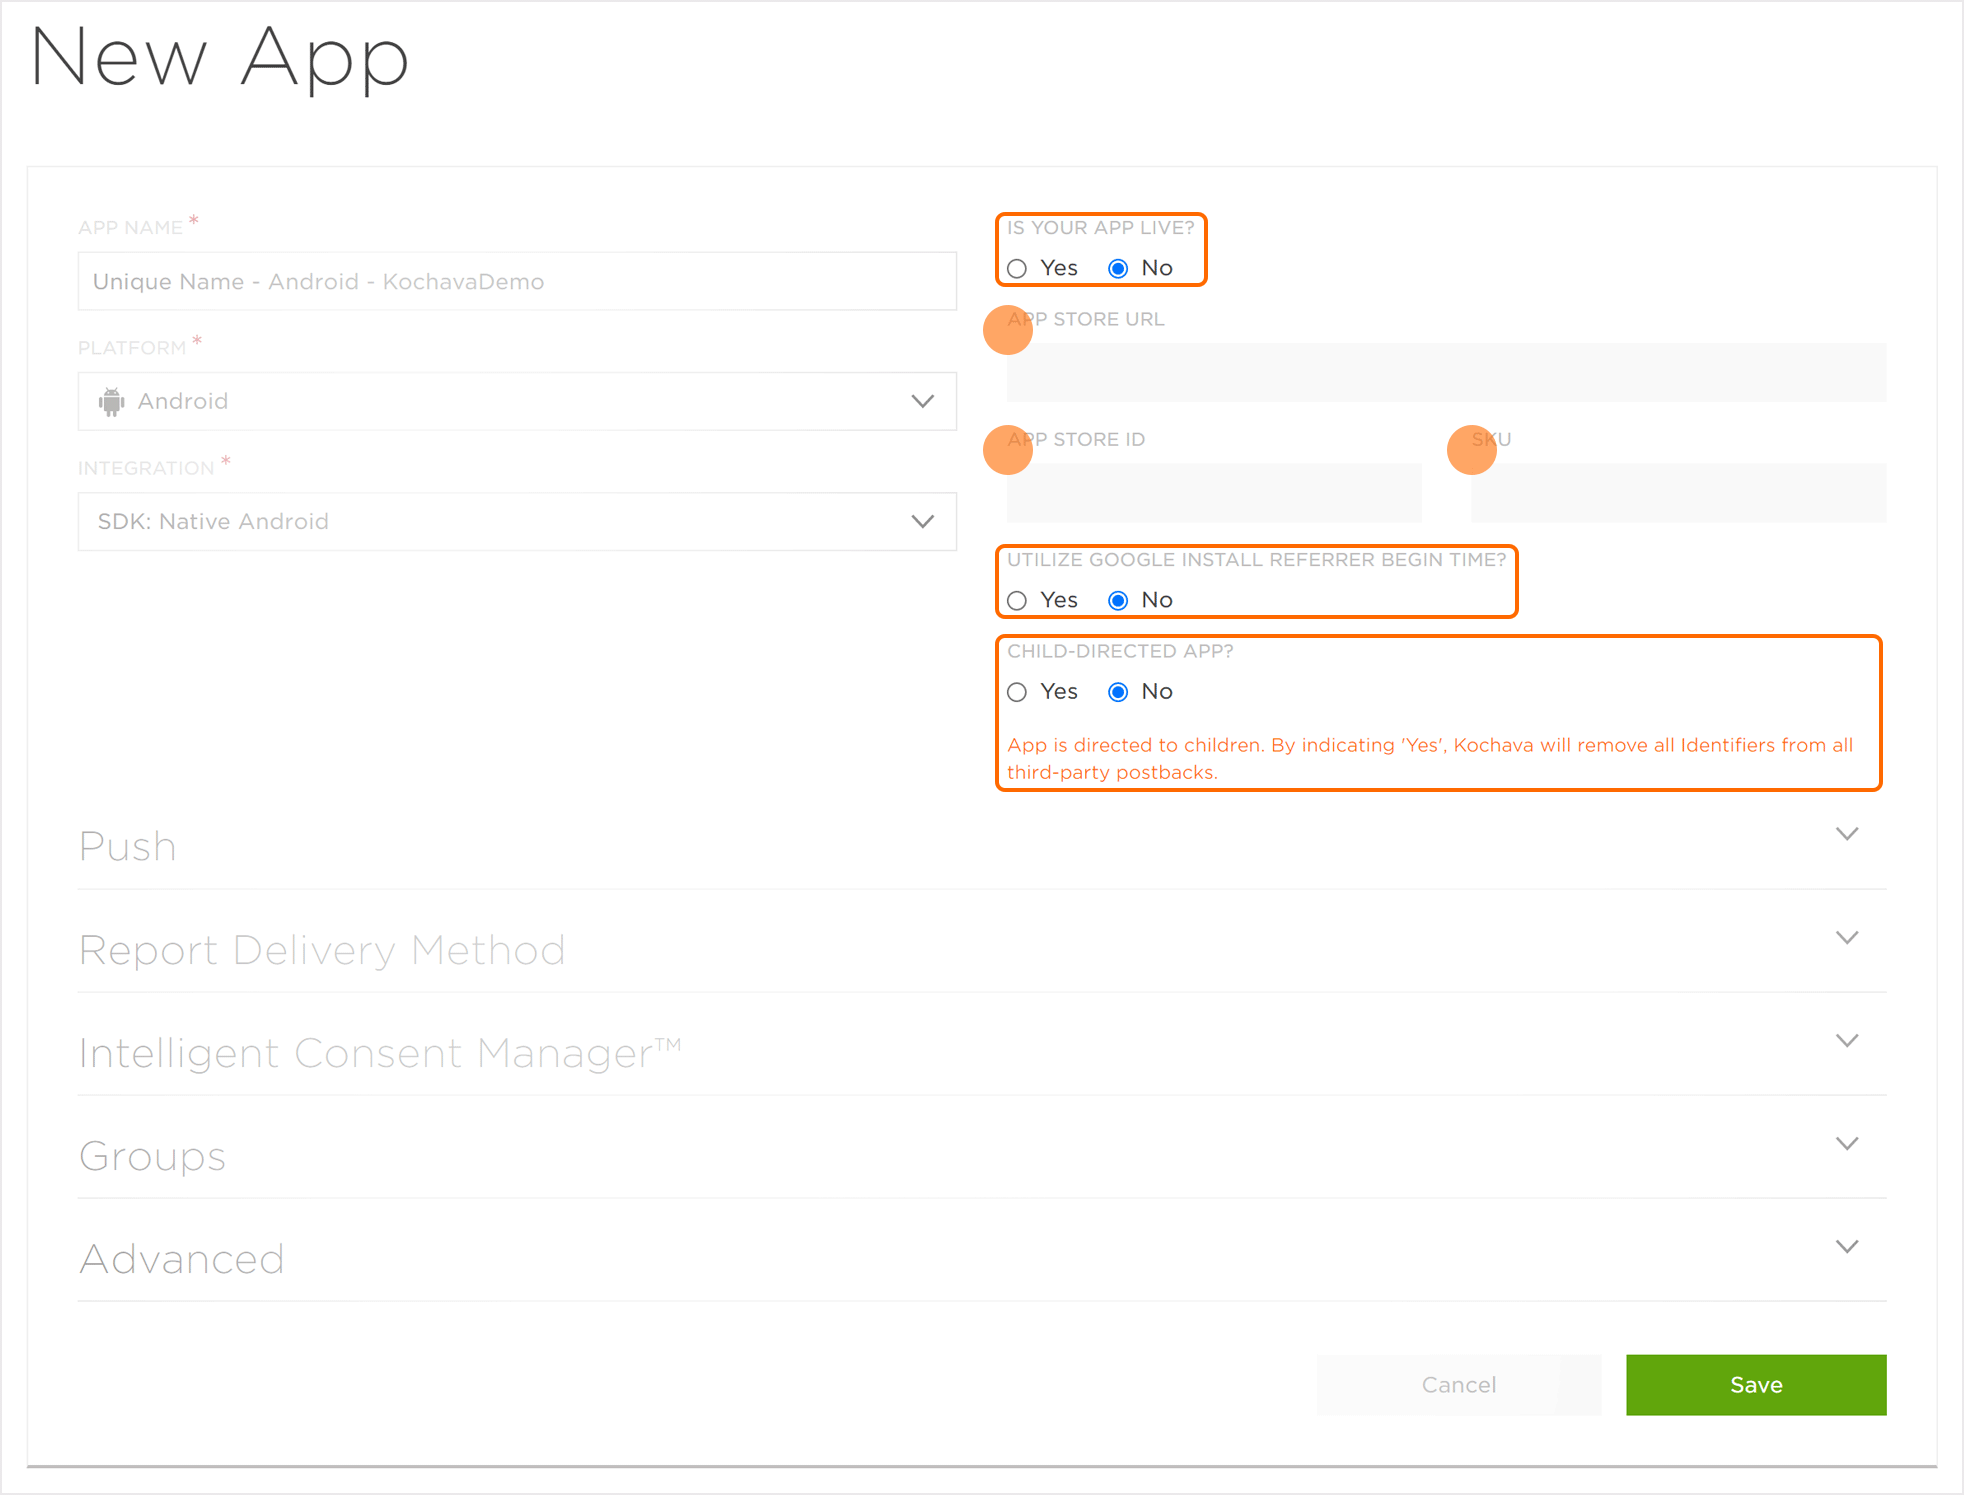
- Select Is Your App Live On An App Store?:
- Yes (App is live on an app store)
- No (App is not live on an app store)
- Enter the App Store URL. (optional)
- Enter the App Store ID. (optional)
- Enter the app SKU. (optional)
- Select Utilize Google Install Referrer Begin Time: (Android only)
- Yes
- No
- Select if the app is a Child-Directed App:
- Yes
- No
NOTE: The App Store URL is the location from which the app can be downloaded (Google Play, Google Market or iTunes Store URL) if available. Once entered, the App Store URL will become the Default Destination URL for click tracking links.
NOTE: For apps targeting the Samsung marketplace, please use the following DeepLink convention for App Store URL. Example: samsungapps://ProductPage/ProdoctDetail
Kochava ensures through our dashboard and our review process to protect personally identifiable information for any app directed to children or contain children directed content. We implemented safeguards to ensure that these designated apps should not transmit personally identifiable information to third parties via postbacks.
To review Apps store guidelines we have provided the following links:
Apple
Google
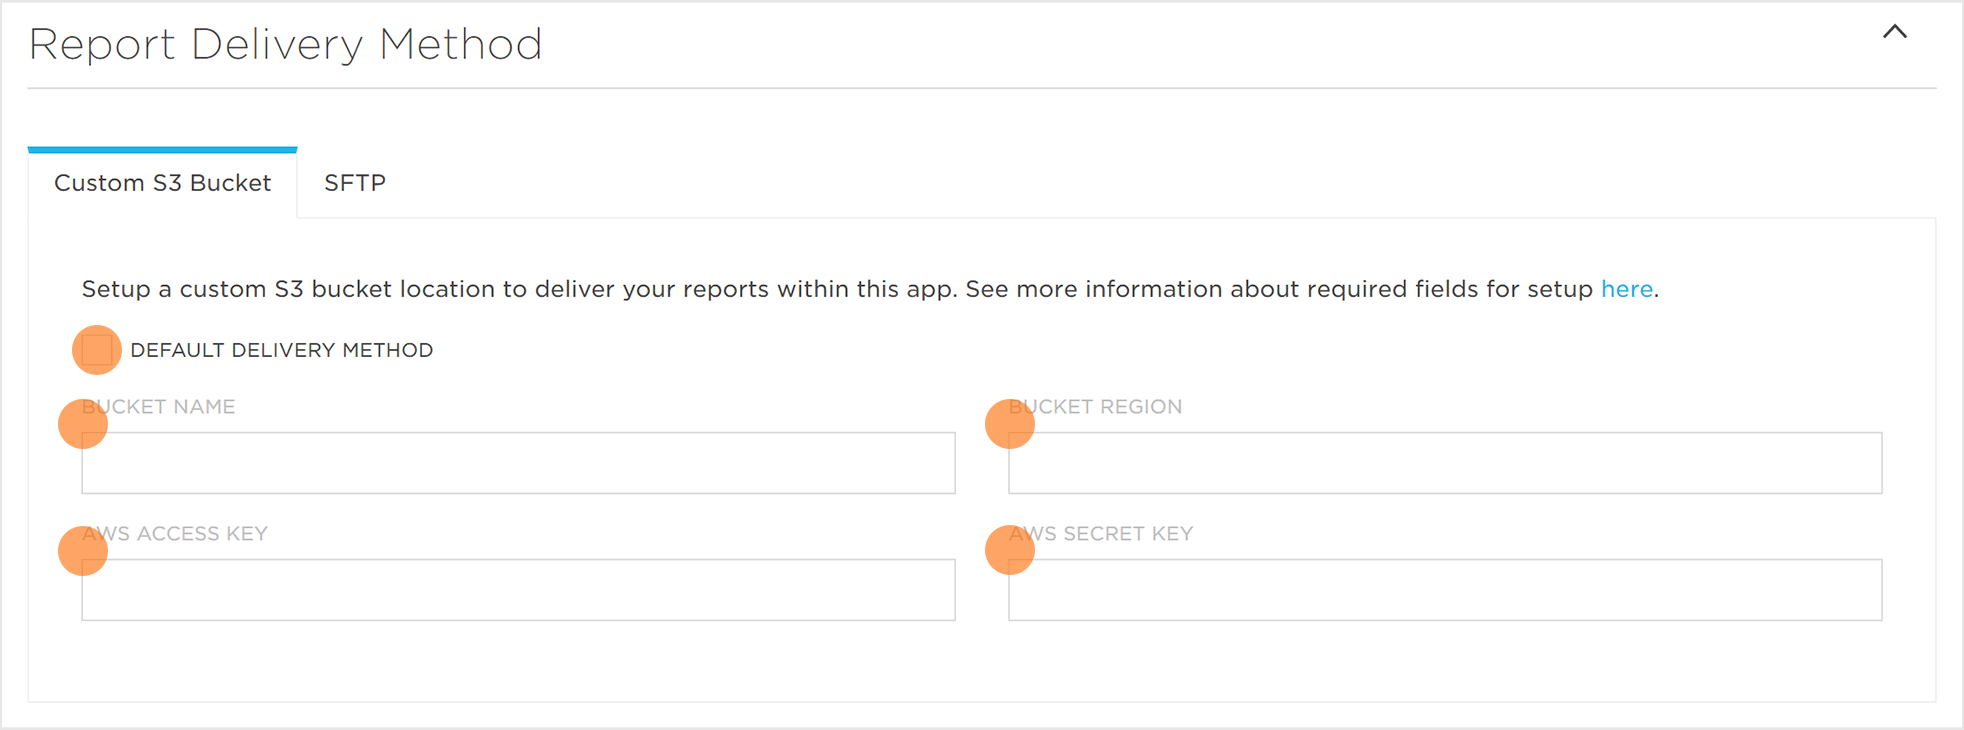
Report Delivery Method
- Select Default Delivery Method (Optional)
- Enter the Bucket Name.
- Enter the Bucket Region.
- Enter the AWS Access Key.
- Enter the AWS Secret Key.
- Select Default Delivery Method (Optional)
- Enter your SFTP Server IP Address or Host Name.
- Enter the Port.
- Enter the Username.
NOTE: The default port is set to 22, but the port may be set to whatever is desired on the SFTP server.

SFTP Key —
ssh-rsa AAAAB3NzaC1yc2EAAAADAQABAAABAQC2x9oNXPkYxXA9pWolBqJ+50TzNIQjDdRLbER4+9ISi+VJdUzqCc1SybRbcvzULi/PZo0++yaB/gaJo/wcyWHhR7qO8msonV119KCl8BtD1FsbYUYCw5aztEQm8xmRh1ef44epCnpy/8E85R+uY+YyjgZrmt3PqOwJ/rAksp2Q4QBSn0Jr1eFuDPlIcBiBfNyFJp7/NruyujqmPmb0H5n+N2KcN9sEQSscdbT0B6W5m8wbrOZnpXXLCrrvtZTQlV2o28FDGVVw13ZYb/fPbfYgjdOraPD6SkiiRY68w/L1dZd18QvN8nASm/5hCWrBS81wHbulywo/9ArLlKAVwIwt devadmin@reporting-02
SFTP Originating IP Addresses —
- 63.131.233.130
- 63.131.233.142
Intelligent Consent Management (ICM)
Intelligent Consent Management is Kochava’s tool to comply with the General Data Protection Regulation (GDPR) enacted by the European Union and the California Consumer Privacy Act (CCPA).
For more information on GDPR, refer to the EU General Data Protection Regulation overview documentation.
For more information on CCPA, refer to the IAB’s U.S. Privacy String specification.
- Select level of Consent Management:
- Off – Set as default, there will be no request for consent from any user no matter the location.
- Present in EU Only – A request for consent will be made for any user within the EU, if consent is not given data will not be processed.
- Present Globally – A request for consent will be made for any user regardless of location, if consent is not given data will not be processed.
- Enter the Reprompt Interval (For Opted Out Users) number of days.
NOTE: Users who have opted out of GDPR may be sent reprompts at a specific interval. The Reprompt Interval by default is set to 30 days.
- Enter the Prompt Version.
NOTE: The Prompt Version enables the internal tracking of when and why prompts were sent to users. Descriptive prompts will enable the quick location of information. For more information on GDPR prompts, contact your Client Success Management team.
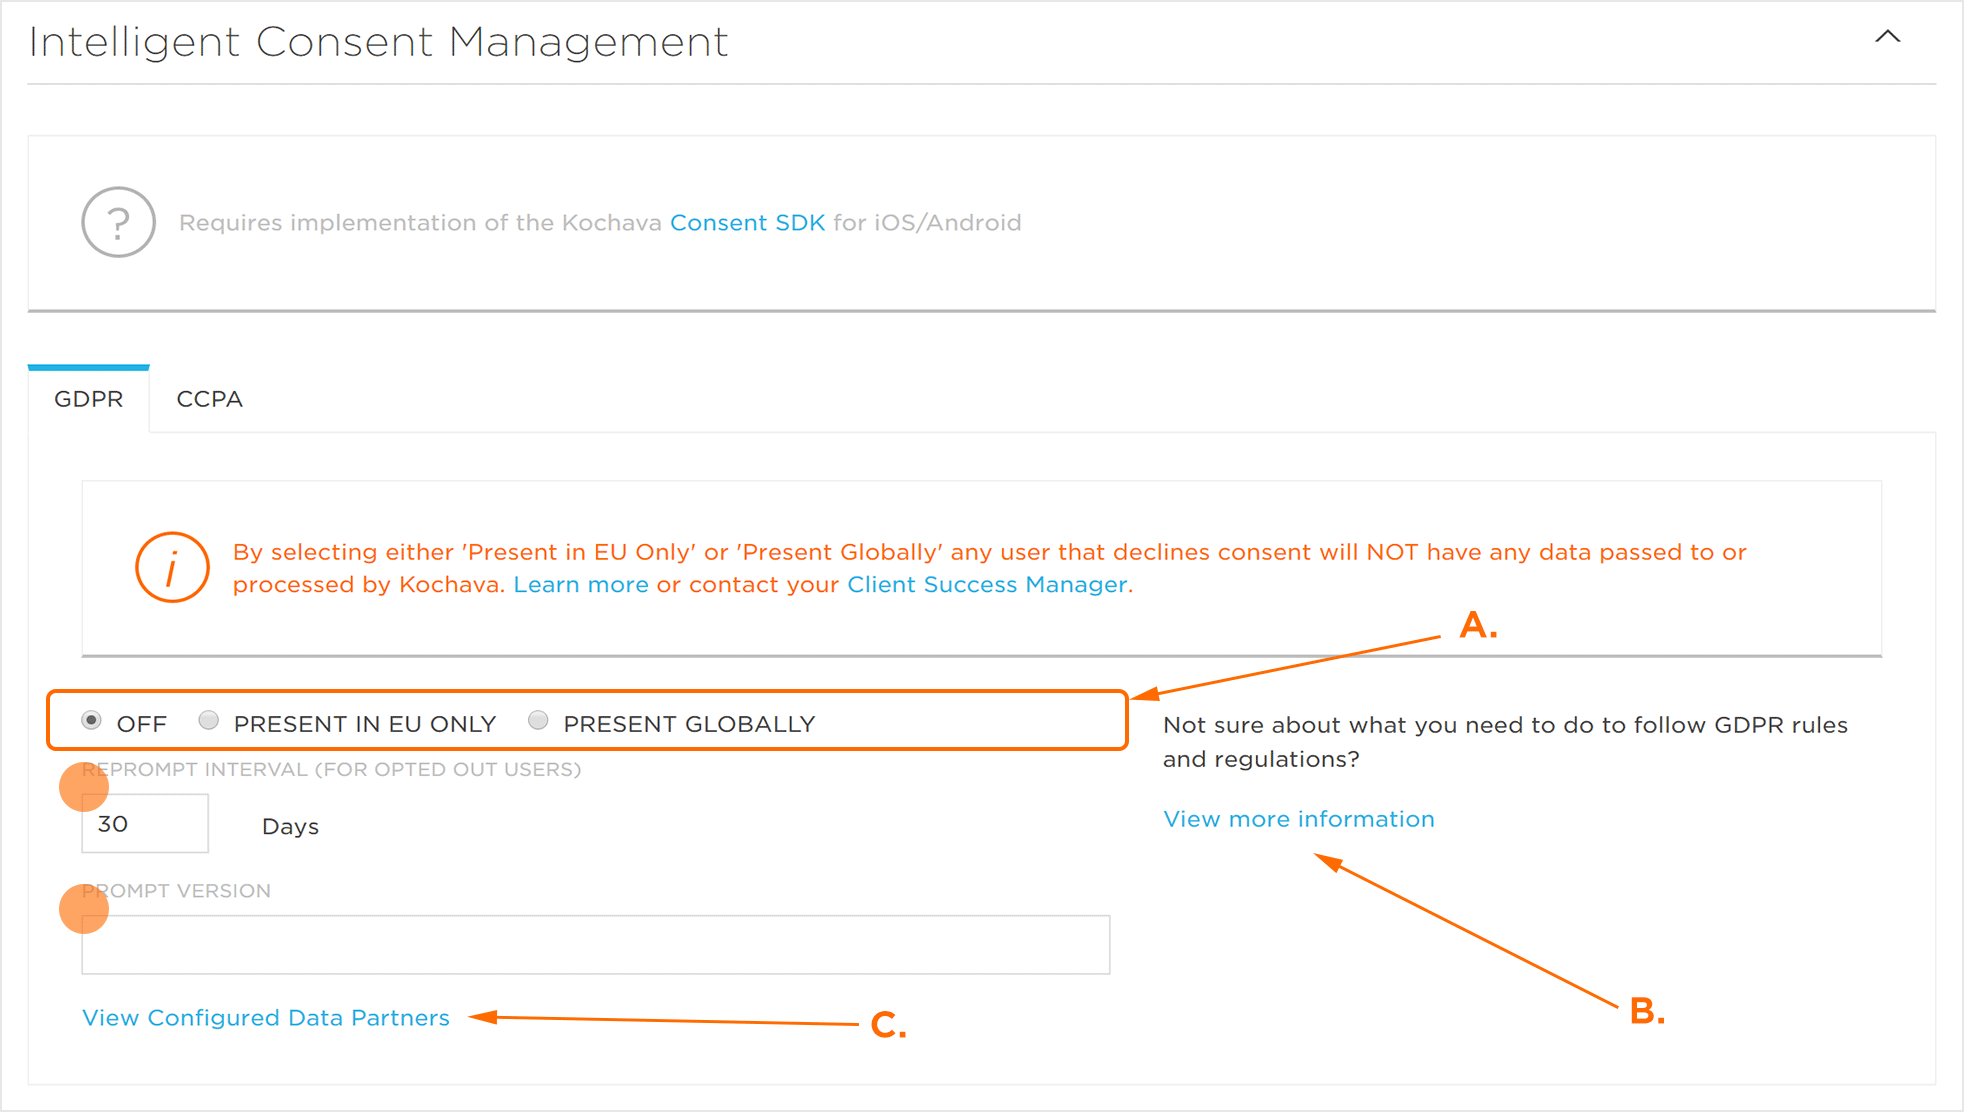
A. Select when prompts will be sent to users.
B. Click the provided link to view GDPR regulations.
C. After an app has been created, click the link to view partners that postbacks are being sent to for the associated app.
- Select the Jurisdiction:
- Off – Set as default, there will be no request for consent from any user no matter the location.
- California – A request for consent will be made for any user within California, the US privacy consent string will reflect whether the user has opted out.
- All States – A request for consent will be made for any user regardless of location within the United States, the US privacy consent string will reflect whether the user has opted out.
- Enter the Package ID:
- Select the LSPA (Limited Service Provider Agreement):
- No — Set as default, a flag will be added to the privacy string indicating that the user declined to opt out.
- Yes — A flag will be added to the privacy string indicating that the user opted out.
NOTE: Google Play Package Name (e.g. com.company.apps) or Apple Bundle (e.g. com.company.apps).
Privacy Policy:
The link text will be displayed to the user and the link will be the location the user will be navigated to when clicked.
- Enter the Link Text.
- Enter the Link URL.
Data Access:
The link text will be displayed to the user and the link will be the location the user will be navigated to when clicked.
- Enter the Link Text.
- Enter the Link URL.
Data Deletion
The link text will be displayed to the user and the link will be the location the user will be navigated to when clicked.
- Enter the Link Text.
- Enter the Link URL.
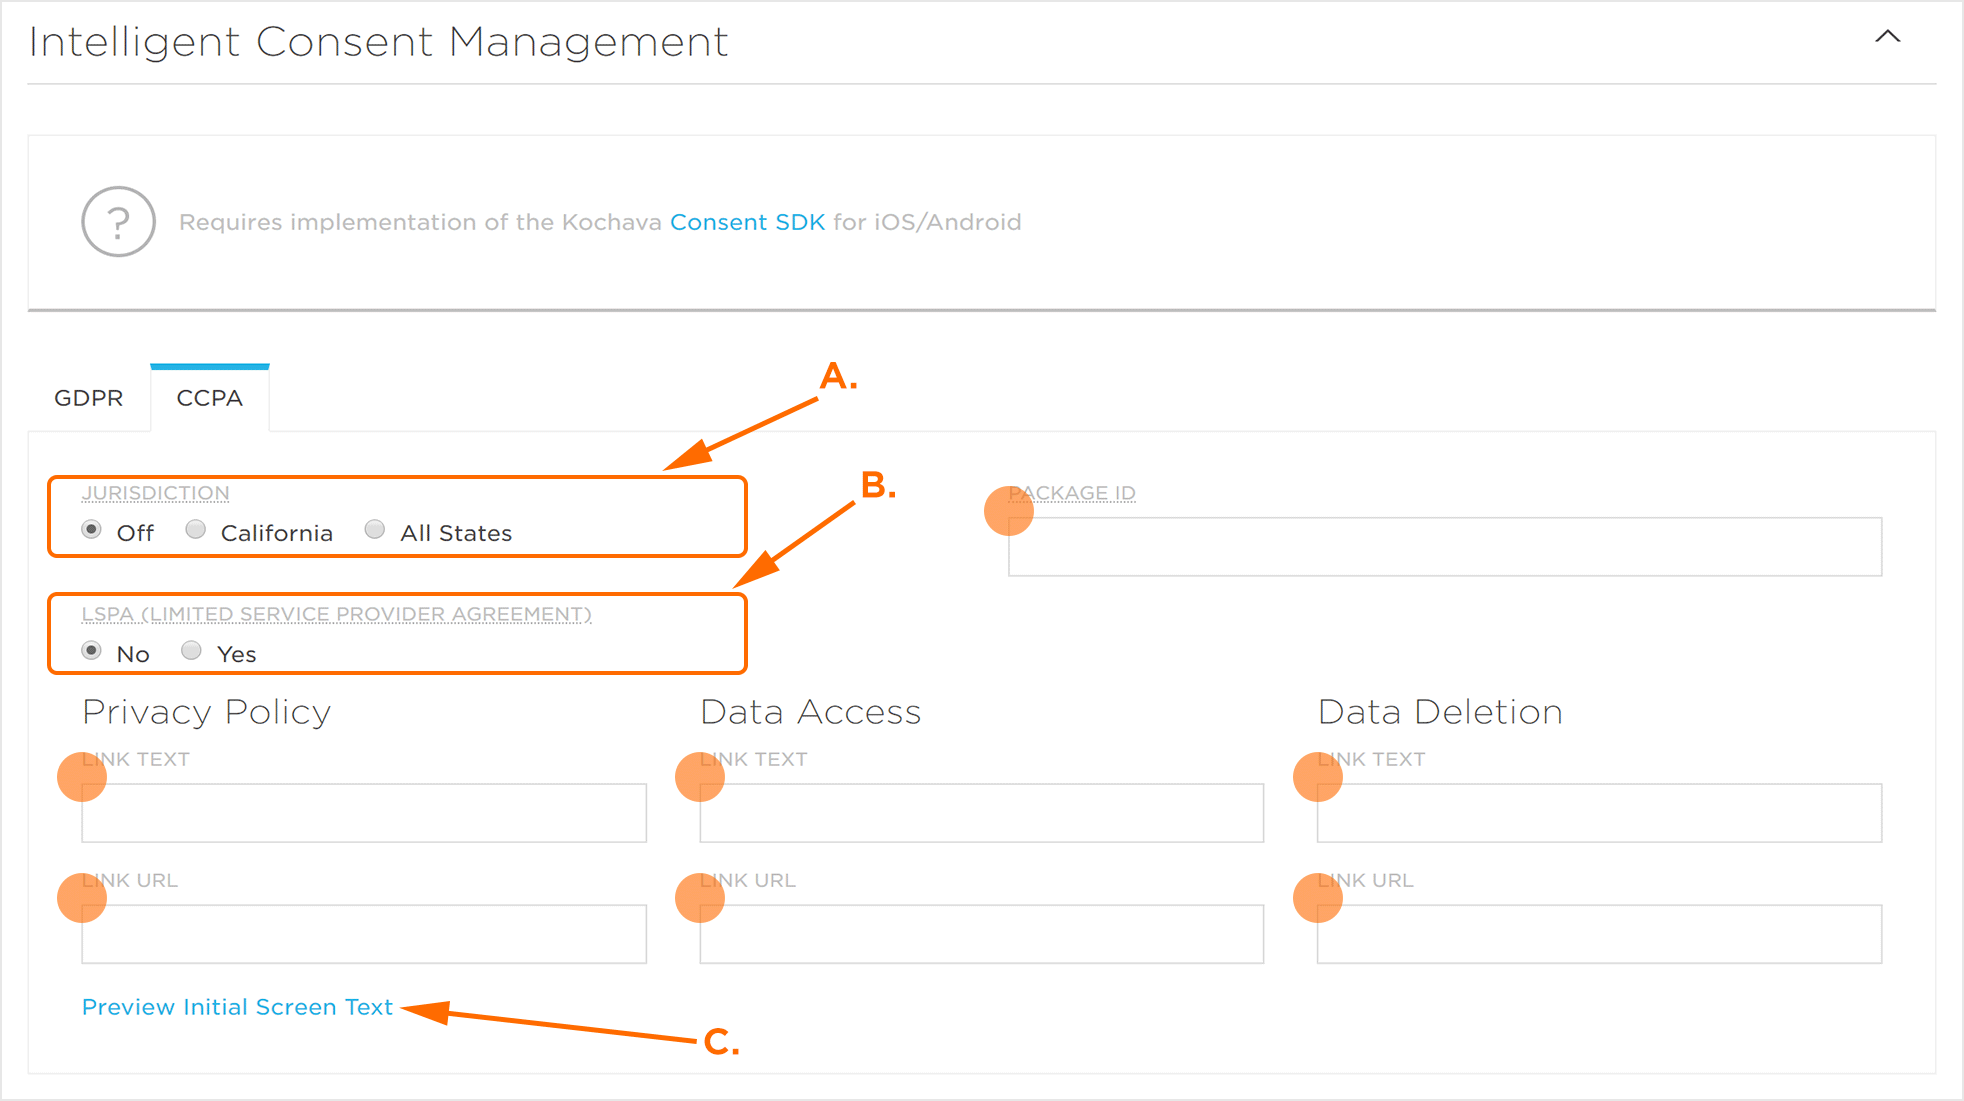
A. Select whether a request for consent will be sent only in California, all of the United States or not at all.
B. LSPA settings.
C. Preview the message that the user will view.
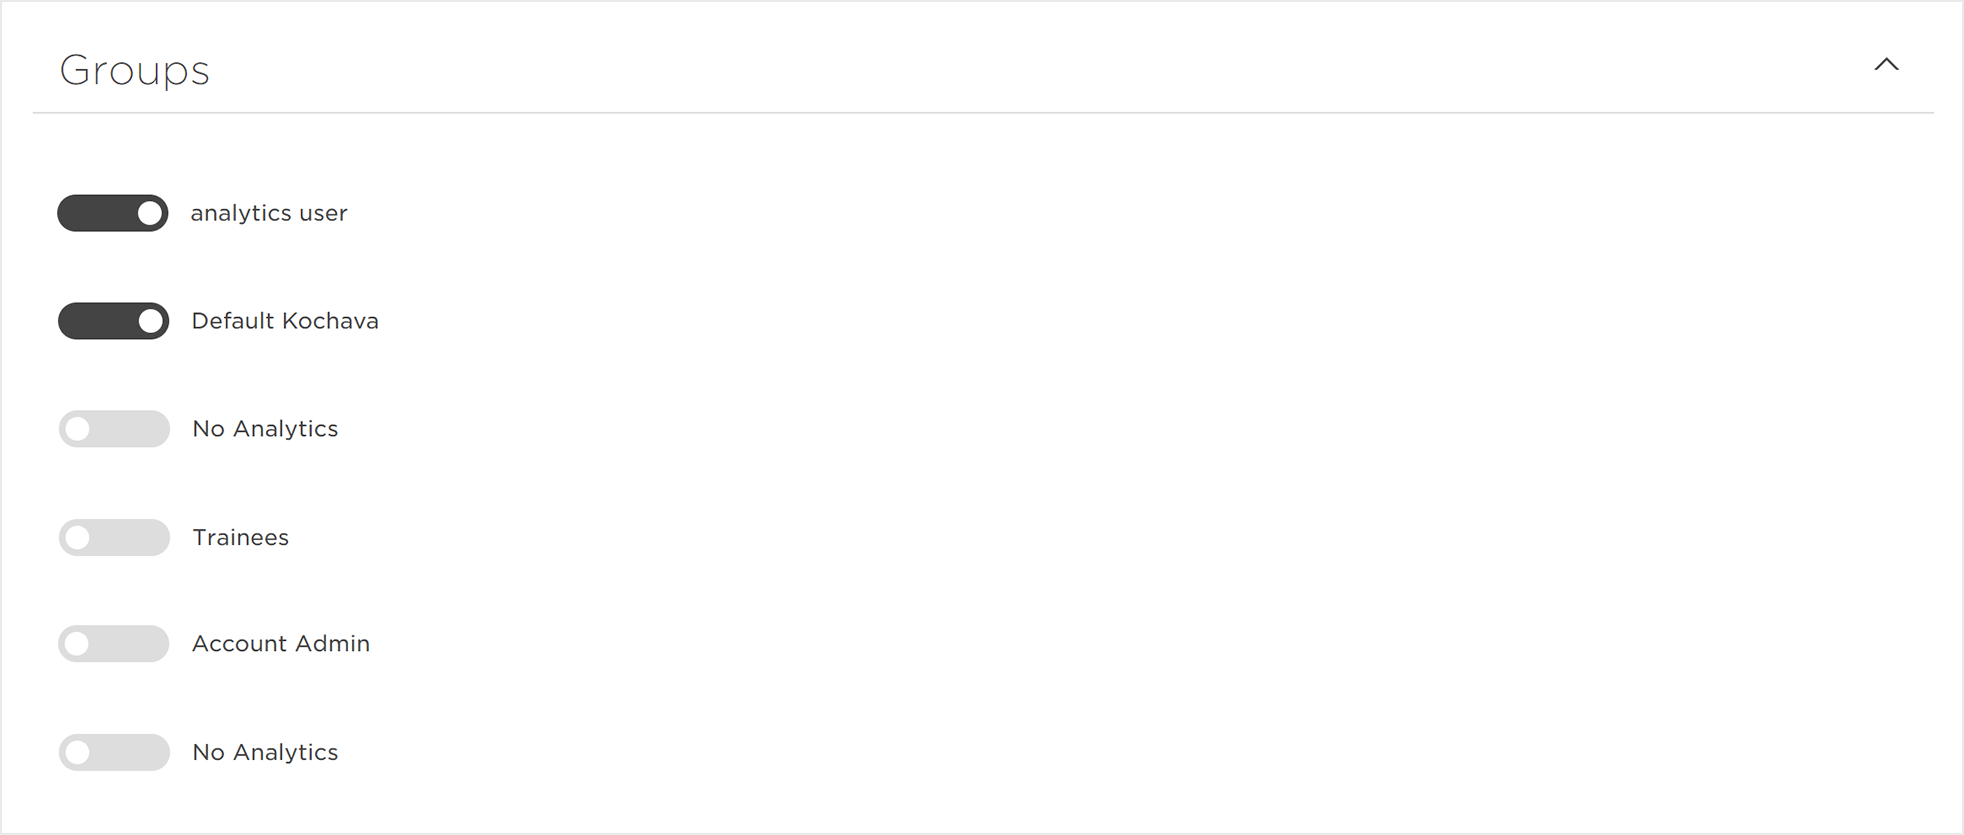
Groups:
- Adjust Group Permissions. (optional)
NOTE: Turning a group OFF will not allow that specific group access to this app, while turning a group ON will allow that group access.
Advanced Settings
Access
- Enable Traffic Processing. (optional)
- Enable iBeacons. (optional)
NOTE: By default Traffic Processing is disabled.
NOTE: By default iBeacons is disabled. For more information about iBeacons, contact your Client Success Managers.
Processing:
- Select the Transaction Time:
- Device
- Kochava
- Enable Overwrite Origination IP. (optional)
- Enable Use Short Version. (optional)
- Enable Seasonal App. (optional)
NOTE: By default the Transaction Time is set to Device which sends the time of install based on the device’s time. When Kochava is selected, if the device does not have internet access at the time of first launch, the time of attribution will be logged at the time Free App Analytics receives the install attribution data. On S2S installs if Kochava is selected the attribution time will always be logged at time of receipt.
NOTE: By default Overwrite Origination IP is disabled. When enabled, the IP provided with origination_ip will be overwritten with the IP sent with the request. This setting should remain disabled unless specifically instructed by your Client Success Managers.
NOTE: By default Use Short Version is disabled. When enabled the app version is reported as CF BundleShortVersionString instead of CF BundleVersion for iOS, and versionName instead of versionCode for Android.
NOTE: By default Seasonal App is disabled. This feature is supported on Android 3.7.2 and iOS 3.15.0 SDK versions and higher. When enabled the SDK will send a new install if the App GUID changes from a previous install, or if the app updates from a previously unsupported SDK version to a supported SDK version. If not enabled, the SDK will not send a new install if the App GUID is changed in code, which may result in orphaned post install events for devices which sent an install under the previous App GUID.
Currency:
- Enable Currency Normalization.
NOTE: By default Currency Normalization is enabled. When this option is enabled, Free App Analytics will dynamically convert all inbound purchase events with a non-US currency to a US Dollar currency.

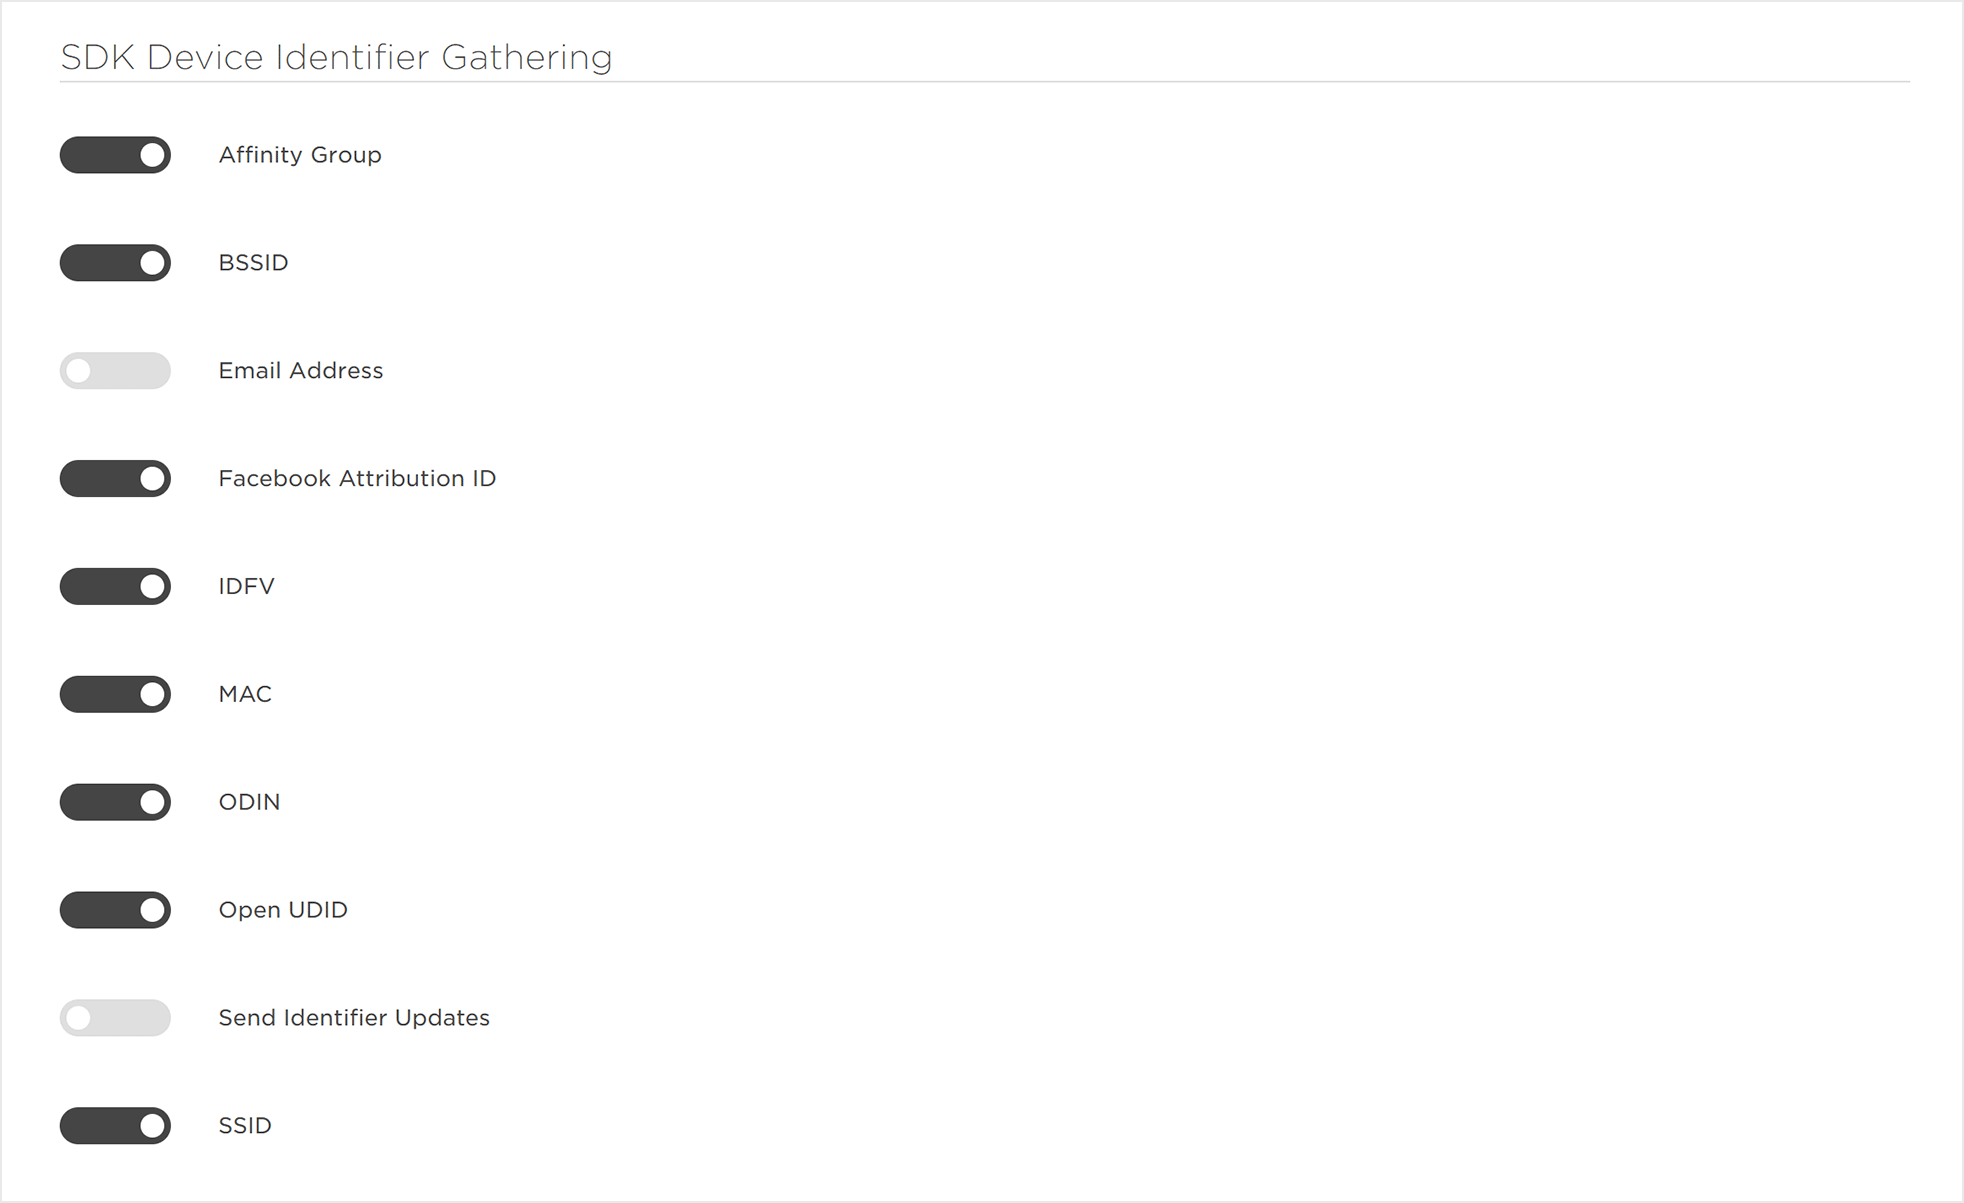
SDK Device Identifier Gathering:
This section provides access to determine whether specific types of device IDs are gathered or not. The following device IDs may be selected for collection:- MAC
- ODIN
- Open UDID
- Facebook Attribution ID
- Android ID
- ADID
- IMEI
- ADID + Others
- IDFV
- BSSID
- SSID
- Affinity Group
- Email Address (OFF by default)
- Send Identifier Updates (OFF by default
NOTE: Send Identifier Updates when enabled notifies Free App Analytics when a device ID has been updated and provides the new device ID for the associated device. Before toggling this setting to ON, contact your Client Success Managers for further details.
NOTE: When ‘ADID + Others’ is toggled on ADID and all other identifiers will be gathered if ADID is present. If ‘ADID + Others’ is toggled off no other identifiers will be gathered if ADID is present(unless toggled on individually).
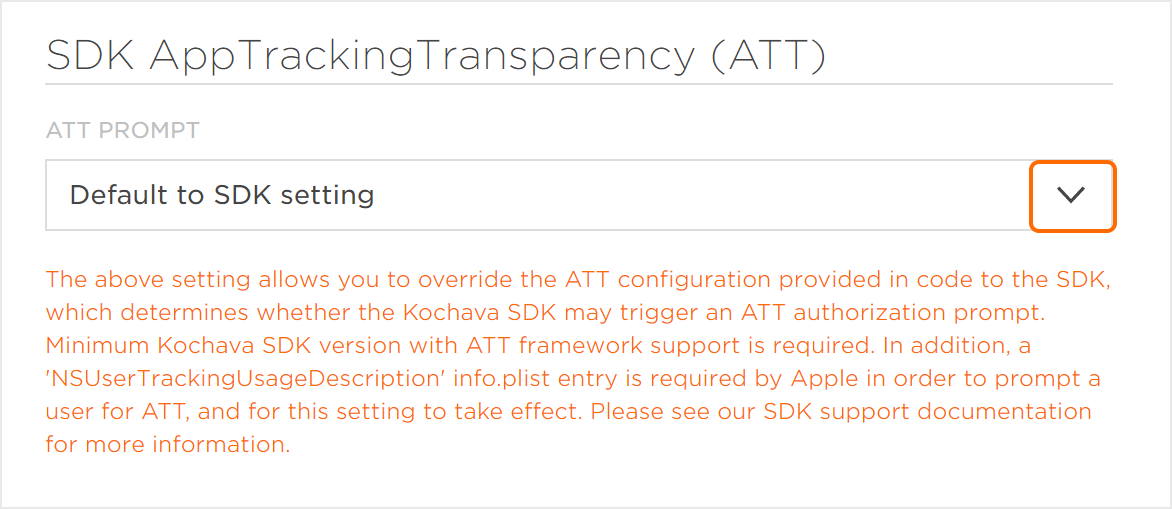
SDK AppTrackingTransparency (ATT):
This section provides access to determine the settings associated with AppTrackingTransparency (ATT). The settings allows for the override of the ATT configuration provided in code to the SDK, which determines whether the Kochava SDK may trigger an ATT authorization prompt. Minimum Kochava SDK version with ATT framework support is required. In addition, a NSUserTrackingUsageDescription info.plist entry is required by Apple in order to prompt a user for ATT, and for this setting to take effect.
NOTE: This feature is only available for iOS apps and will not appear for other platforms.
One of the following settings may be selected:
- Default to SDK settings
- Disable for all users
- Enable for 14.0 and greater OS versions only