Use Cases for Post-Install Events:
- Gather in-app purchase information that can be used for LTV (Lifetime Value) calculation.
- Create a JSON formatted string in which several data points can be tracked.
- Pass any piece of information to be paired with an event title.
Create an Event
Post-install events allow users to understand and correlate the relationship between attribution source information and post-install behavior. The following steps provide instructions for creating events within Kochava.
- Log in to Free App Analytics.
- Select the desired Account.
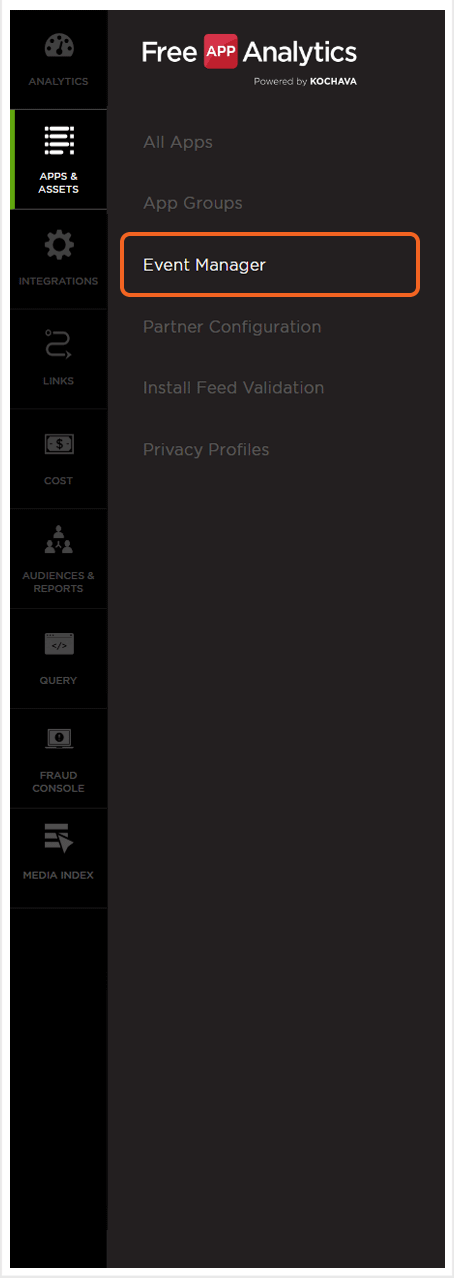
- Select Apps & Assets > Event Manager.
- Click Add an Event.
- Select a Standard Event or Enter a Custom Event name.
- Click Go.
NOTE: The action of ‘Add an Event’ for your app is simply a placeholder event name for your app and will not automatically create an event in the SDK. You will still need to instrument the event in the SDK for the data to flow into the event you created. We recommend that you instrument the event in the SDK and allow Kochava to automatically provision the event for you. Please contact your Client Success Management team for more details.
Event Configuration
NOTE: After the event reengagement period has elapsed, the events that occur after the elapse will be labeled as unattributed.
NOTE: When the event reengagement setting is modified, only the events that occur after the setting modification will apply the logic that was changed.
Standard Event Configuration:
The following options are available for configuring standard events:
- Reengagement Settings (Set the Minimum Time for Reengagement for the event)
- Disable (Temporarily stop the tracking of the event)
- Revenue (Select the Revenue assignment)
- Delete (Permanently remove the event)
NOTE: When a purchase event is sent it will automatically be considered a revenue event when values are present.
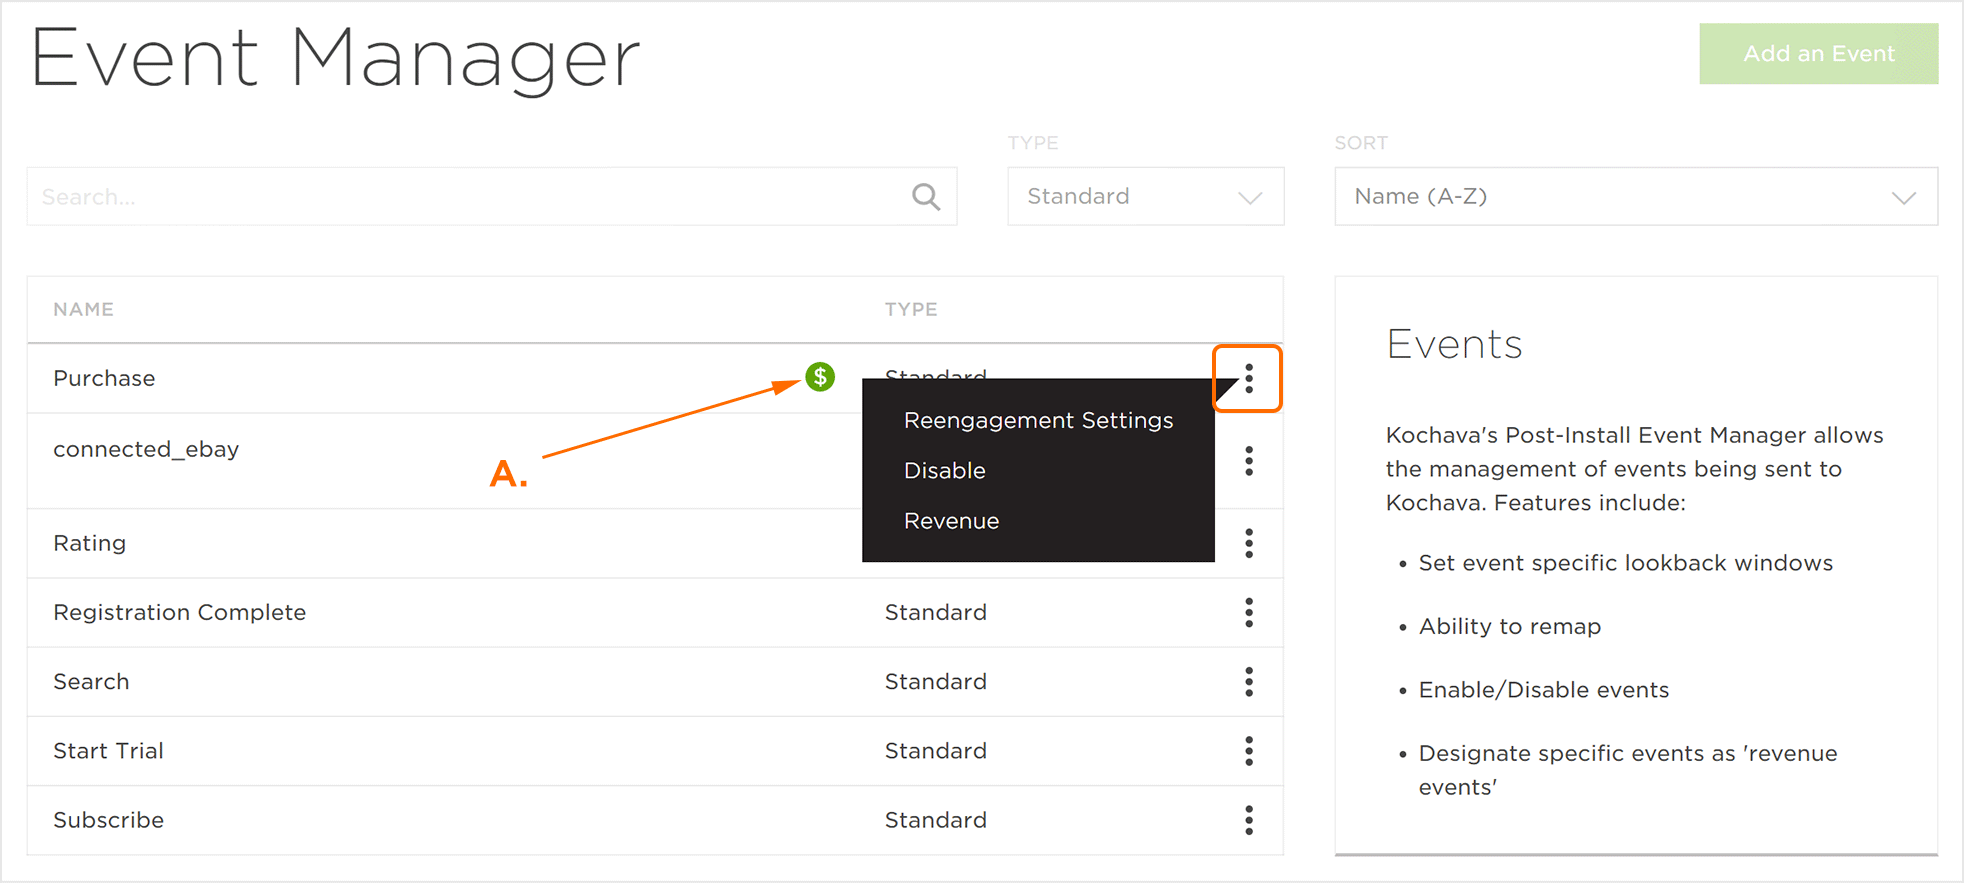
A. Indicates Revenue Event
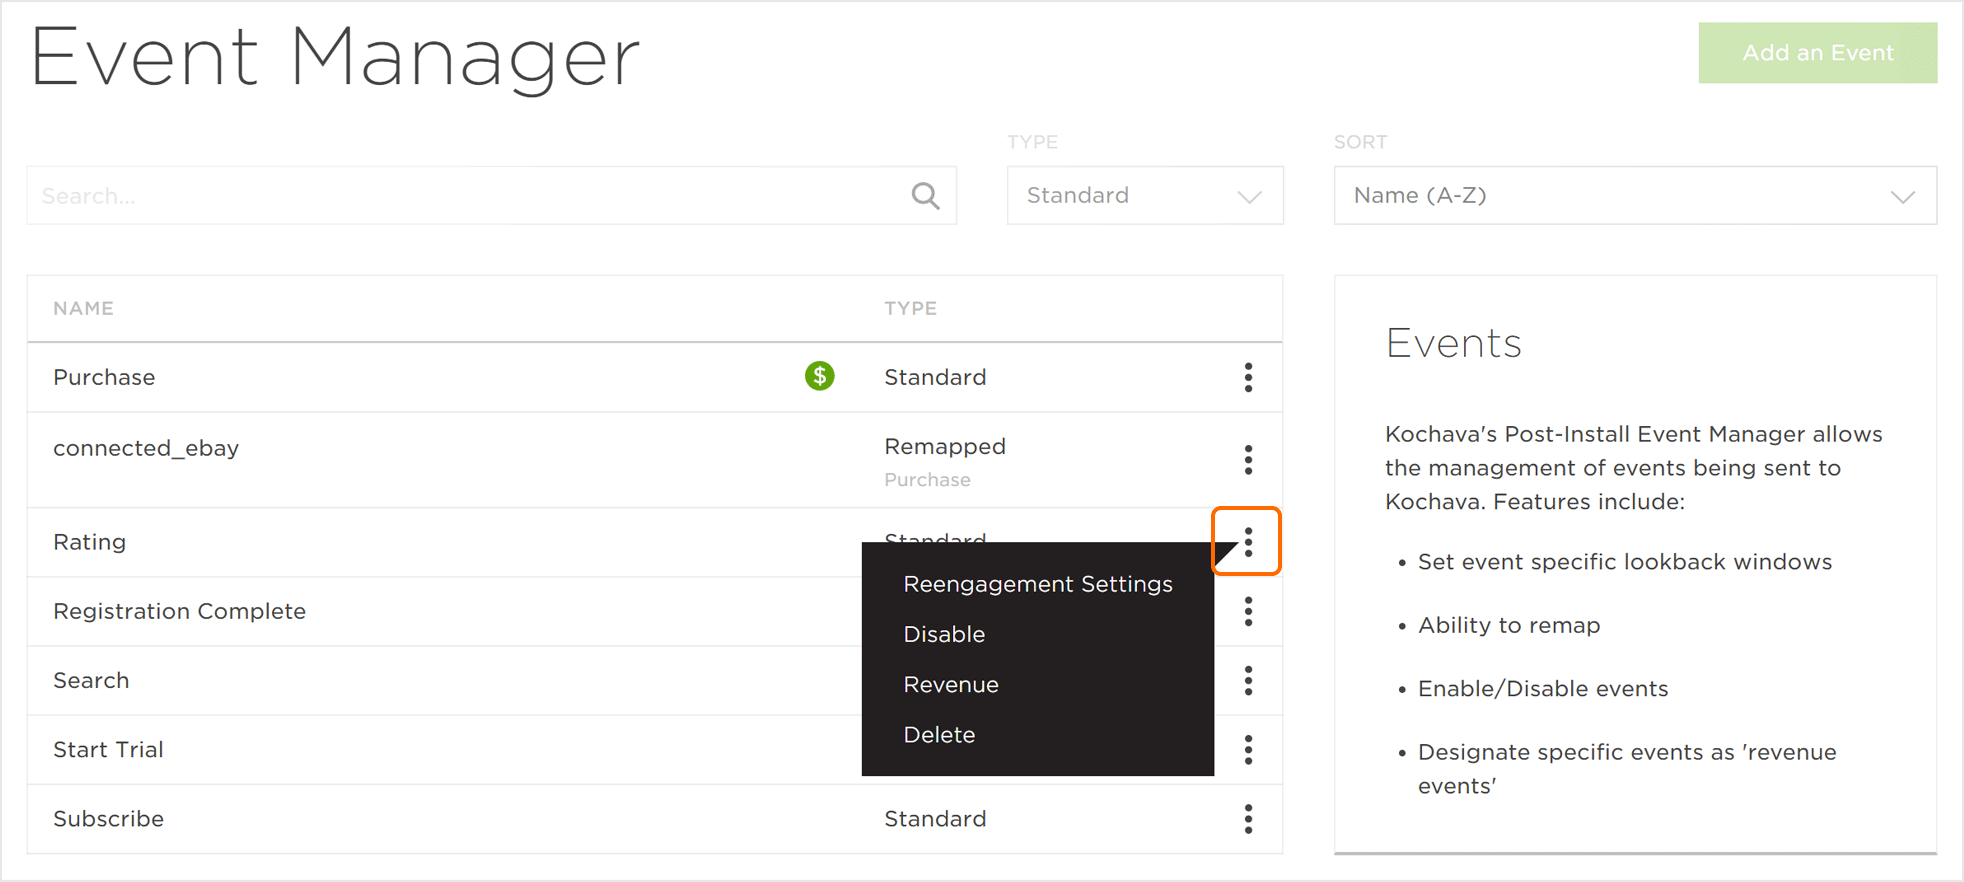
Event Minimum Time to Reengagement Settings —
- Click Event Tools > Reengagement Settings.
- Select the desired Lookback Window:
- Default (24 Hours)
- 1 Second up to 365 Days
- Click Save.
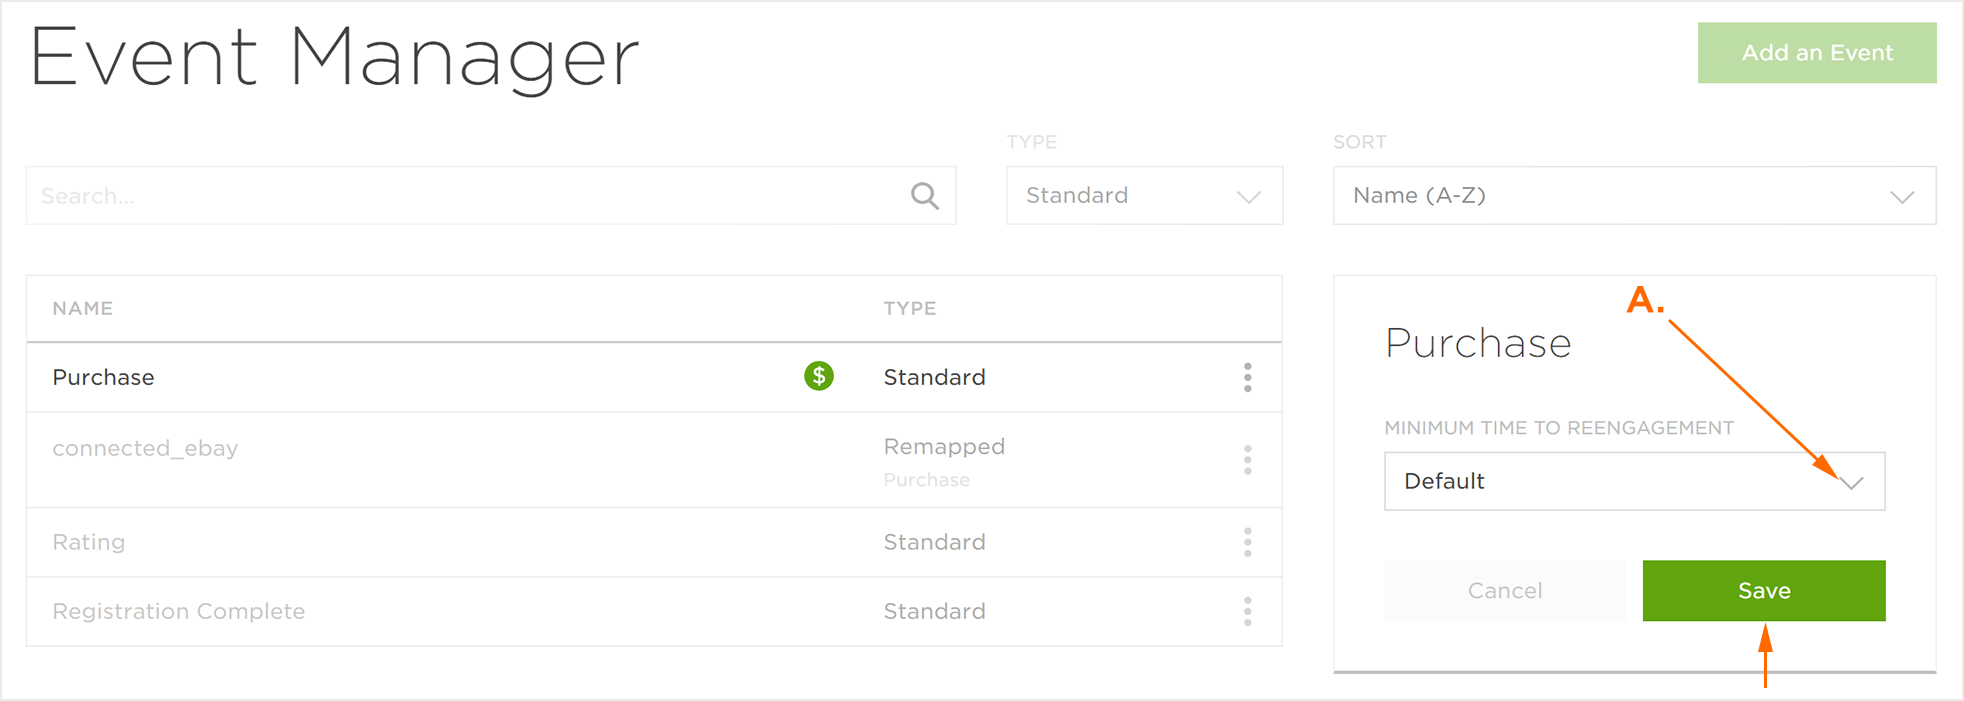
A. Select the desired Lookback Window (1 Second up to 365 Days)
Custom Event Configuration:
The following additional options are available for configuring custom events:
NOTE: The standard event options are also available for custom events. For more information on standard event options, refer to the Standard Event Configuration section above.
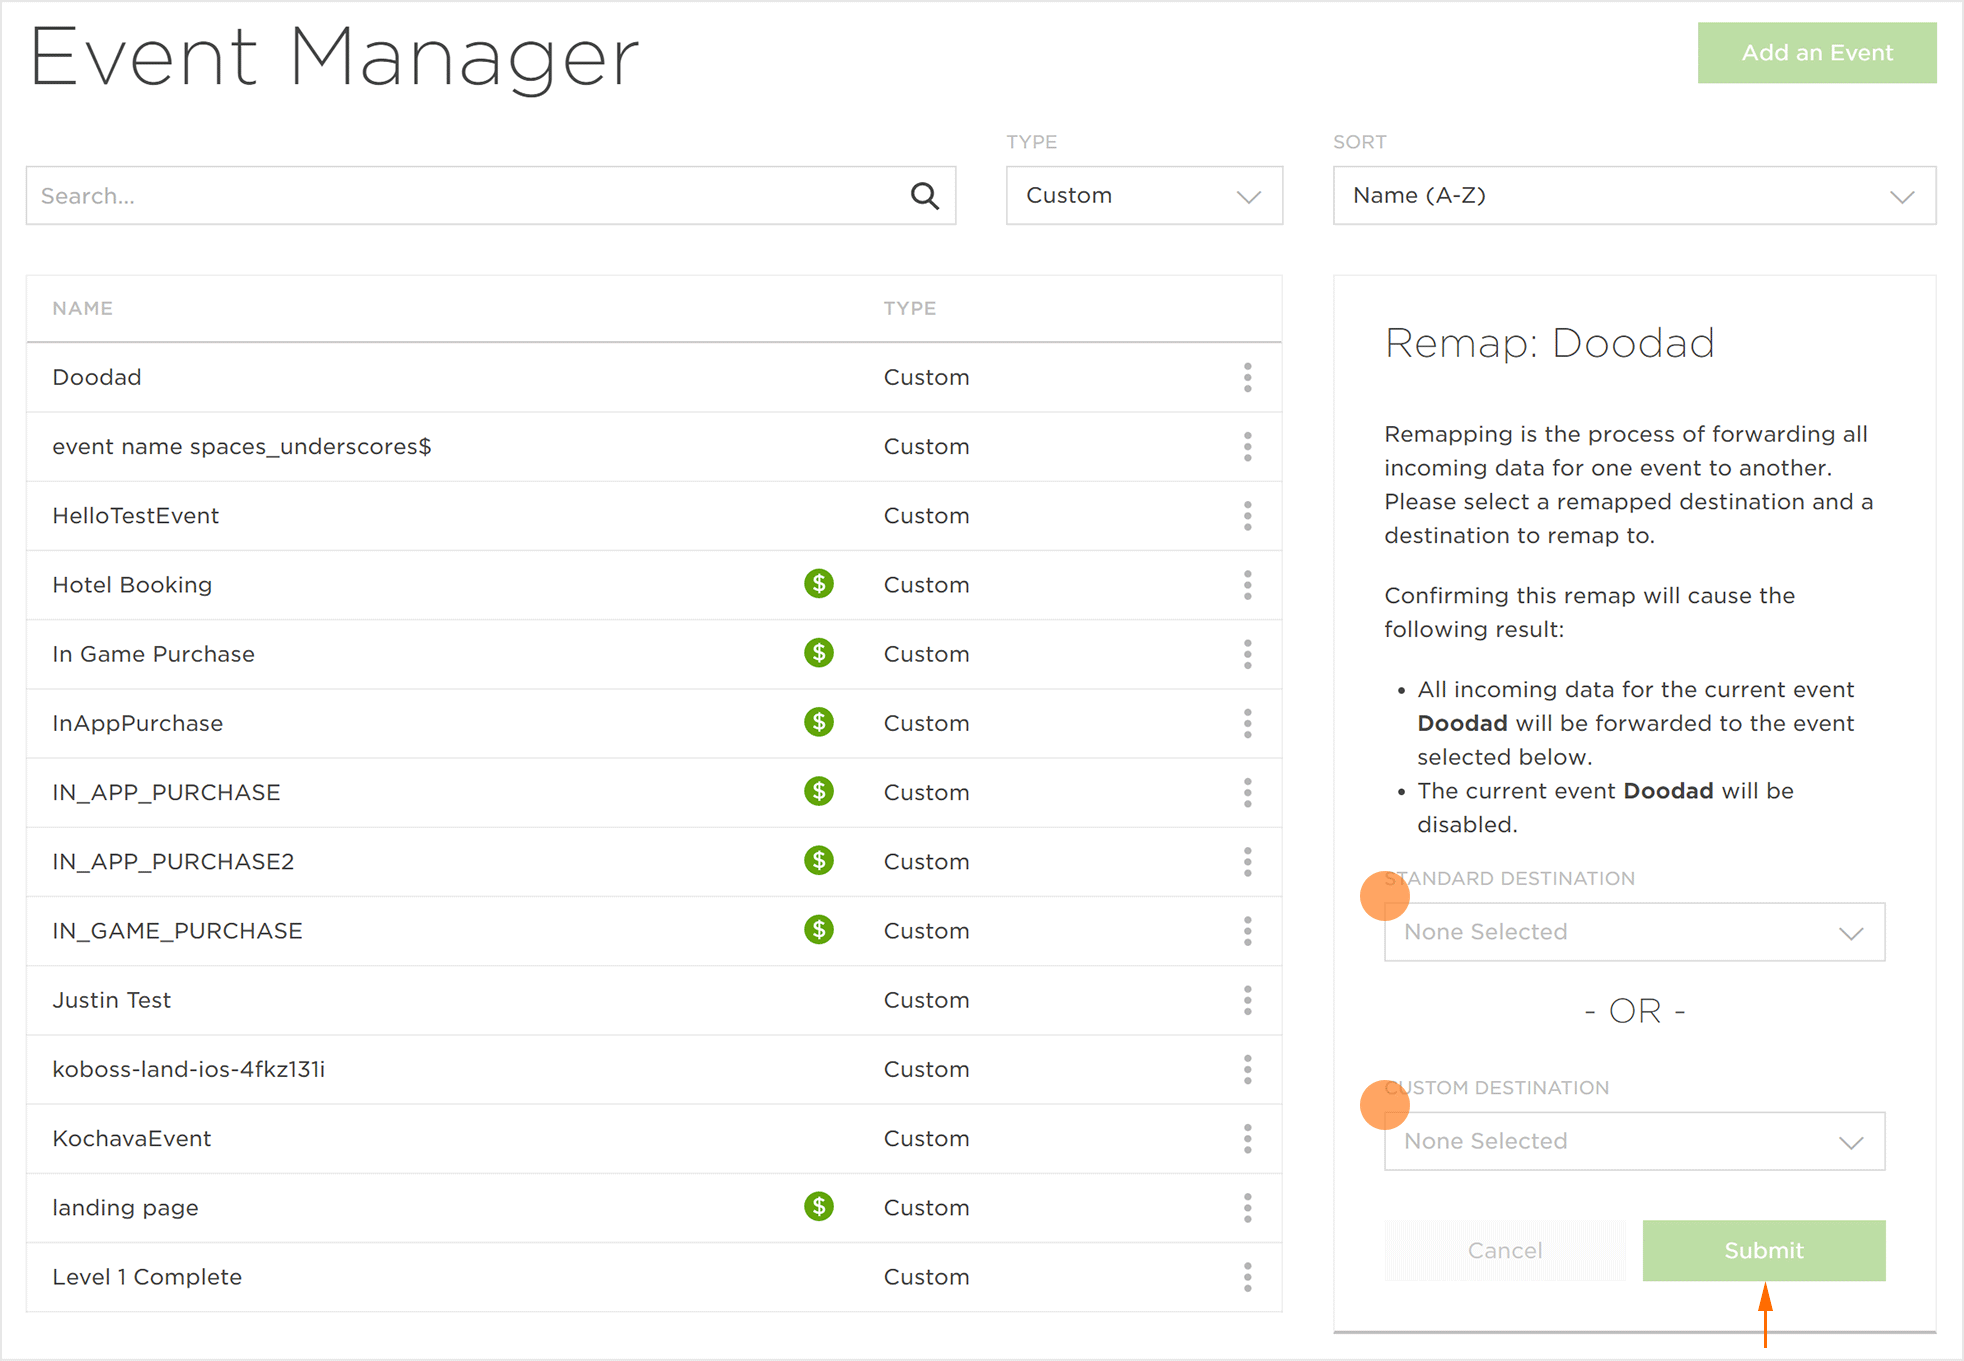
- Remap (Forward all incoming data from one event to another)
- Select Standard Destination, or Select Custom Destination.
- Click Submit.
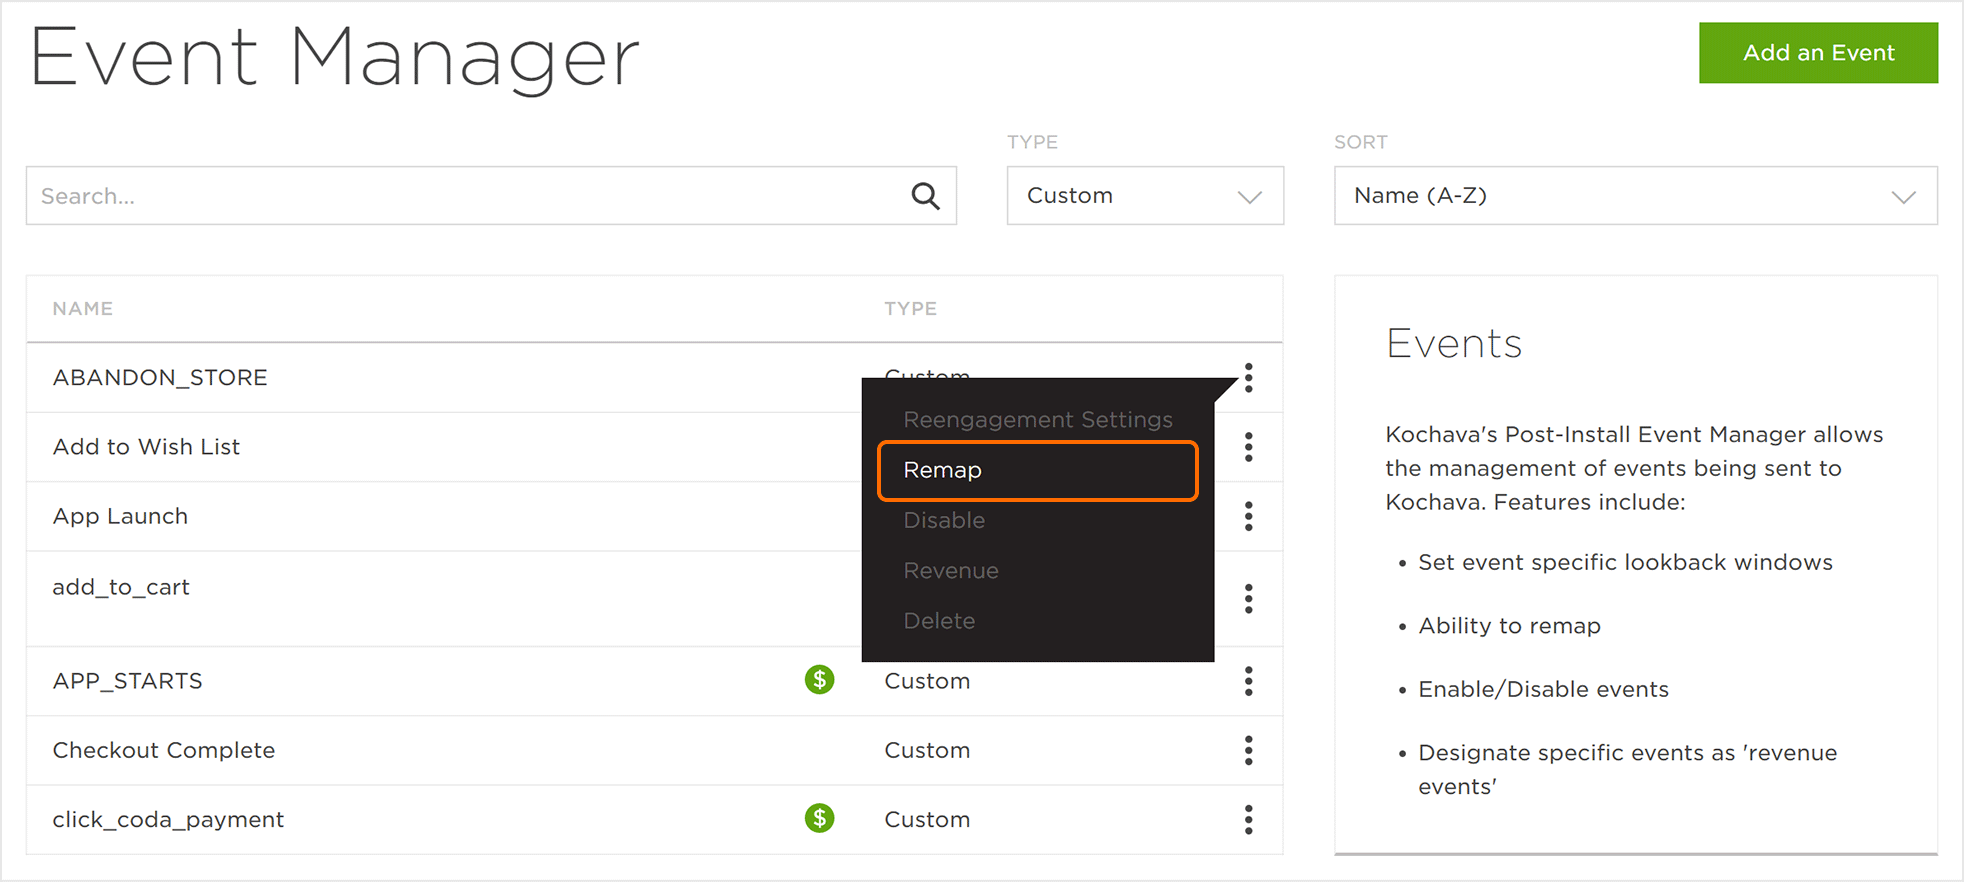
NOTE: When an event is remapped, that event will be disabled. All incoming data will be forwarded to the destination selected during the remapping process. Marketers may want to remap an event for several reasons, such as if an event naming convention has been updated.
NOTE: Ensure that the proper naming conventions are used with the network partner when remapping an event. If improper naming conventions are used, the event may not remap properly. For more information about event naming conventions, contact the specific network partner.
