
NOTE: Before an Install Campaign can be set up, the corresponding app must be properly created within Free App Analytics. Refer to our Create/Edit Apps support document for more information.
NOTE: The Install Campaign setup process for iOS and Android is similar and therefore this document will cover the setup for both operating systems, with specific differences noted.
NOTE: Free App Analytics accounts will only have access to run campaigns with Self-Attributing Networks (for example, Google, Facebook, Twitter, Amazon, etc.). The full list of SANs you can run campaigns with will be included in the dropdown in your Kochava dashboard. You will need an upgraded account in order to run campaigns with non-SAN partners.
Creating an Install Campaign
- Log in to Free App Analytics.
- Select the desired Account and App.
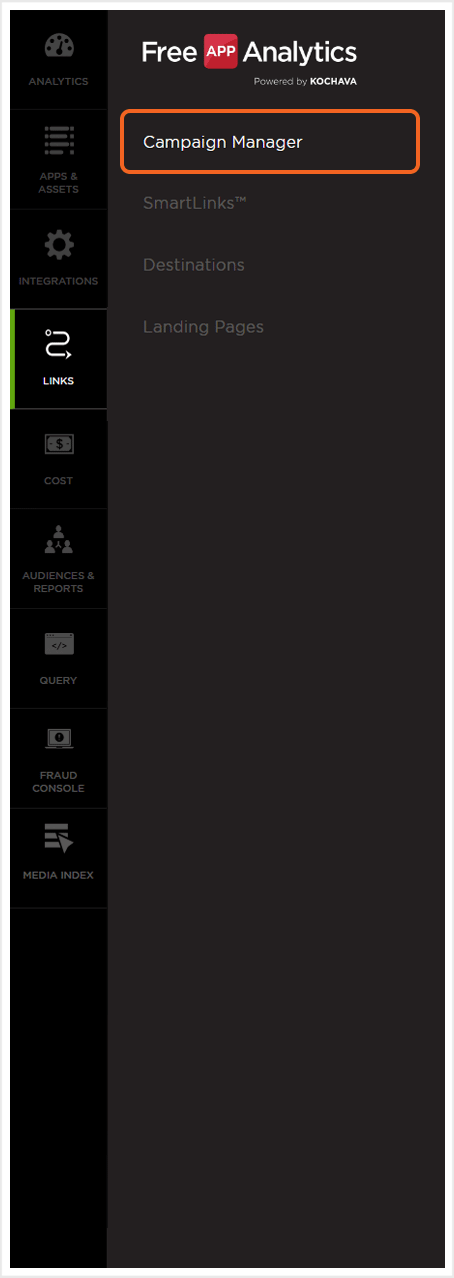
- Select Links > Campaign Manager.
- Click Add a Tracker or Select Segment Tools (⋮) > Add a Tracker.
- Click the provided link to create a campaign or segment.
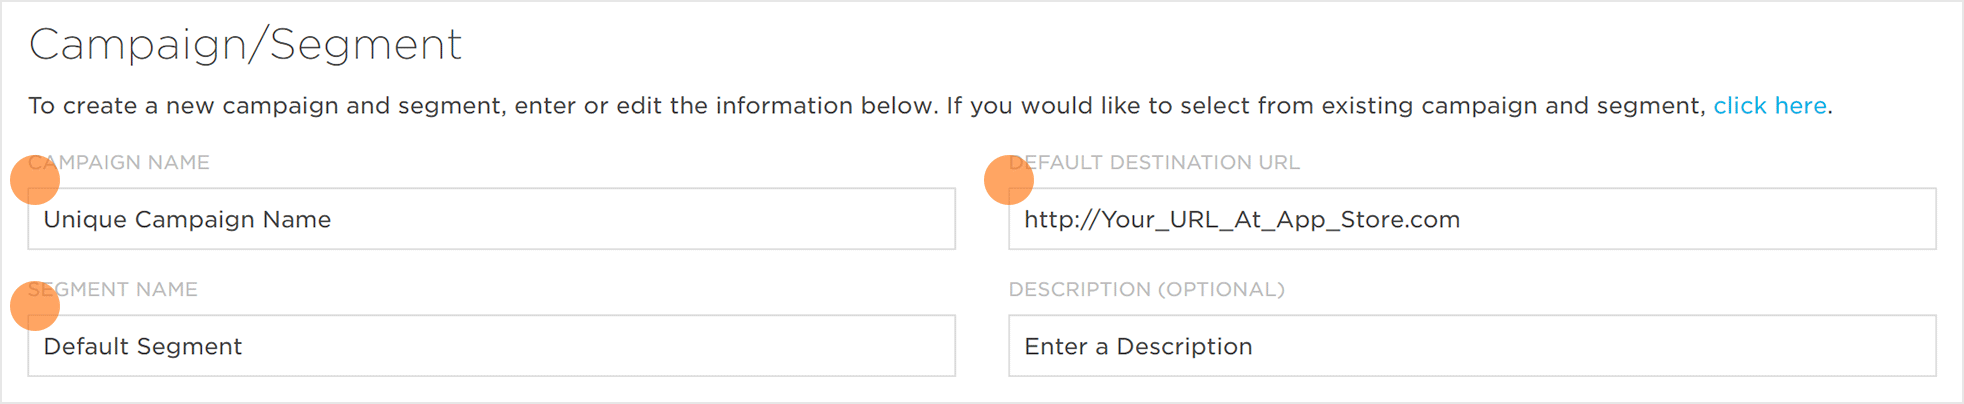
- Enter a Campaign Name.
- Enter the Default Destination URL.
- Enter a Segment Name.
- Enter a Segment Description. (optional)
- Select an existing Campaign.
- Select an existing Segment.
- Enter a Tracker Name.
- Select Tracker Type > Acquisition.
- Select a Media Partner.
- Select an Agency Partner. (optional)
- Select the Destination URL Type:
- Custom
- Google Referrer (Android Only)
- Landing Page
- Enter the Install Destination URL.
- Enter a Deep Link. (optional)
- Add a Custom Parameter. (optional)
- Click Add a Parameter.
- Enter the Custom Parameter.
- Add additional Custom Parameters. (optional)
- Click Save (If no further Trackers need to be created).
- Click Save & Add Another Tracker (if additional trackers need to be created).
- Click Save & Create Postback (if a Postback needs to be created for the Media Partner).
- If available, Copy and Send Click URL to publisher. (optional)
- If available, Copy and Send Impression URL to publisher. (optional)
![]()
Creating or Selecting a Campaign/Segment:
While creating a new tracker, a campaign or segment can be either selected or created.
Creating a New Campaign/Segment –
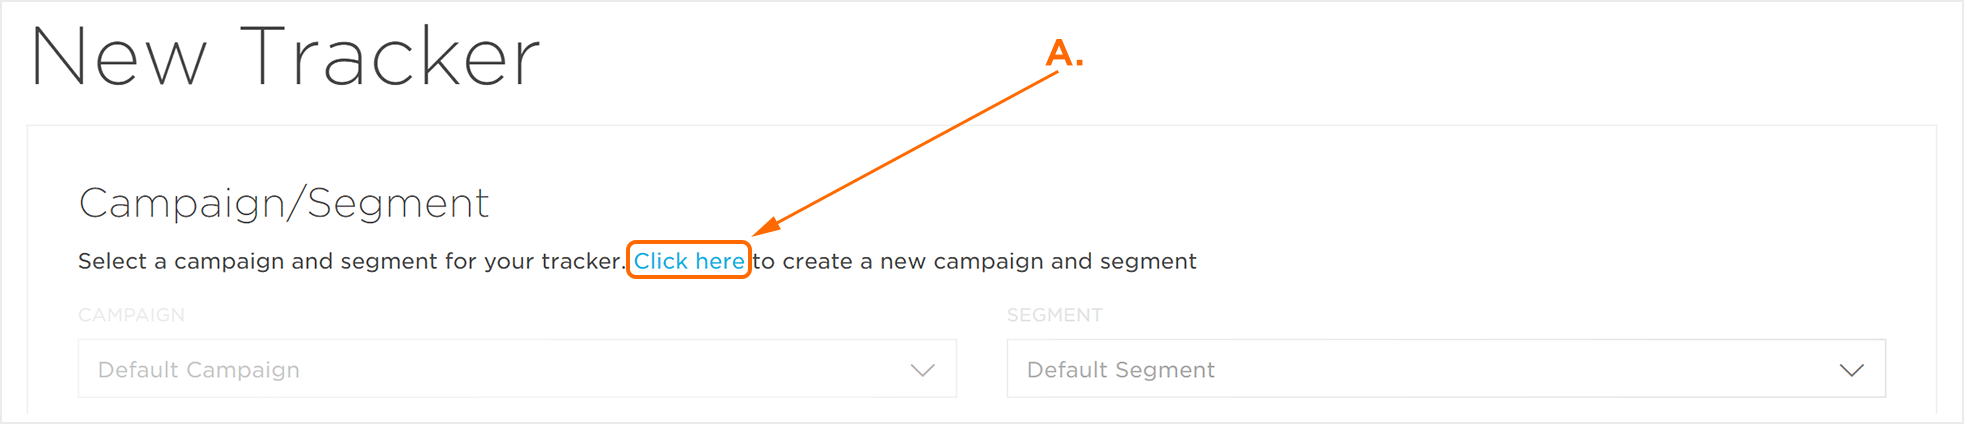
A. Link for creating a campaign or segment.
NOTE: A segment may also be created within an existing campaign by selected the desired campaign and selecting the Segment drop-down menu>Create Segment.
Select Existing Campaign and Segment –

NOTE: Acquisition is the default setting for Tracker Type.
NOTE: The Share With Publisher setting allows the associated publisher to view the settings for this tracker. By unchecking this box, the associated publisher will not be able to view the settings for the tracker.
![]()
A. Check to allow Publisher to view settings for the tracker.
NOTE: For more information on creating and using Landing Pages, refer to our Landing Page Creation and Maintenance support documentation.
NOTE: Google Referrer is set as the default destination type for Android apps. For the majority of Android install campaigns, Google Referrer is used for optimal conversion tracking. Google Referrer will only appear for Android-based apps. If the Google Referrer Install URL needs to be updated, refer to our Update Google Referrer Install URL support documentation.
NOTE: Depending on the selected destination URL type, default and optional settings will vary.
NOTE: For more information about deep links, refer to our Deep Linking support documentation.
NOTE: At the Campaign Level, advertisers can utilize the Custom Parameter fields to track any custom aspect of their campaigns that they define. You can use cp_0 through cp_9 and they will be populated within their own column in reporting in concatenated form. For assistance with Custom Parameters, contact your Client Success Managers.

A. Custom Parameter
NOTE: When a custom parameter is created, it is inserted automatically into the Click URL.
NOTE: In order to remove a custom parameter, Click the “X” associated with the specific parameter.
A. Enter any Optional Settings.
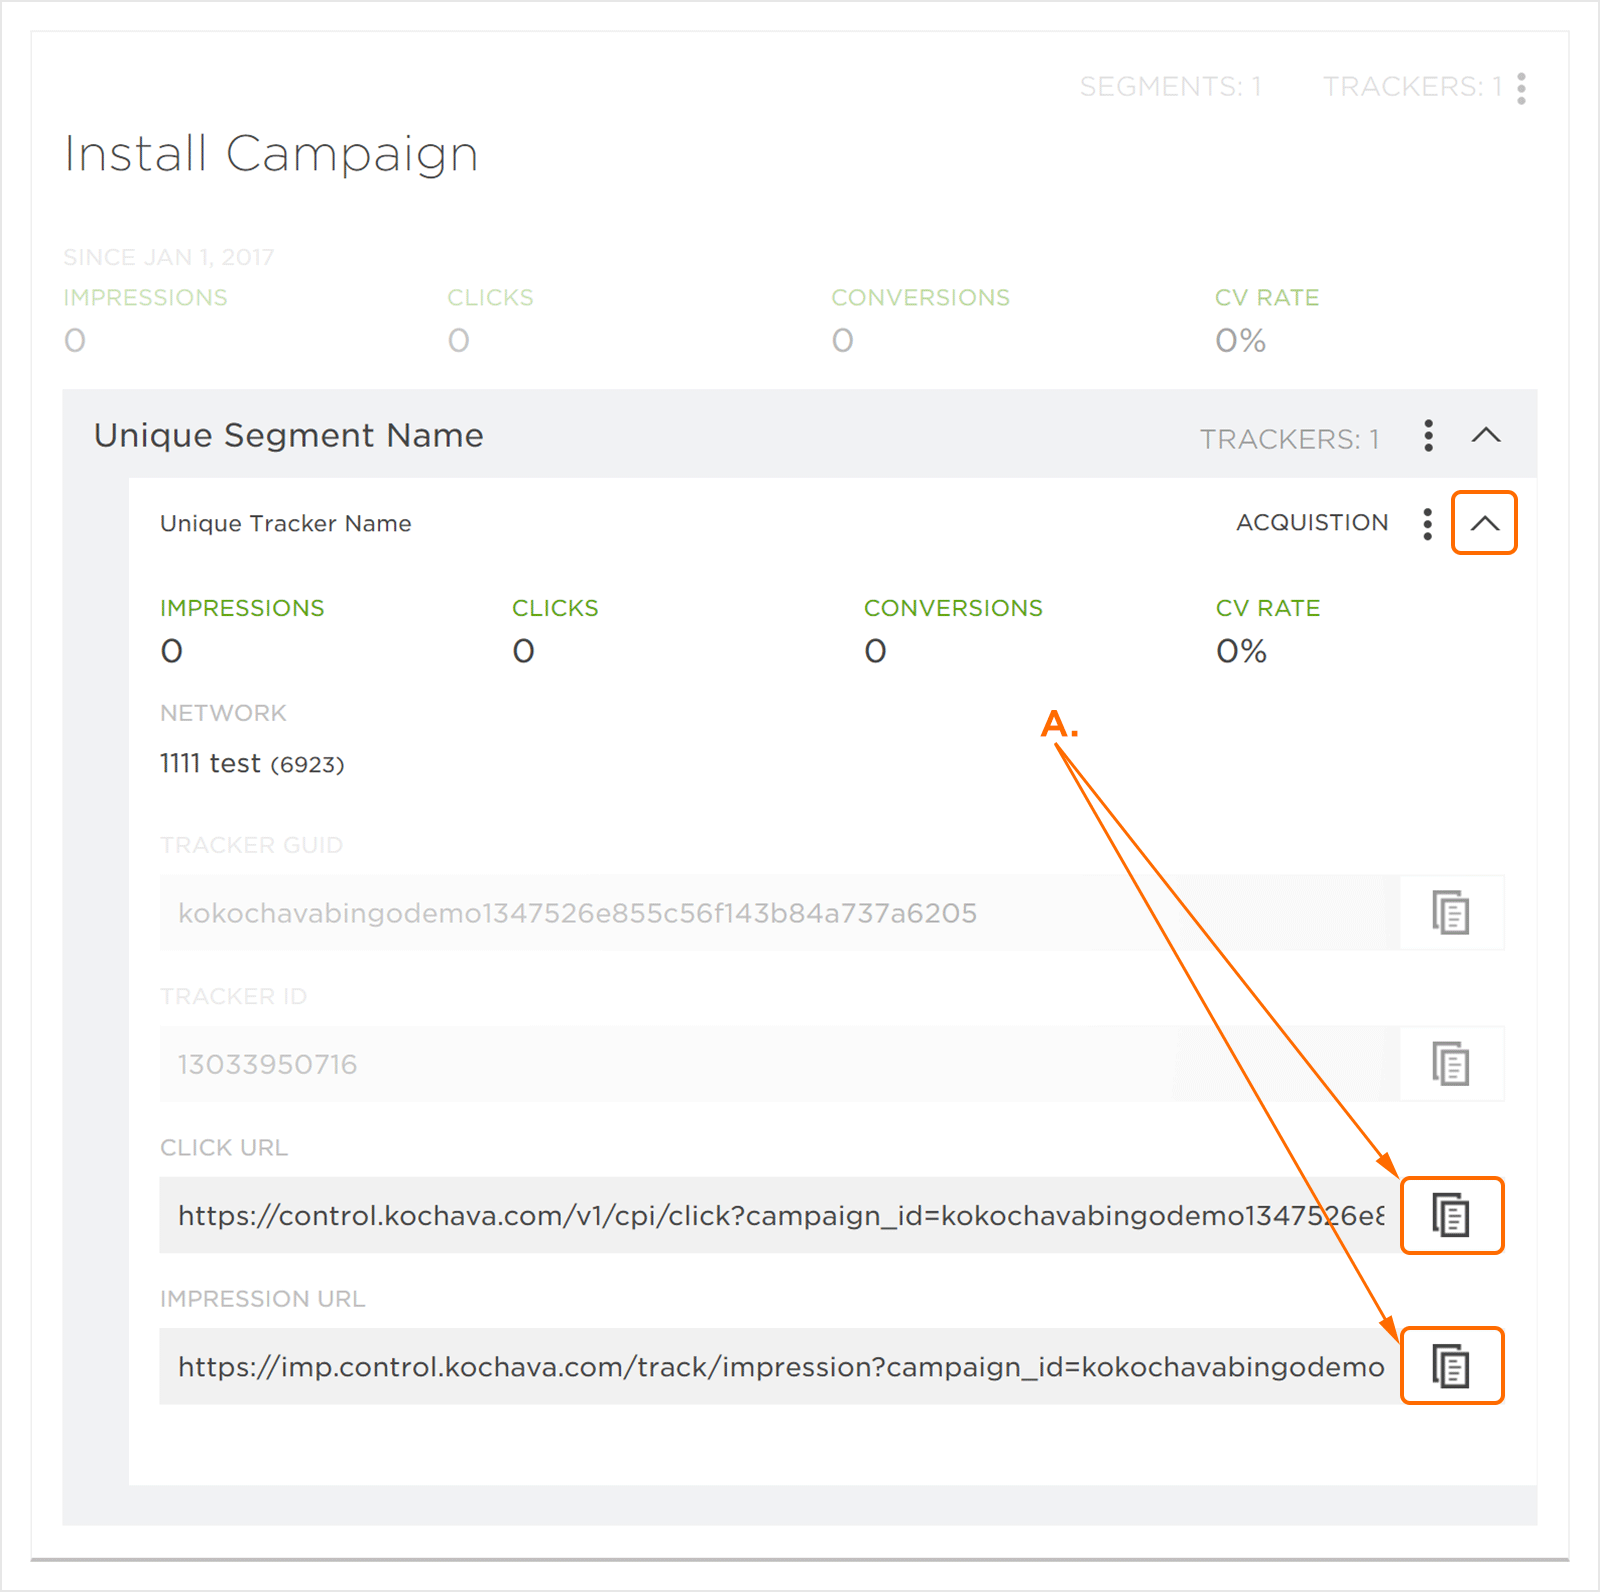
A. Copy and send to Publisher
NOTE: For more information on Impressions, refer to our Attribution Overview support documentation.
Create a Postback
If desired, create a postback for the install event. Refer to our Creating Kochava-Certified Postback or Creating a Custom Postback support documents for more information.