The Analytics Retention (Advanced) page provides a visualization of the retention of installs, RPU (Revenue per User), revenue, and events for a selected time frame. Retention (Advanced) provides quick access to organize Retention intervals by cohorts and custom milestones. Data within Retention can also be calculated utilizing the Classic or Range approaches providing data calculations to answer any question that may exist.
BEST PRACTICE: The advanced features within the retention page may take some time to process. If quick results are needed, use the standard retention page.
Analytics Interface
- Log in to Free App Analytics.
- Select the desired Account and App.
- Select Analytics > Retention (Advanced).
Analytics Page Tools
For more information about the tools that can be used on the Analytics page such as date range, filters, sharing the page and exporting device ID, refer to our Analytics Page Tools support documentation.
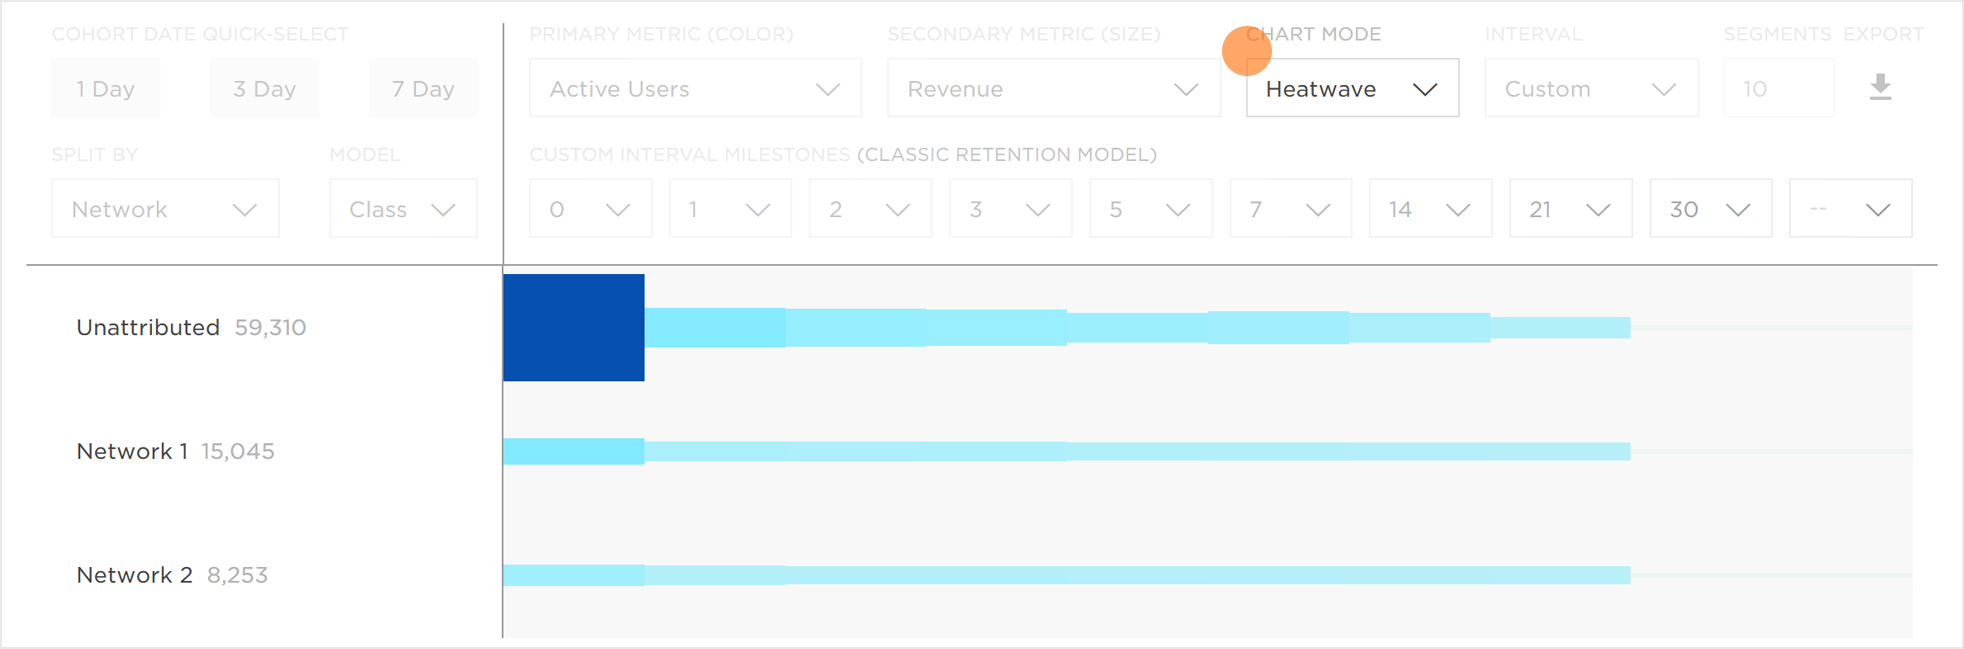
Retention (Advanced) Chart Overview
The Retention chart is divided into two main sections, the metrics and date interval displayed and the graphical display of retention in either grid or heatwave form.
Clicking on any of the specific days within the retention chart will display the Active Users, Percentage of users Retained, Revenue, Revenue per User, Events, Events per User, Sessions and Sessions per User.
NOTE: When leveraging cross app functionality, the retention data for all apps within the App Name filter will be displayed. Retention data may be displayed for each app by utilizing the split by feature. For more information on viewing retention data by app, refer to the Retention Organization section. For more information about adding apps using the filter feature, refer to our Analytics Page Tools support documentation.
NOTE: Days within the Retention chart that do not have any data will be displayed as an empty box within the Grid display or a gap within the Heatwave display.
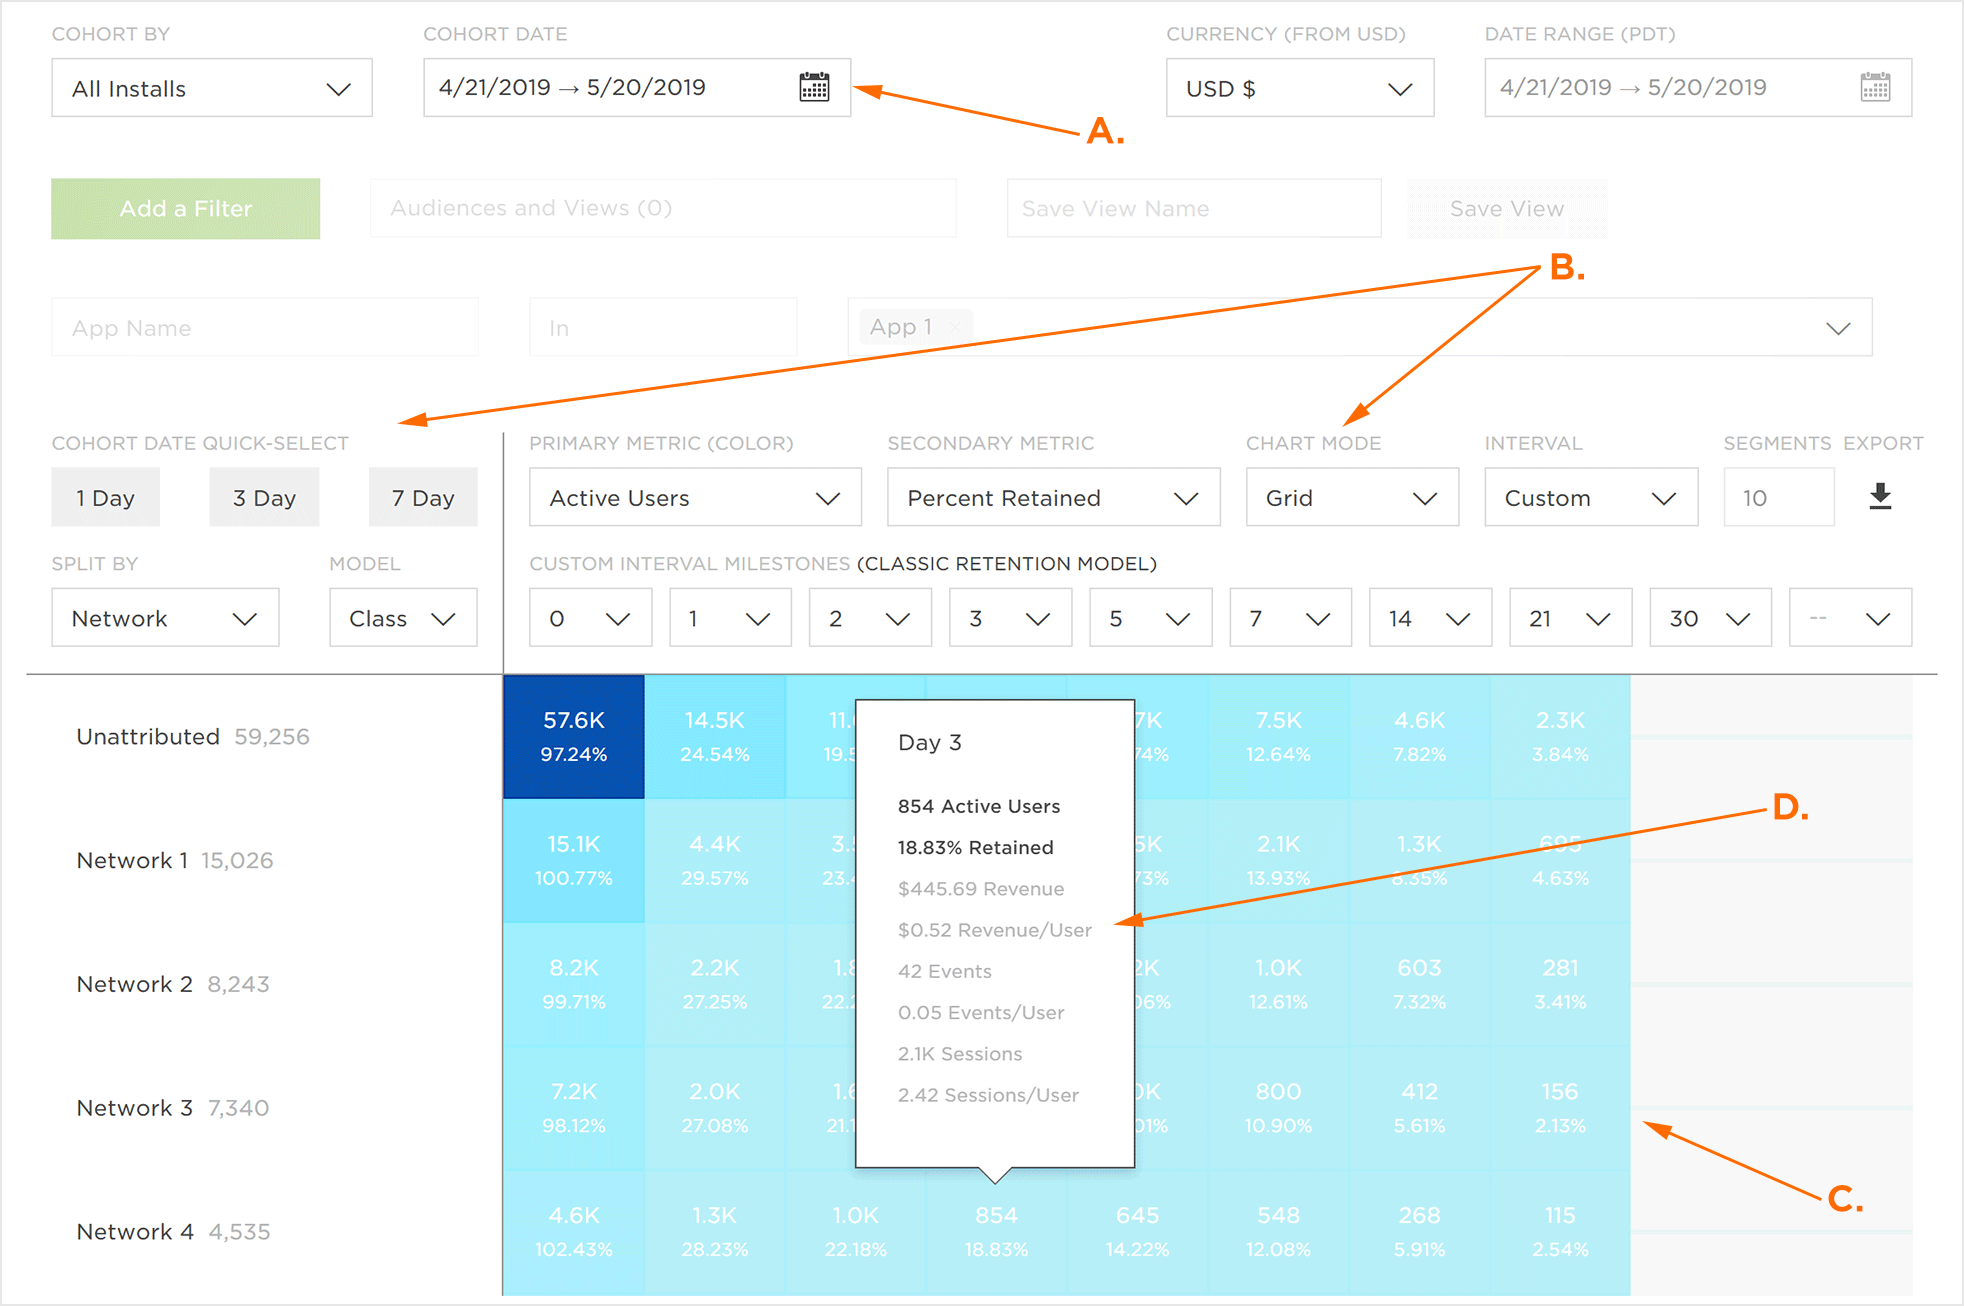
A. Cohort Date, refer to Analytics Page tool support documentation for more details.
B. Metric and Date interval selections
C. Graphic display of Retention data
D. Specific date data
NOTE: Data within the graphic display is color coordinated. The darker the color represents the higher the retention rate.
Retention Organization
Retention data can be organized in many different ways in order to assist in the optimization of data visualization.
- From the Split By drop-down menu, Select one of the following:
- App
- App IdKochava-specific ID of the app. If selected, data will be organized under each corresponding app ID.
- App NameUser generated name of an app. If selected, data will be organized under each corresponding app name.
- App VersionUnique version name or numeric value that represents the unique state of the app. If selected, data will be organized under each corresponding app version.
NOTE: In order to use the App split by feature, the desired apps must be added utilizing the filter feature. For more information about adding apps using the filter feature, refer to our Analytics Page Tools support documentation.
- Campaign
- CampaignInstall or Post-Install - User generated Campaign Name. If selected, data will be organized under each corresponding campaign name.
- CreativeInstall or Post-Install - Typically an image or video, Kochava receives the creative ID upon install or event. If selected, data will be organized under the corresponding creative ID.
- SegmentInstall or Post-Install - User generated name for a group within a campaign. If selected, data will be organized under each corresponding segment name.
- TrackerInstall or Post-Install - User generated name for a tracker within a segment and campaign. If selected, data will be organized under each corresponding tacker name.
- Device
- Device Carrier NameInstall or Post-Install - The cellular service provider (e.g., Verizon, AT&T). If selected, data will be organized under each corresponding carrier name.
- Device LanguageInstall or Post-Install - The primary language set for the device. If selected, data will be organized under each corresponding language code (e.g., en-US, zh-CN).
- Device Network Conn TypeInstall or Post-Install - The device connection type (e.g., WIFI, Cellular). If selected, data will be organized under each corresponding network connection type.
- Device OrientationInstall or Post-Install - The physical orientation of the device with respect to gravity (e.g, Landscape, Portrait). If selected, data will be organized under each device orientation.
- Device OsInstall or Post-Install - The mobile operating system that is installed on the device (e.g., iOS, Android). If selected, data will be organized under each corresponding operating system.
- Device Os VersionInstall or Post-Install - The unique version number for the operating system (e.g., iOS-10.3.3, Android-8.0.0). If selected, data will be organized under each corresponding operating system version.
- Device TypeInstall or Post-Install - The description of the device that install or post-install event is attributed to (e.g., SM-G935V-Verizon, iPhone8,1). If selected, data will be organized under each corresponding device type.
- Device VersionInstall or Post-Install - The device hardware version (e.g., iPhone-iOS-11.3, Samsung SM-N950U-Android-7.1.1). If selected, data will be organized under each corresponding device version.
- Location
- CityInstall or Post-Install - The name of the city where the click, install or post-install event occurred. If selected, data will be organized under each corresponding city.
- CountryInstall or Post-Install - The 2 digit country designation where the click, install or post-install event occurred. If selected, data will be organized under each country.
- DMAInstall or Post-Install - The designated marketing area where the click, install or post-install event occurred. If selected, data will be organized under each corresponding dma.
- RegionInstall or Post-Install - The 2 digit region designation where the click, install or post-install event occurred. If selected, data will be organized under each region.
- ZipInstall or Post-Install - An alpha numeric representation of the particular postal area where the click, install or post-install event occurred. If selected, data will be organized under each corresponding ZIP code.
- Attribution
(see iOS 14+ restrictions)
- TypeInstall - The type of attribution (e.g., Unattributed, Install). If selected, data will be organized under each corresponding attribution type.
- Install CampaignInstall - The install campaigns associated with the app. If selected, data will be organized under each corresponding install campaign.
- Install CreativeInstall - The creative associated with install. If selected, data will be organized under each corresponding install creative.
- Install Matched ByInstall - The device ID type by which the install was matched (e.g., idfa, ip, probabilistic). If selected, data will be organized under each corresponding install match type.
- Install Network NameInstall - The name of the newtork to which the install was attributed. If selected, data will be organized under each corresponding network name.
- Install SiteInstall - The site to which the install was attributed within the publisher partner. If selected, data will be organized under each corresponding site.
- Install TrackerInstall - The tracker name to which the install is attributed. If selected, data will be organized under each corresponding tracker name
- Matched ToInstall - The identifier to which attribution was matched (e.g., idfa, iad, adid). If selected, data will be organized under each attribution identifier.
- Matched ByInstalls and Post-Install - The method to which attribution was matched (e.g., click, impression, unattributed). If selected, data will be organized under each corresponding attribution method.
- Network NameInstall Post-Install - The name of the network to which attribution was awarded. If selected, data will be organized under each corresponding network name.
- Network IdInstall or Post-Install - The Kochava-specific ID of the network to which attribution was awarded. If selected, data will be organized under each corresponding network ID.
- Network Key
- Partner Ad Group IDInstall or Post-Install - The Kochava-specific ID of the ad group to which attribution was awarded. If selected, data will be organized under each corresponding ad group ID.
- Partner Ad Group NameInstall or Post-Install - The name of the ad group to which attribution was awarded. If selected, data will be organized under each corresponding ad group name.
- Partner Campaign IdInstall or Post-Install - The unique numeric identification for the partner campaign. If selected, data will be organized under each corresponding partner campaign ID.
- Partner Campaign NameInstall or Post-Install - The name of the partner campaign to which attribution was awarded. If selected, data will be organized under each partner campaign name.
- Partner KeywordInstall or Post-Install - The partner keyword for the campaign which was awarded attribution. If selected, data will be organized under each corresponding keyword.
- Partner PlatformInstall Post-Install - The name of the partner digital platform to which attribution was awarded (e.g., facebook, display, messenger). If selected, data will be organized under each corresponding platform.
NOTE: For more information about how the Partner fields map to SAN metadata, please refer to our SAN Networks Campaign Data Mapping support documentation.
- QR CodeInstall - A boolean value (true, false) indicating if the installed was attributed to a QR Code. If selected, data will be organized under the boolean category.
- SiteInstall or Post-Install - The site to which the install or post-install event is attributed to (e.g., 3054, Facebook). If selected, data will be organized under each corresponsind site.
- Agency
- Agency NameInstall or Post-Install - The name of the agency to which the install or post-install event is attributed (e.g., MediaMath, AdParlor). If selected, data will be organized under each corresponding agency name.
- Agency IdInstall or Post-Install - The Kochava-specific agency ID to which the install or post-install event was attributed (e.g., 6702, 8577). If selected, data will be organized under each corresponding agency ID.
- Traffic Verification
- Traffic Verification Fail ReasonInstall or Post-Install - The traffic verifier metric which did not meet the defined condition and value (e.g., country, platform). If selected, data will be organized under each traffic verification fail reason.
- Traffic VerifiedInstall or Post-Install - Inidication whether the traffic has been verified or not. 1 indicates the traffic is verified, 0 indicates it was not verified. If selected, data will be organized under the traffic verified category.

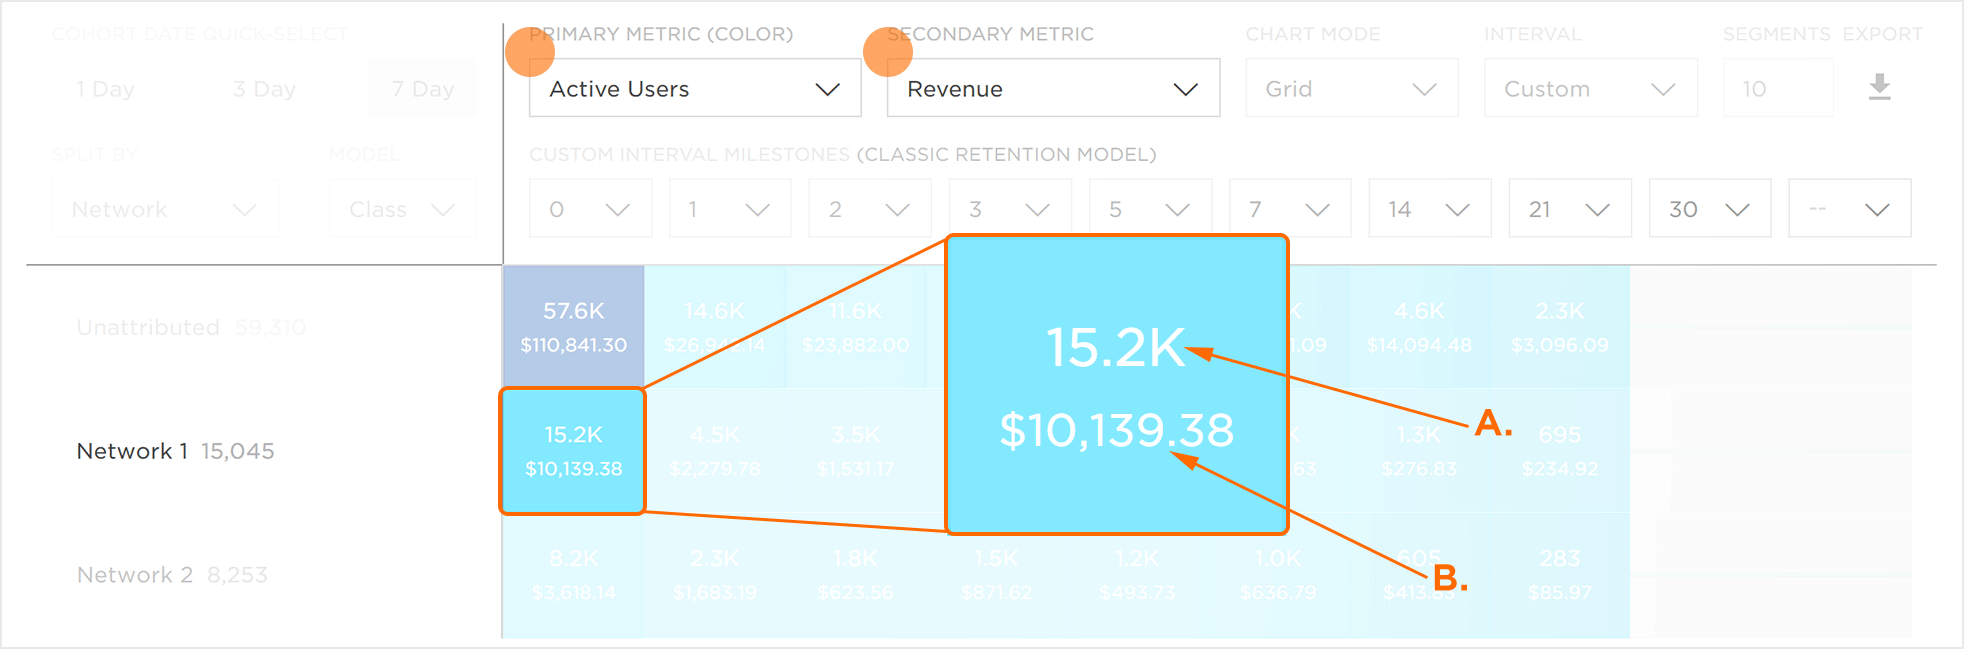
A. Primary Metric Selected (Active Users)
B. Secondary Metric Selected (Revenue)
Retention Interval
- Select a Cohort Date Quick-Select. (optional)
NOTE: 1 Day = The initial day selected in Cohort Date, 3 Day = The initial day selected in Cohort Date + 2 previous days, 7 Days = The initial day selected in Cohort Date + 6 previous days.
NOTE: The Cohort Date Quick-Select option overrides the primary Cohort date based on the interval and number of segments that are selected.
- Select Interval. (optional)
- 1 Day
- 7 Days
- 30 Days
- Custom
NOTE: When Interval > Custom is selected Custom Interval Milestones become available allowing the display of specifically selected days of data to be displayed.
BEST PRACTICE: When setting custom intervals, it is best to set each interval option to blank “- -” from right to left and then reassign the interval options as desired.

Data Display
The data that is being displayed within the Analytics Retention page can be viewed in different formats and using different models. Data can be shown in two different forms, grid format or heatwave format and the data can also be shown calculated using the classic data model or the range data model.
- Select Model.
- Classic

- Range

- Select Chart Mode.
- Grid
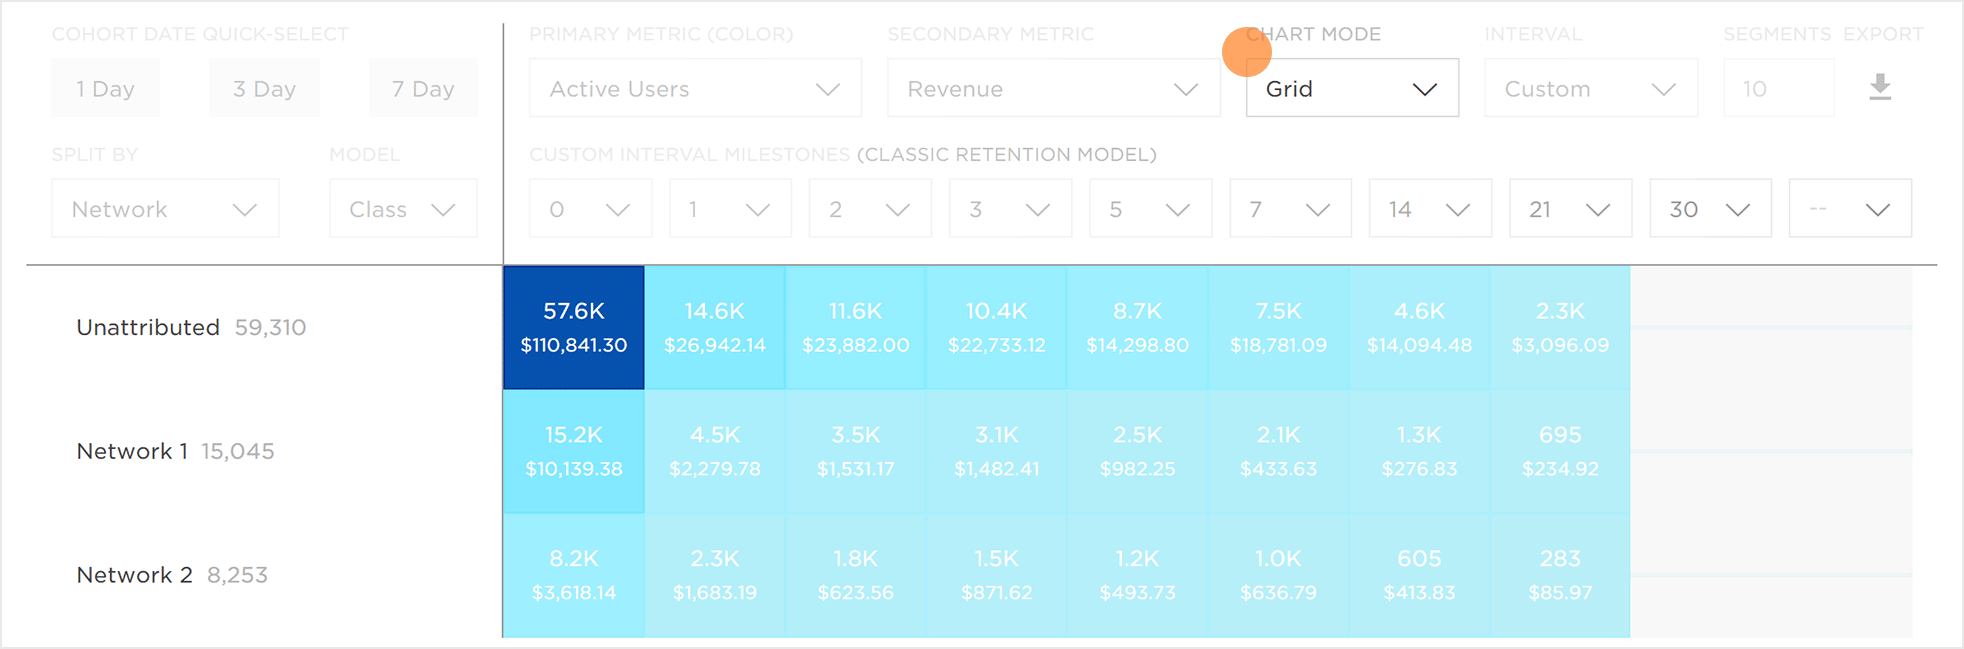
- Heatwave
FAQ
-


The data in the retention analytics view is based on summary numbers to allow for reasonable render time and therefore have a statistical accuracy margin of 3-5%.
The retention views use Cohort Dates instead of the standard date range.

