
This feature is available only with paid Kochava accounts. Contact us to learn more.
NOTE: The Non-Verified Purchase Receipt page is only available to marketers.
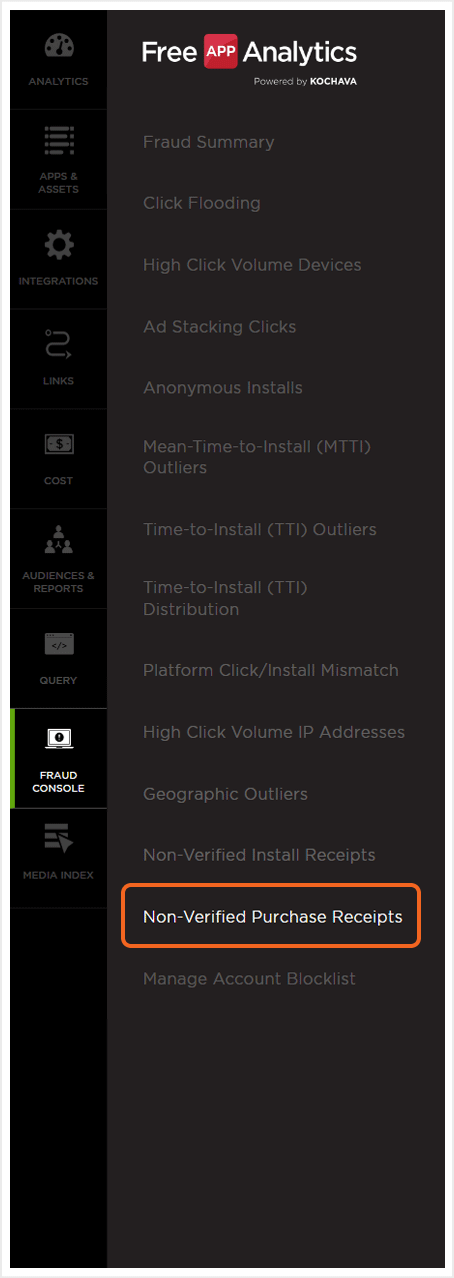
Fraud Console Interface
- Log in to Free App Analytics.
- Select the desired Account and App.
- Select Fraud Console > Non-Verified Purchase Receipts.
Non-Verified Purchase Receipts Overview
The Non-Verified Purchase Receipts page is divided into four main sections: the non-verified purchase receipts volume graph, metrics section, account/app select section and data detail section.
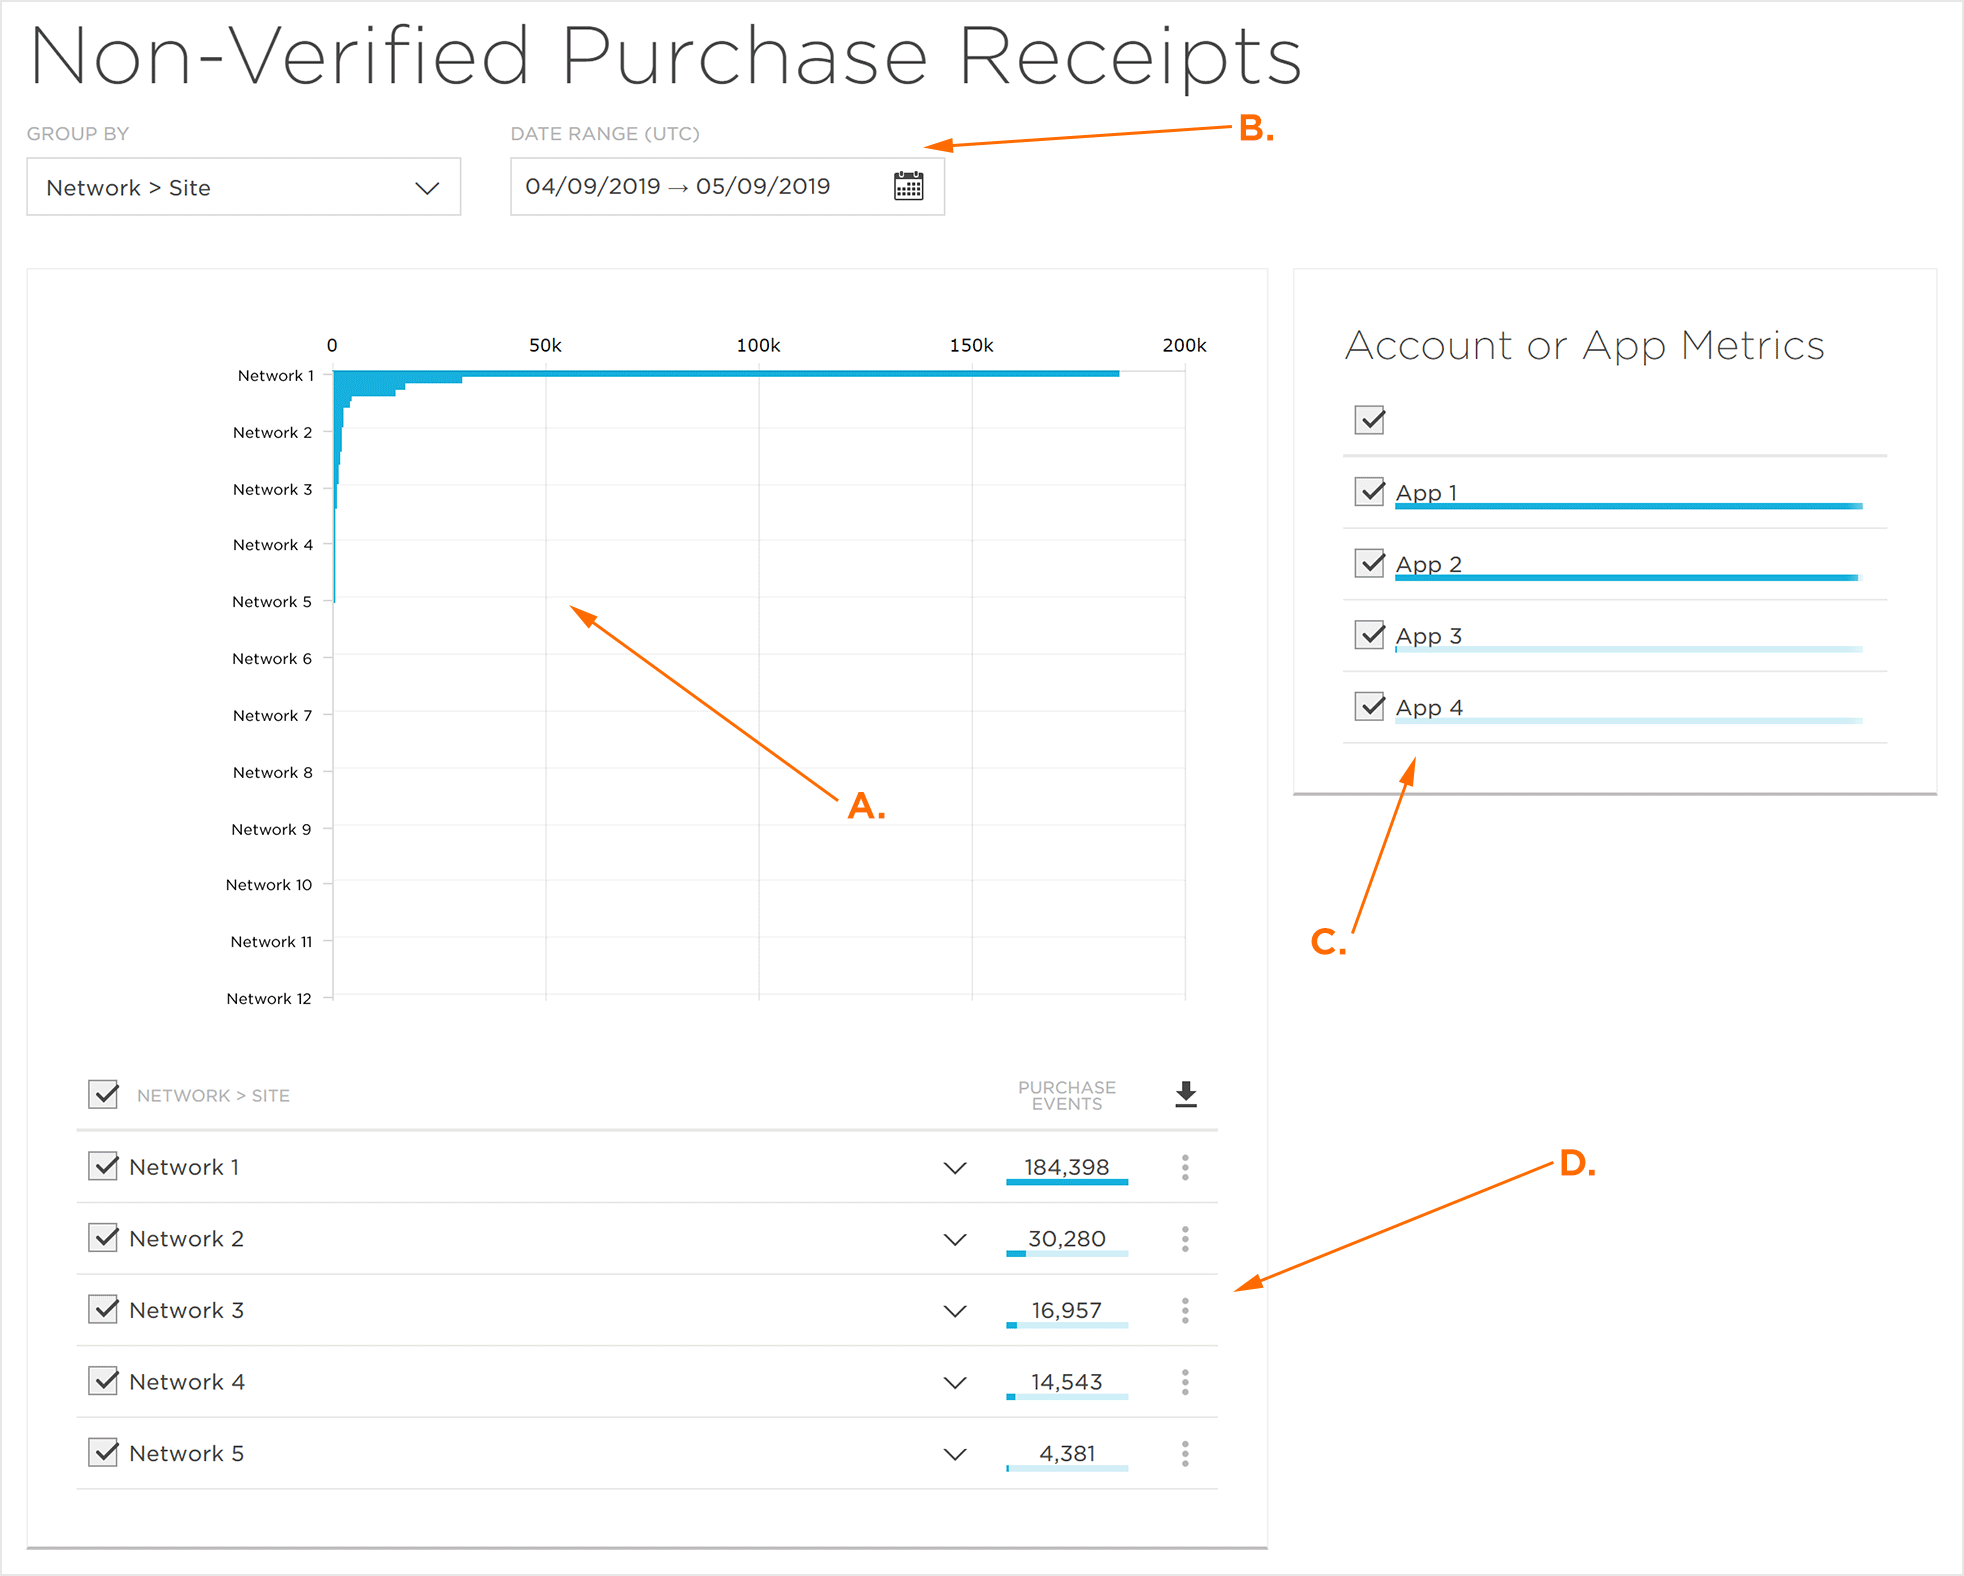
A. Non-Verified Purchase Receipts Volume Graph
B. Metrics (Date Range, Group By)
C. App Selection Section
D. Data Detail Section
Non-Verified Purchase Receipts Metrics
Date Range (UTC):
The Non-Verified Purchase Receipts page may be filtered by date range. By default, the data displayed is set to cover the previous 30 days.
The following options are available for date range selection:
- Today — The current day from 12:00 a.m. to 11:59:59 p.m.
- Yesterday — The last full day from 12:00 a.m. to 11:59:59 p.m.
- Week-to-date — From Monday to the current time of the current week.
- Last week — From Monday to Sunday of the last completed week.
- Last 7 days — The last 7 days up to the current time of the current day.
- Month-to-date — From the first day of the current month to the current time of the current day.
- Last month — All days within the previous month.
- Last 30 days — The last 30 days including the current day.
- Custom — Based upon selection.
The date range is adjusted by selecting one of the predefined selections, clicking on the desired dates within the calendar or manually entering the desired date range into the provided date fields.
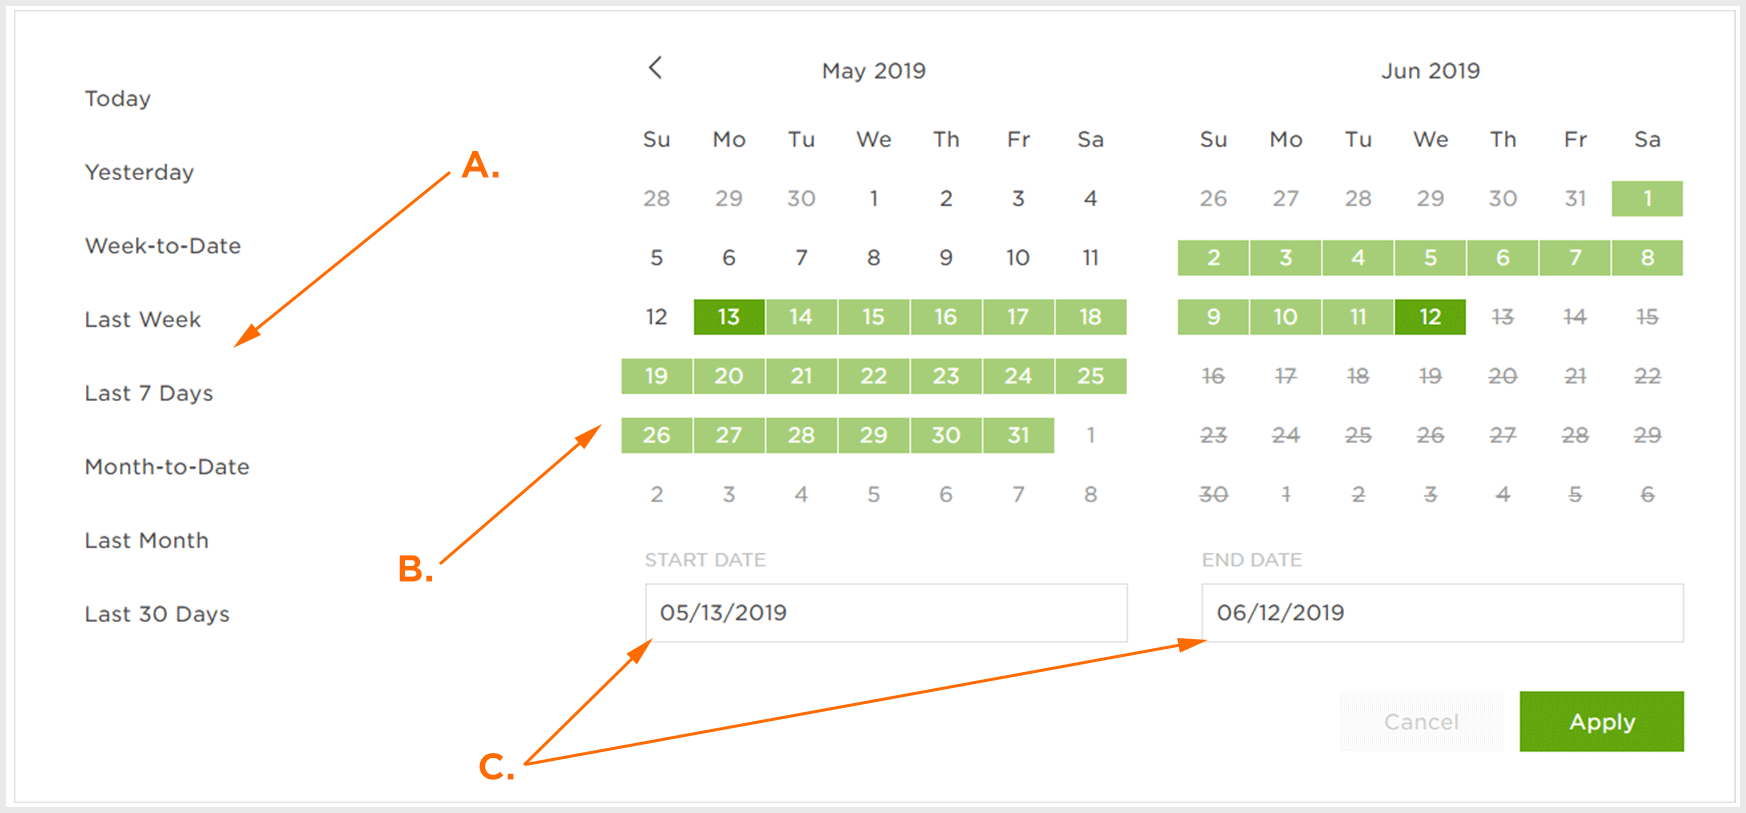
A. Preset date ranges, click to activate
B. Indicates selected data range that can be adjusted by clicking on desired dates
C. Indicates selected date range that can be adjusted by manually entering dates
Group By:
The following options are available for the Group By option:
- App>Site
- App>Network
- App>Tracker
- Network>App
- Network>Site
- Network>Tracker
- Site>Network
- Site>Tracker
- Tracker>Site
App Selection
The data displayed in the non-verified install receipts volume graph and the data detail section is associated with the apps selected. By default, all apps are selected. Apps may be deselected, and the amount of data associated with an app is indicated by the blue bar directly below the app.
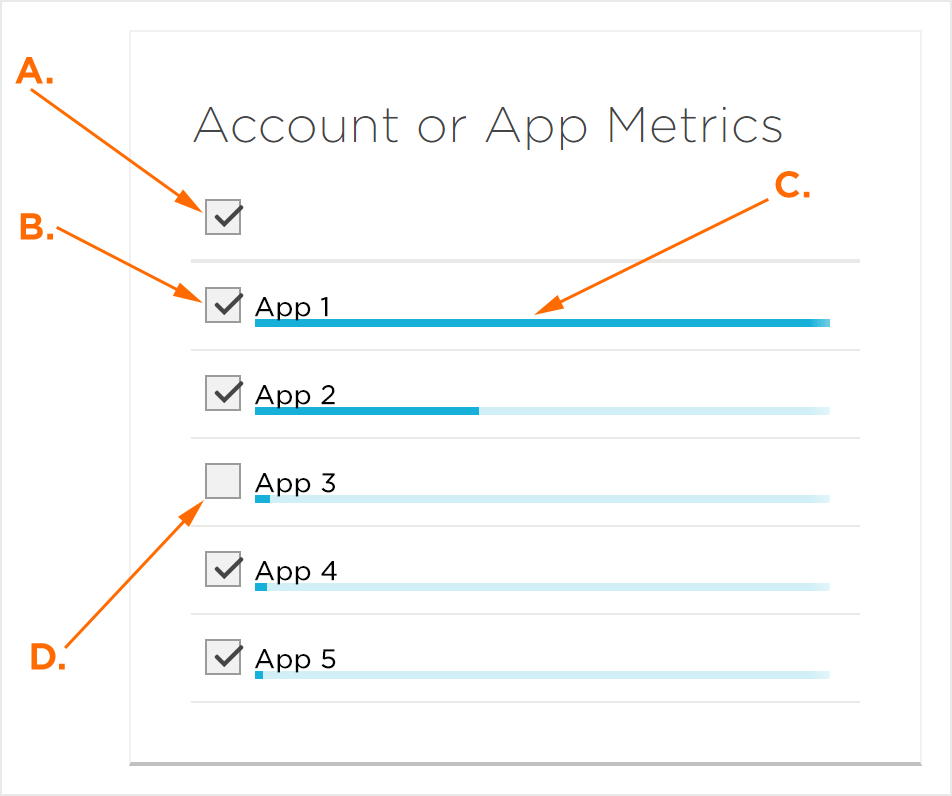
A. Select or deselect all accounts/apps
B. Selected accounts/apps
C. Indication of amount of data associated with account/app
D. Deselected account/app
Non-Verified Purchase Receipts Volume Graph
The Non-Verified Purchase Receipts Volume graph is a visual representation of the number of purchases that occurred by network that do not have a verified purchase receipt. Mousing over any of the rows displays the corresponding network installs without a receipt.

A. Networks
B. Purchase Event Volumes
C. Mouseover Data
Refine Specific Network Range
Refine Network Range
The data for a group of networks can be viewed in further detail.
- Click, hold and drag over a network range to refine.
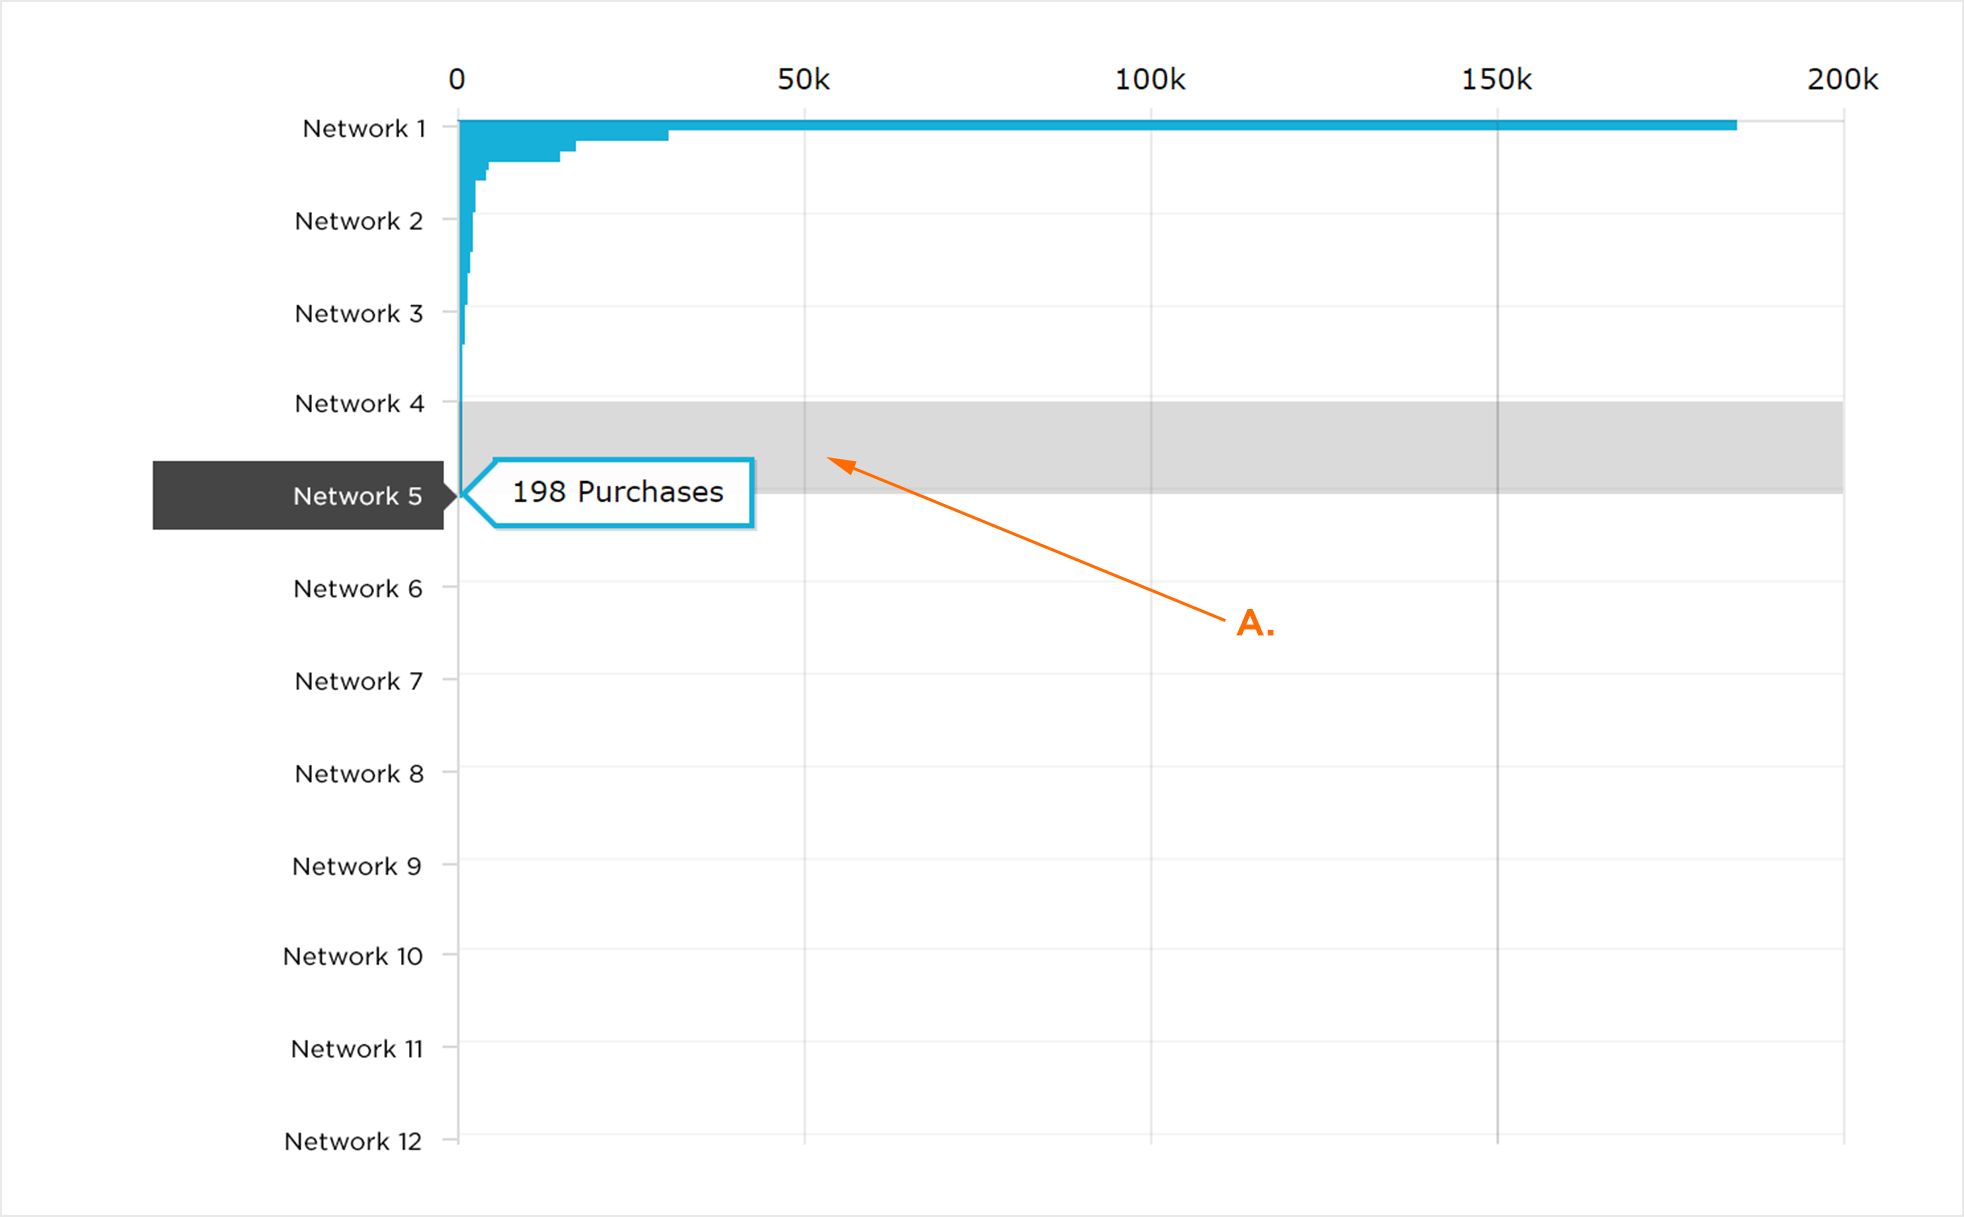
A. Click, hold and drag over a Network range.
The selected network range is now displayed. Specific data for each network within the refined range can be viewed by mousing over the network.
NOTE: The Network range can be refined down to two networks.
Return to Full Graph:
In order to return to the full graph, Click Show all.
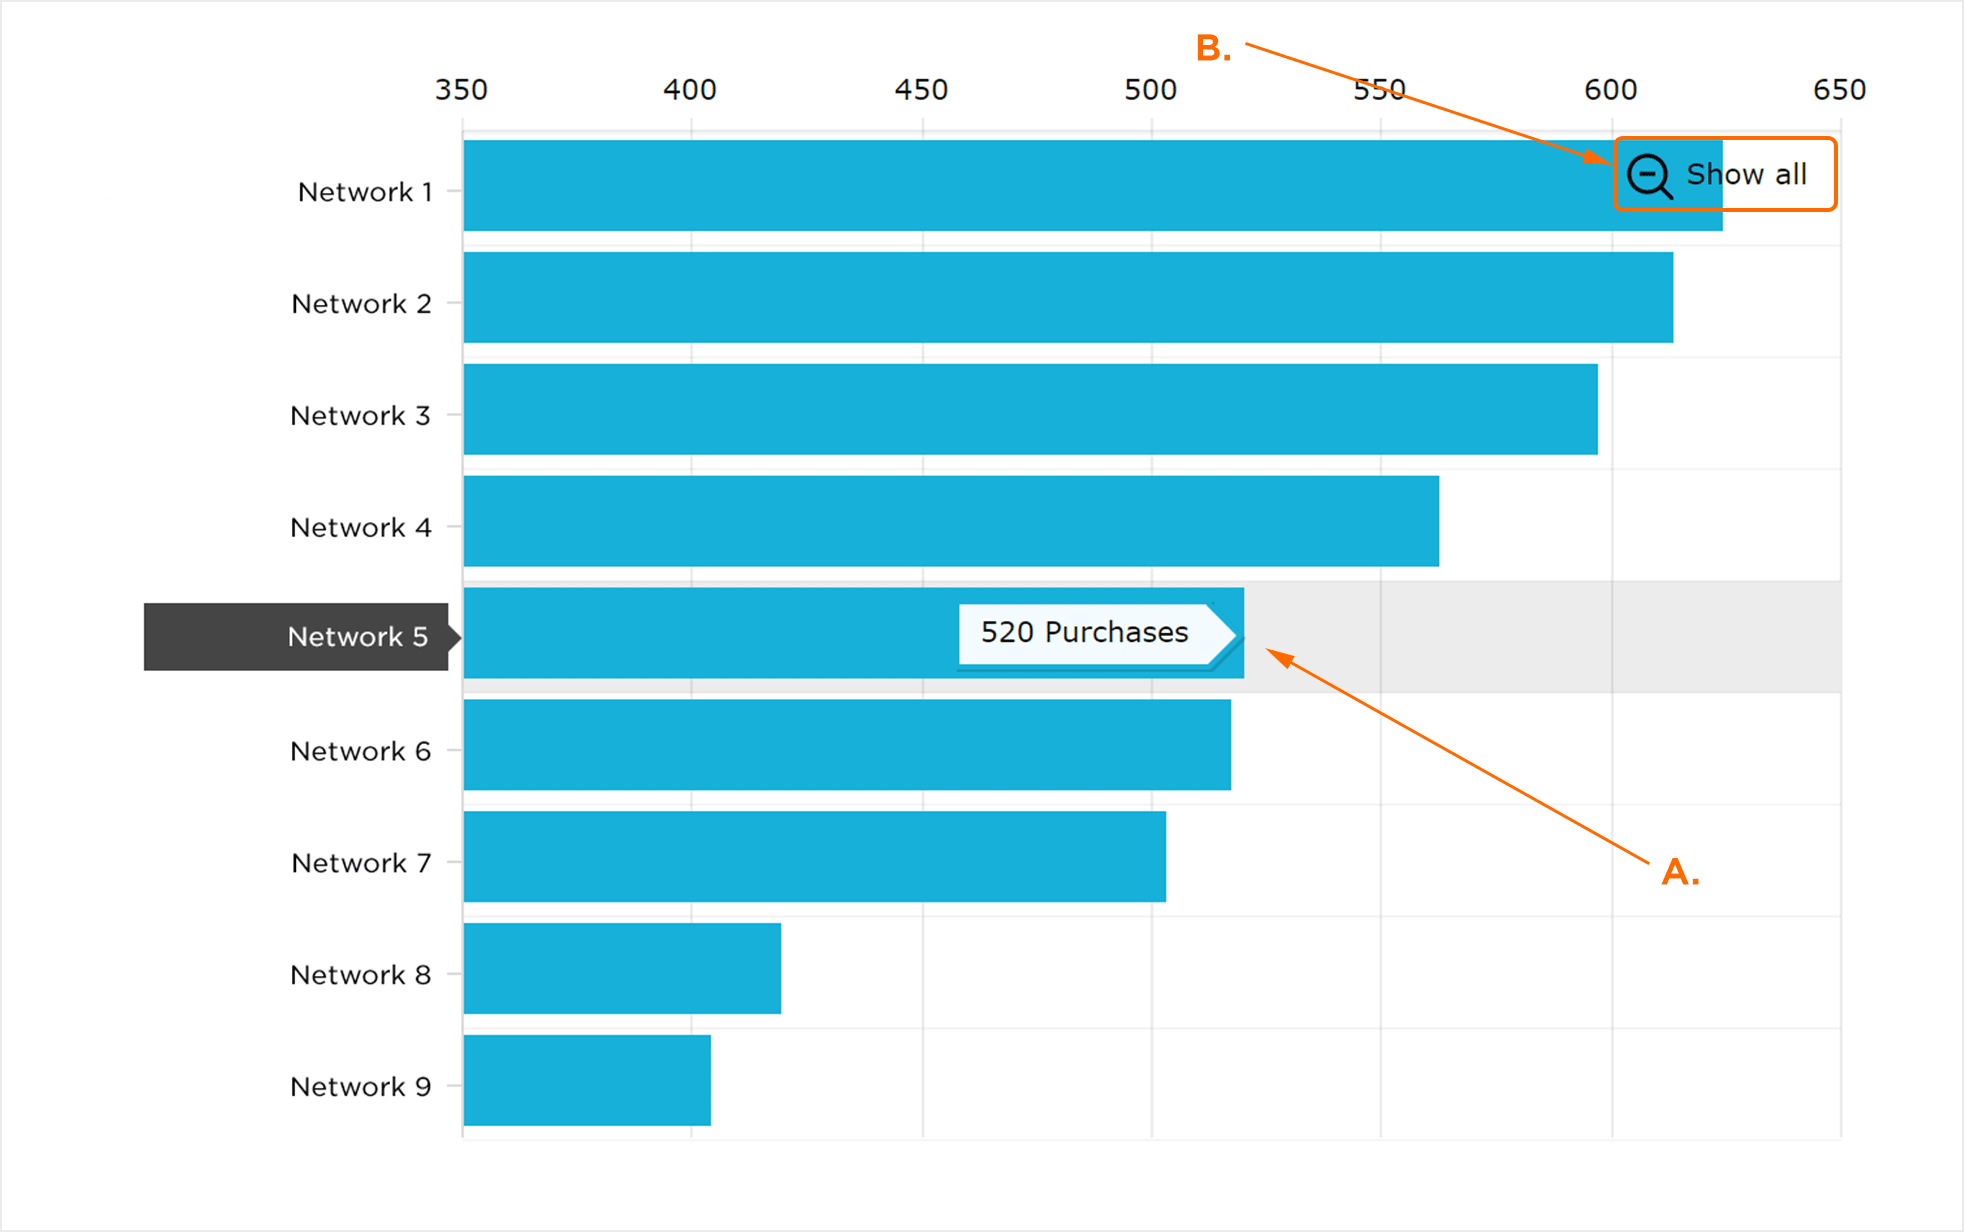
A. Mouseover to view Network specific data.
B. Click to return to original Network range.
Detail Data
The detail data section provides an in-depth look into the specific event receipt counts. Data is organized by the selected Group By option and selections or deselections are reflected within the non-verified purchase receipts volume graph. The data may also be exported to a CSV file.
NOTE: The CSV file produced with contain only the top-level group by category.
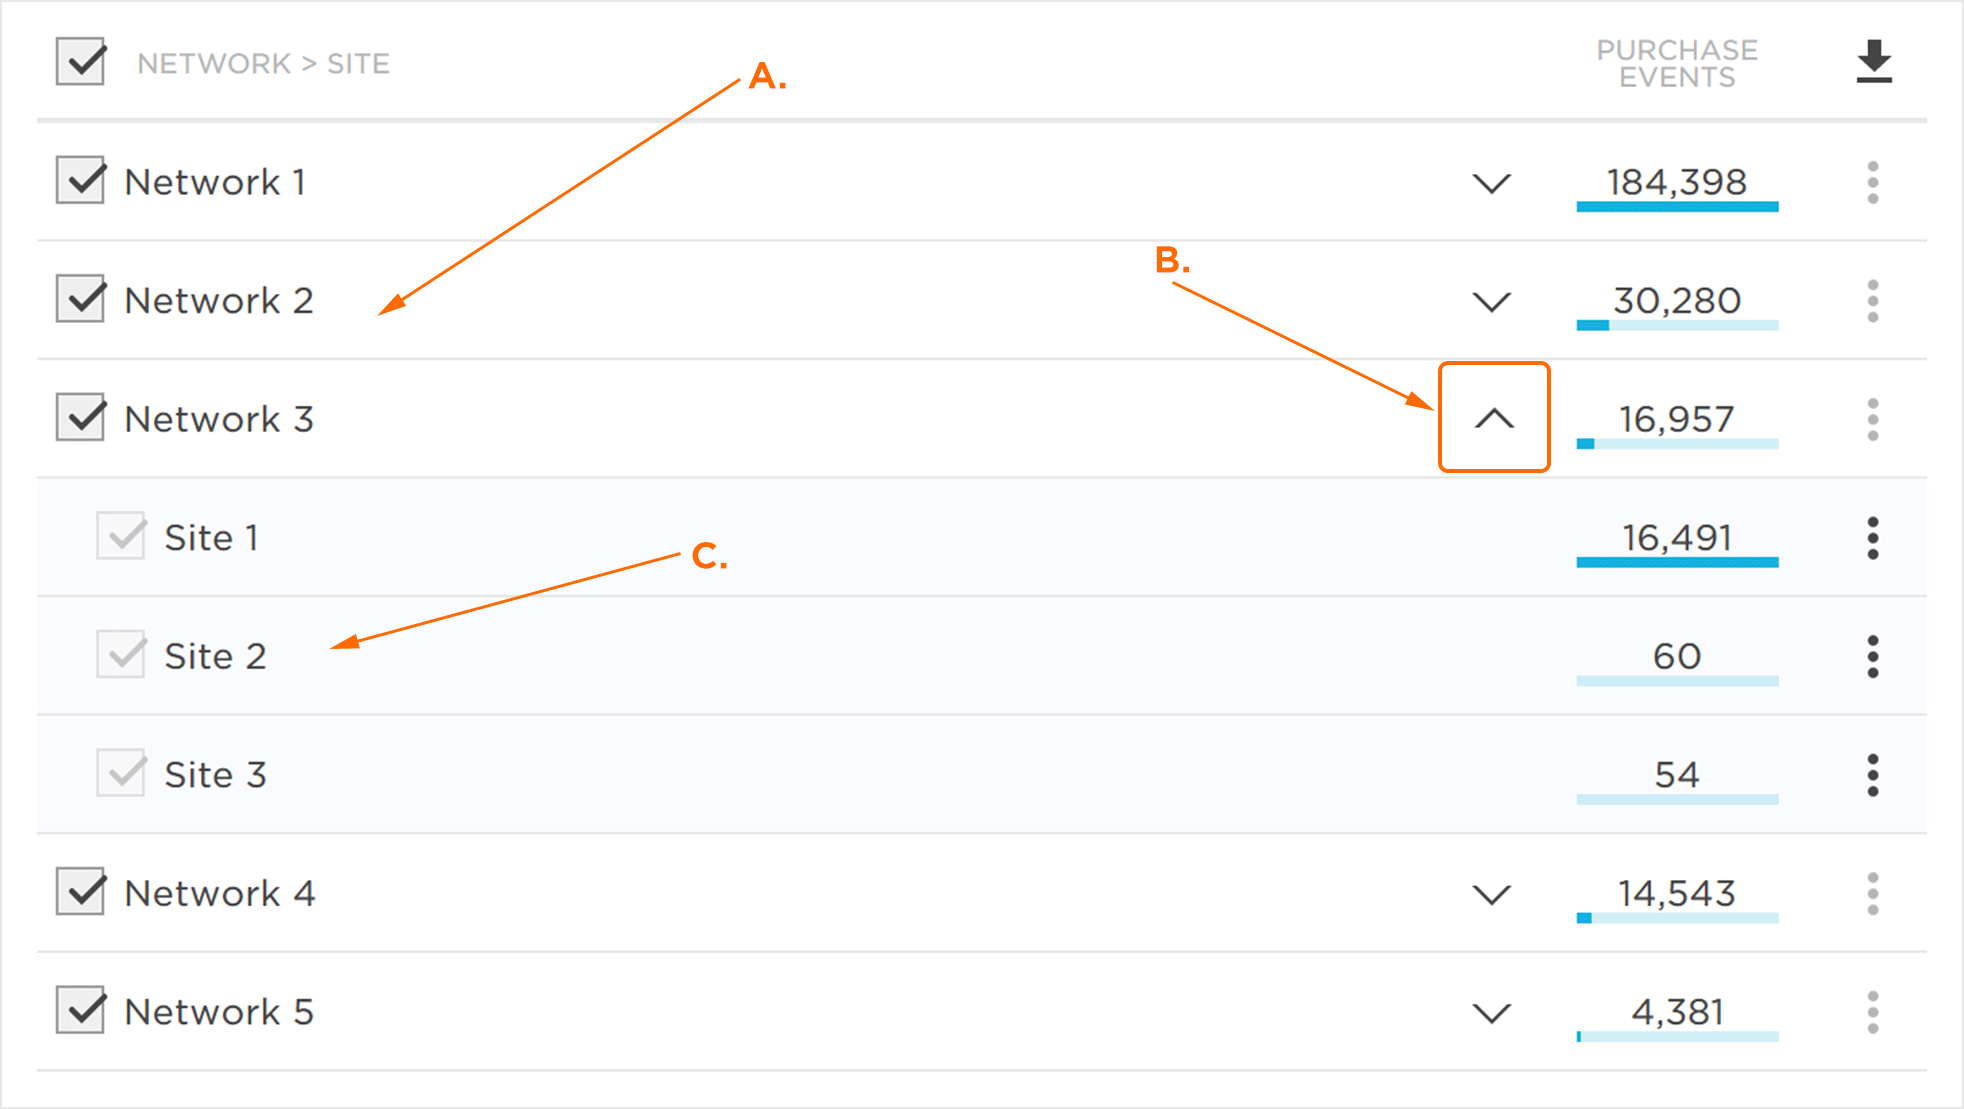
A. Top Level Group By category
B. Purchase Event Count detail data
C. Second Level Group By category
Top-level Group By categories can be expanded by clicking on the Category Expand button.
Data within the detail data section can exported by clicking on the Download Button.
Blocklisting a Site
Marketers have the opportunity to add sites to their Account Blocklist which enables the application of the Kochava Fraud Blocklist traffic verification rules.
- Select the desired Group By.
- App > Site
- Network > Site
- Site > Network
- Site > Tracker
- Tracker > Site
- Locate the desired Site.
- Click the Add Site ID to Blocklist
NOTE: Apps, networks and trackers are not eligible to be added to the Global Fraud Blocklist. Their Add Site ID to Blocklist button will be grayed out.
NOTE: To manage the real-time Global Blocklist, refer to or Global Fraud Blocklist support documentation.
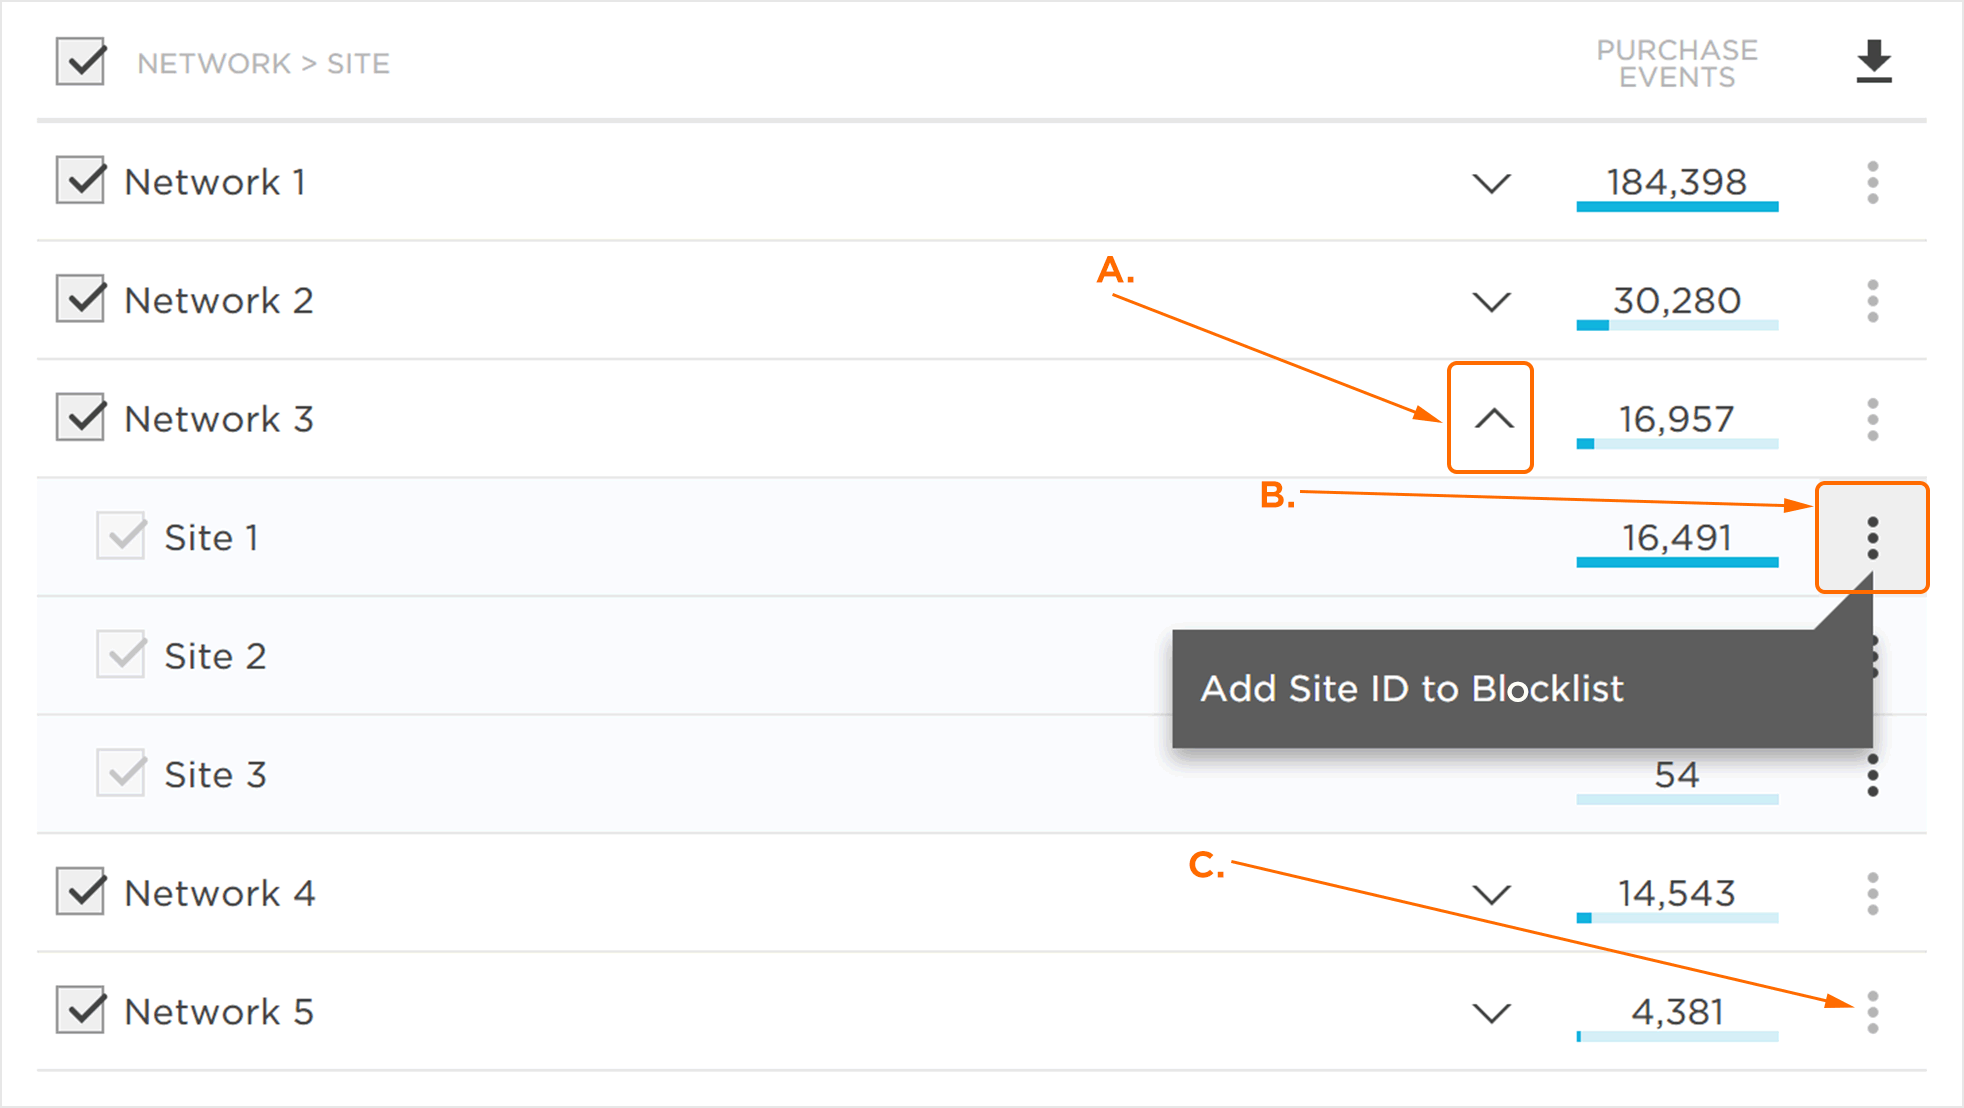
A. Group By Expand Button
B. Add Site ID to Blocklist Button
C. App, Network or Tracker which cannot be added to the Global Fraud Blocklist