Data/Steps Needed Before Beginning Process:
- TikTok App ID
- Follow the instructions within the Create a TikTok Campaign below.
- Copy the Click and Impression URLs.
- When creating a new app witin TikTok’s Ads Manager, paste the Click and Impression URLs.
- Event Type (Provided by TikTok)
- Content Type Metadata Key (Provided by TikTok)
NOTE: In order for third-party tracking to be verified with TikTok, you must apply your TikTok App ID on the postbacks for Install and/or any Post-install events you are running campaigns with. For more information on locating the TikTok App ID, refer to their support documentation.
This section provides the steps for a first time creation of a TikTok App ID.
At this point, TikTok will generate an App ID, which will be used within the Postback Configuration.
Create a TikTok Campaign
NOTE: The following procedures are only completed within the Free App Analytics UI.
- Log in to Free App Analytics.
- Select the desired Account and App.
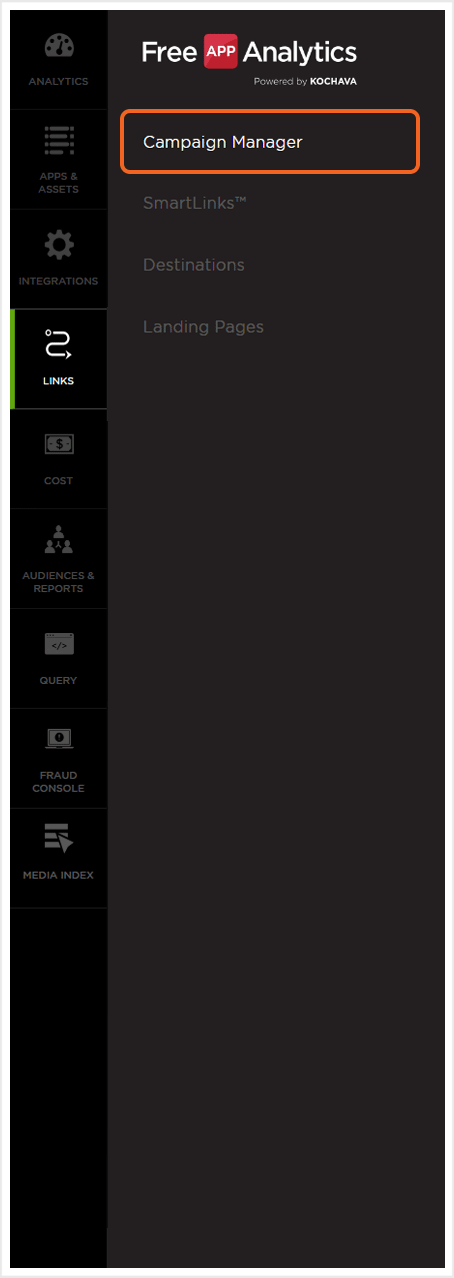
- Select Links > Campaign Manager.

- Click Add a Tracker or Select Segment Tools (⋮) > Add a Tracker.
- Select the Campaign.
- Select the Segment.
- Enter a unique Tracker Name.
- Select the Tracker Type > Acquisition
NOTE: By default the Tracker Type is set to Aquisition.
- Select Media Partner:
- TikTok for Business – iOS
- TikTok for Business – Android
- TikTok for Business – Web
- Select a Agency Partner. (optional)
- Select the Destination URL Type:
- Custom
- Google Referrer (Android Only)
- Landing Page
- Enter the Install Destination URL.
- Enter a Deep Link. (optional)
- Add a Custom Parameter. (optional)
- Click Add a Parameter.
- Enter the Custom Parameter.
- Add additional Custom Parameters. (optional)
- Enter Pricing Type and Target Pricing. (optional)
- Click Save. (If no further trackers need to be created)
- Click Save & Add Another Tracker. (If additional trackers need to be created)
- Click Save & Create Postback. (To navigate directly to the Partner Configuration page).
NOTE: In order to streamline the Campaign/Segment/Tracker creation process a feature has been added to allow the creation of campaigns and segments while creating a new tracker. For more information about creating a campaign or segment while adding a new tracker, refer to our Create an Install Campaign support document. support documentation.
![]()
NOTE: The Share With Publisher setting allows the associated publisher to view the settings for this tracker. By unchecking this box, the associated publisher will not be able to view the settings for the tracker.
NOTE: For more information on creating and using Landing Pages, refer to our Landing Page Creation and Maintenance support documentation.
NOTE: Google Referrer is set as the default destination type for Android apps. For the majority of Android install campaigns, Google Referrer is used for optimal conversion tracking. Google Referrer will only appear for Android based apps. If the Google Referrer Install URL needs to be updated, refer to our Update Google Referrer Install URL support documentation.
NOTE: For more information about deep links, refer to our Deep Linking support documentation.
NOTE: At the Campaign Level, advertisers can utilize the Custom Parameter fields to track any custom aspect of their campaigns that they define. You can use cp_0 through cp_9 and they will be populated within their own columns in reporting. For assistance with Custom Parameters, contact your Client Success Managers.
NOTE: When a custom parameter is created, it is inserted automatically into the Click URL.
NOTE: In order to remove a custom parameter, Click the “X” associated with the specific parameter.
NOTE: Depending on the selected destination URL type, default and optional settings will vary.
![]()
A. Campaign and Segment selection/creation section.
B. Custom Settings.
Reengagement Configuration
The information within this section provides the steps necessary to establish a reengagment campaign. If a reengagment campaign does not need to be created, the information in this section may be disregarded.
NOTE: An install tracker must be created in order for postback information to be sent.
Create a Reengagement Segment:
- Locate the desired Campaign.
- Select Campaign Tools (⋮) > Add a Segment.
- Enter a Segment Name.
- Enter a Segment Description. (optional)
- Click Submit.
Create a Reengagement Tracker:
- Click Add a Tracker or Select Segment Tools (⋮) > Add a Tracker.
- Select the Campaign.
- Select the Segment.
- Enter a Tracker Name.
- Select Tracker Type > Reengagement.
- Select Media Partner:
- TikTok for Business – iOS
- TikTok for Business – Android
- TikTok for Business – Web
- Select an Agency Partner. (optional)
- Select the Destination URL Type:
- Custom
- Google Referrer (Android Only)
- Landing Page
- Enter the Install Destination URL.
- Enter a Deep Link. (optional)
- Add a Custom Parameter. (optional)
- Enter Pricing Type and Target Pricing. (optional)
- Select the Line Event.
- Click Save (If no further trackers need to be created).
- Click Save & Add Another Tracker If additional events need to be created).
- Click Save & Create Postback. (To navigate directly to the Partner Configuration page).
![]()
A. Campaign and Segment selection/creation section.
Postback Configuration
- Select Apps & Assets > Partner Configuration.

- Click Add a Configuration.
- Select Network Partner:
- TikTok for Business
- TikTok for Business – Android
- TikTok for Business – iOS
- TikTok for Business – Web
- Click Go.
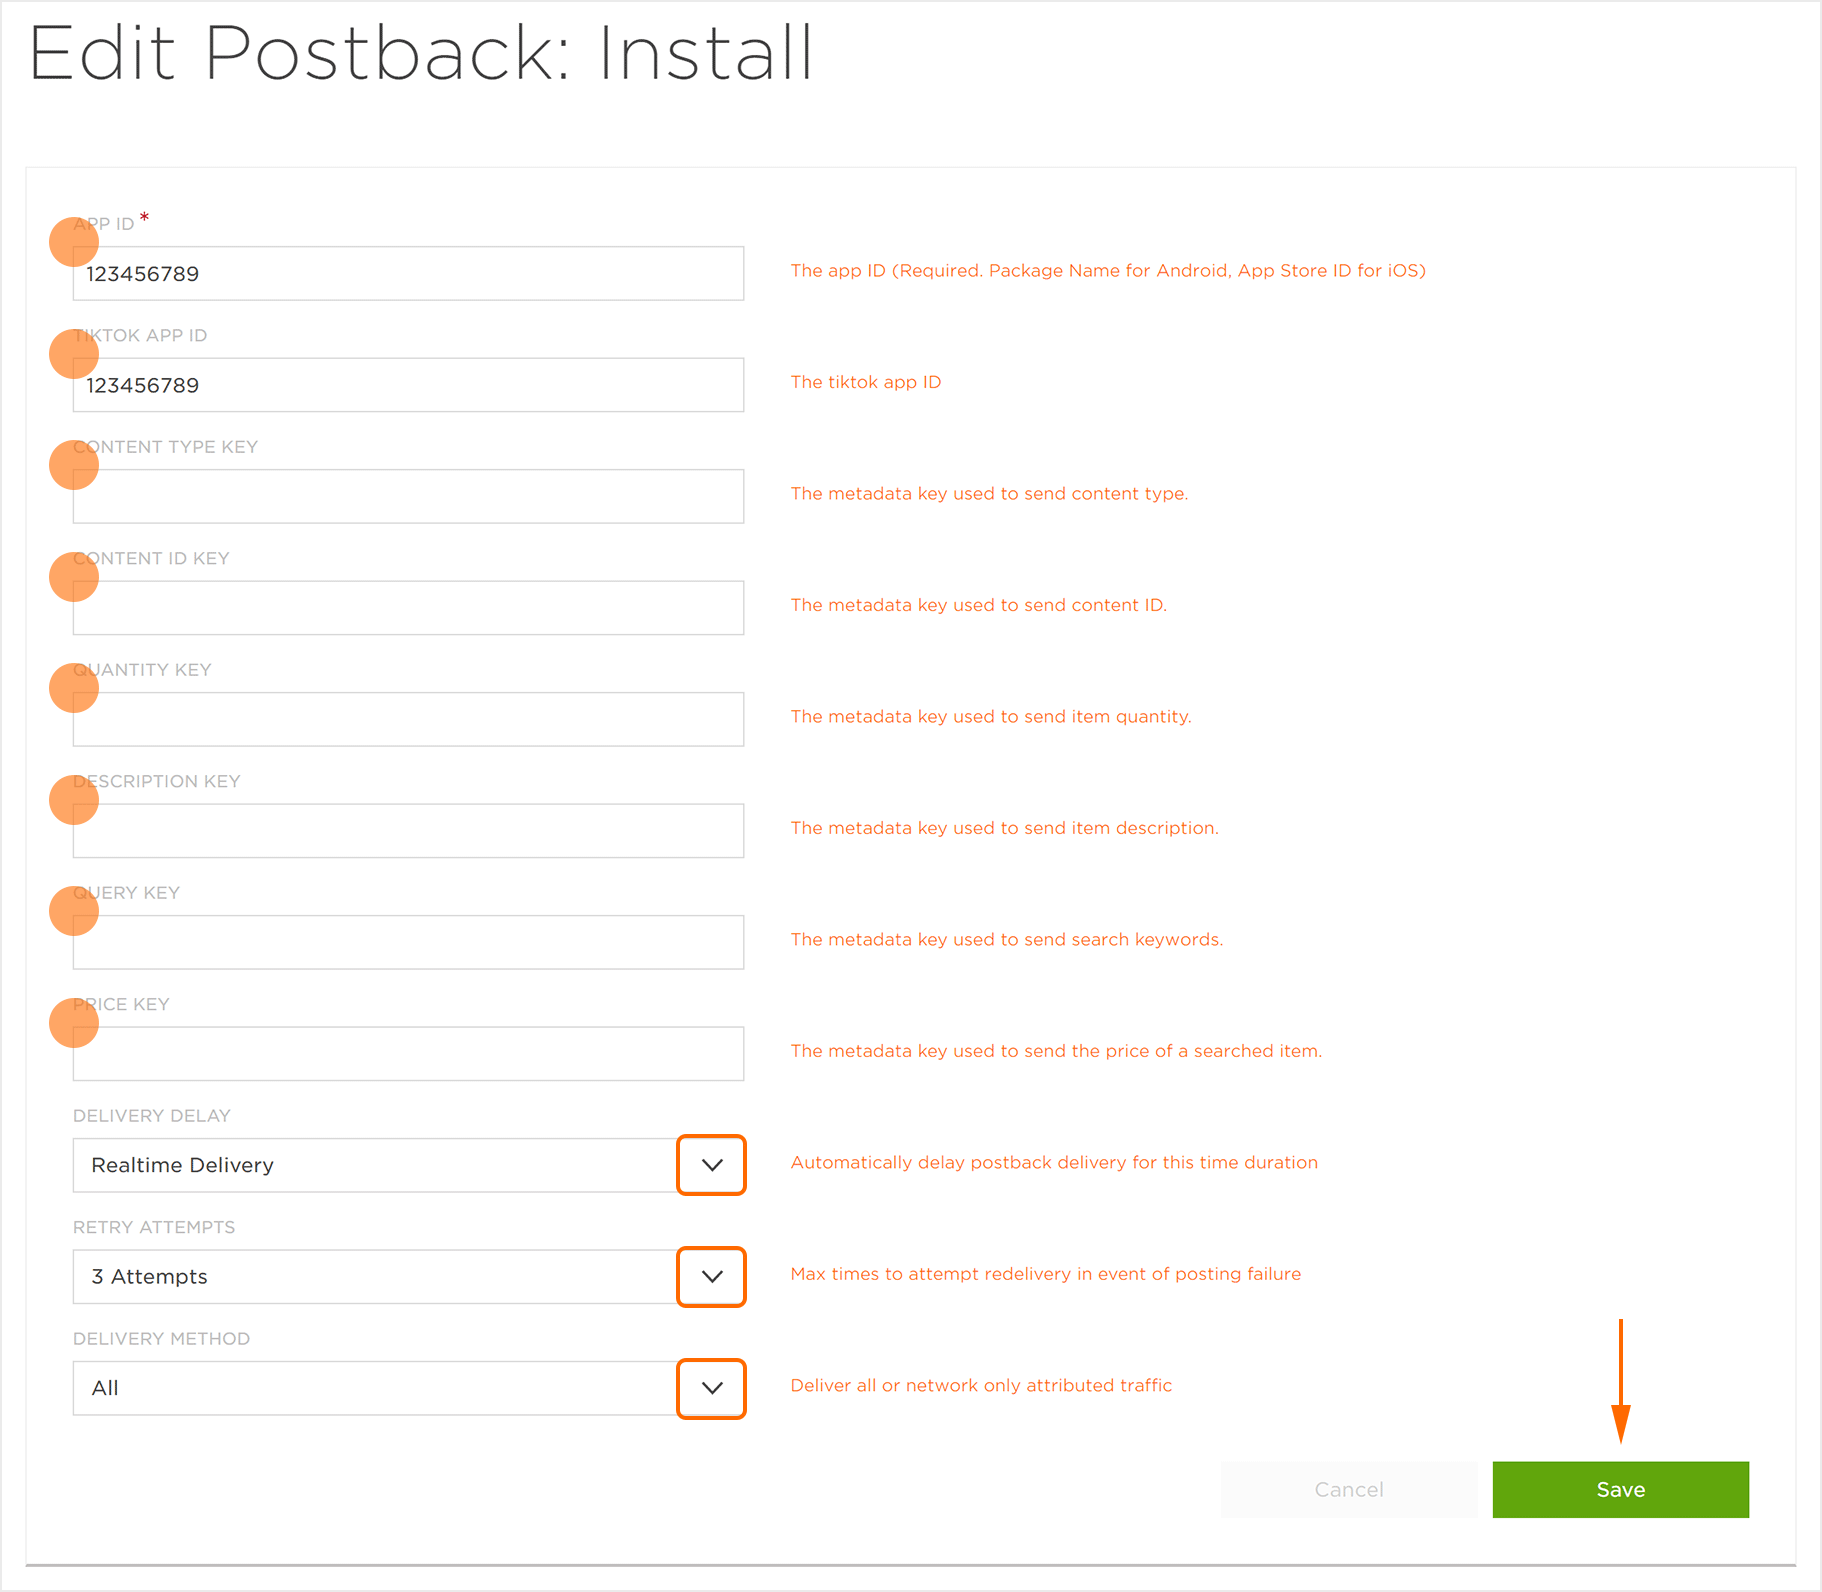
Install Configuration:
- Enter the App ID (required).
- Enter the TikTok App ID.
- Enter the Content Type Metadata Key.
- Enter the Content ID Metadata Key.
- Enter the Quantity Metadata Key.
- Enter the Description Metadata Key.
- Enter the Query Metadata Key.
- Enter the Price Metadata Key.
- Select the Event Type (required).
- Select the Delivery Delay.
- Select the number of Retry Attempts.
- Select the Delivery Method.
NOTE: For more information on locating the TikTok App ID, refer to their support documentation.

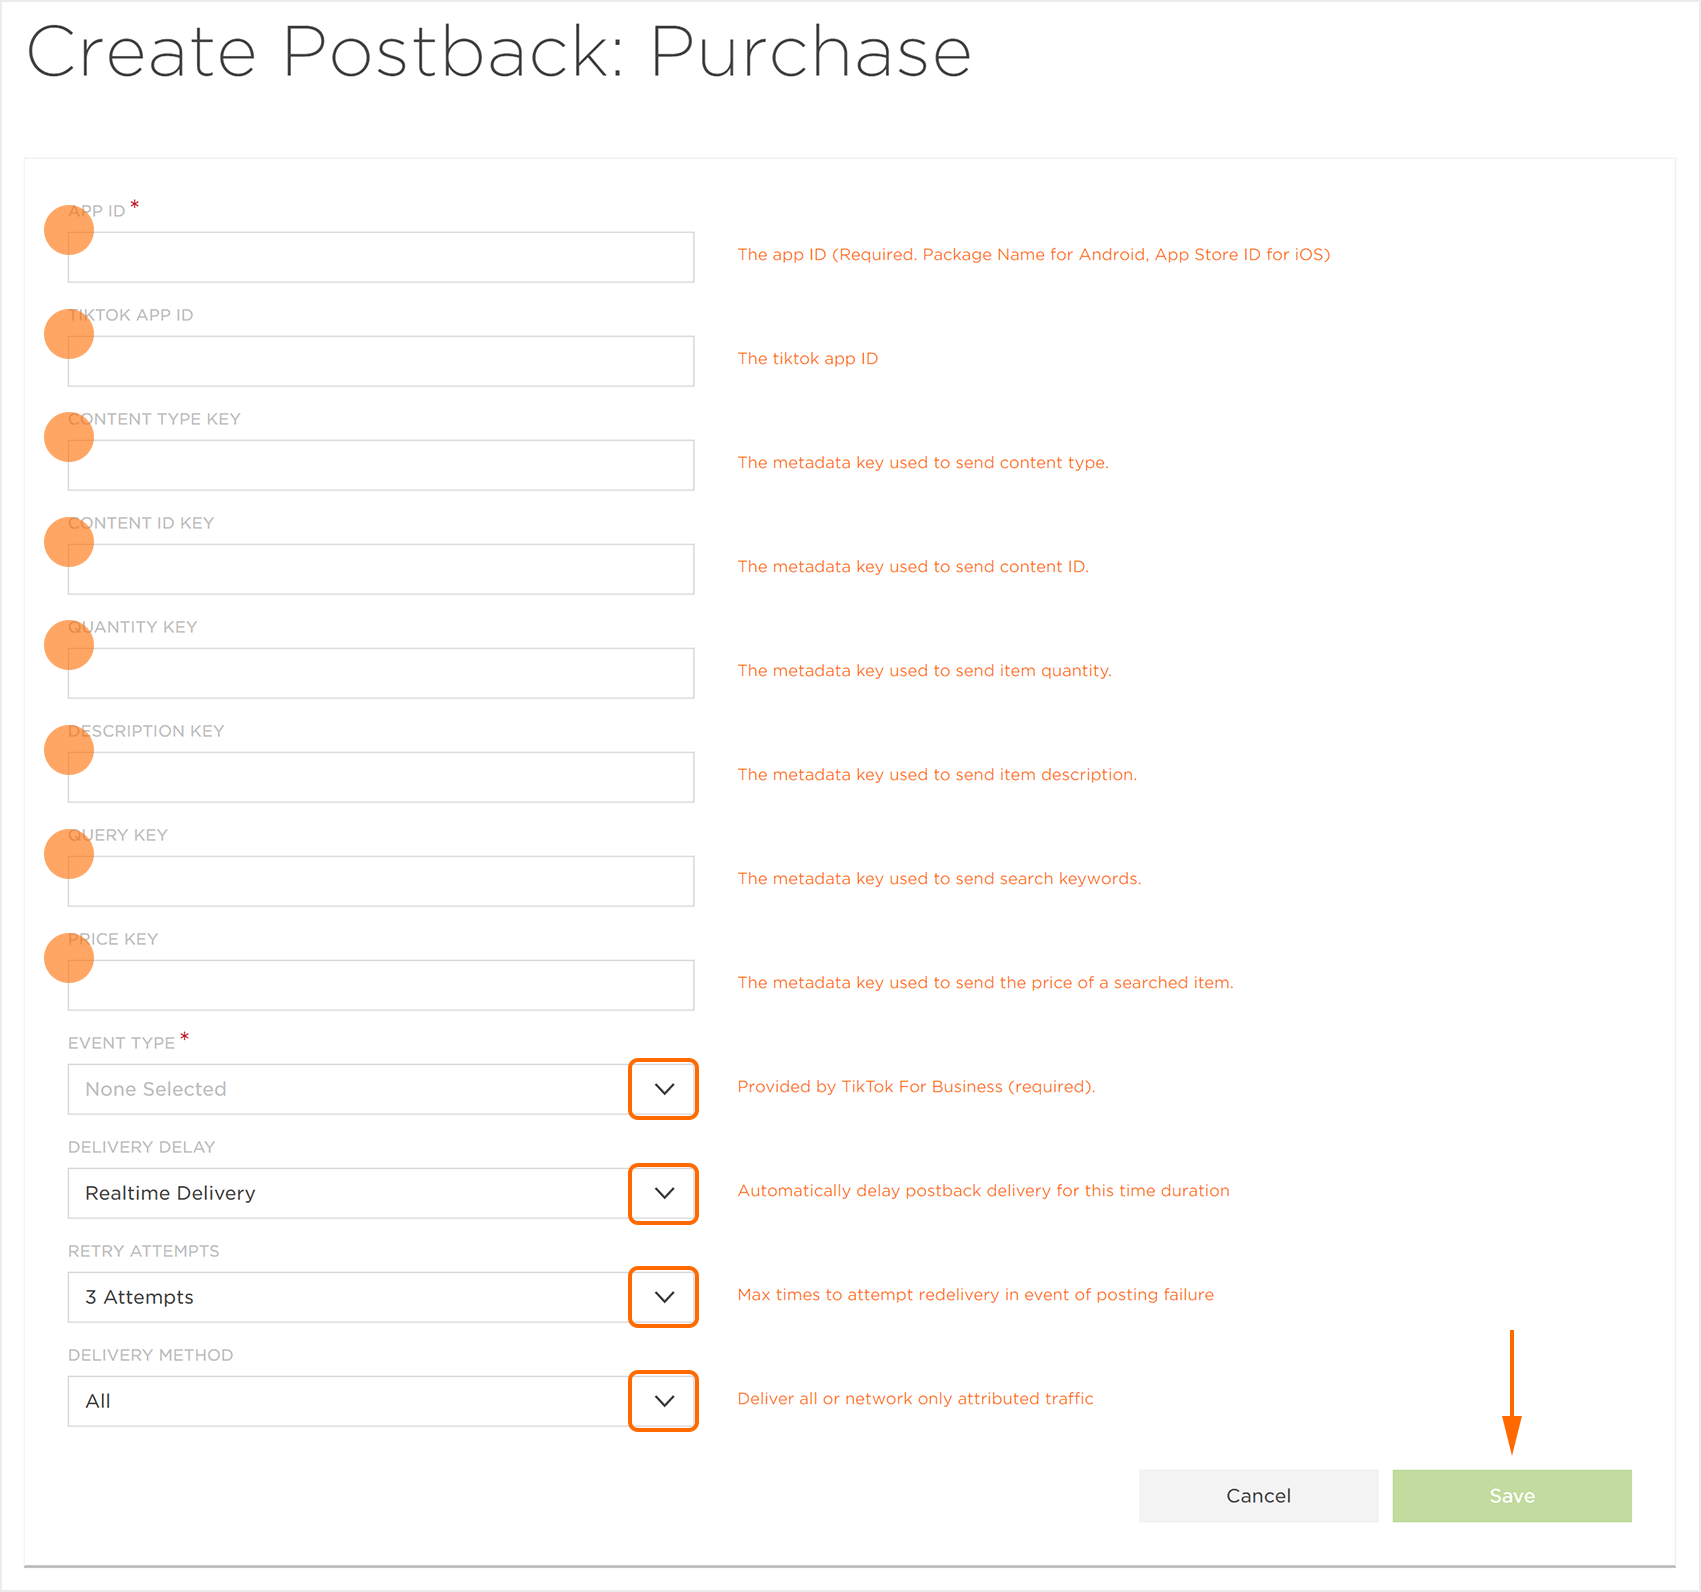
Post-Install Configuration:
- Enter the App ID.
- Enter the TikTok App ID.
- Enter the Content Type Metadata Key.
- Enter the Content ID Metadata Key.
- Enter the Quantity Metadata Key.
- Enter the Description Metadata Key.
- Enter the Query Metadata Key.
- Enter the Price Metadata Key.
- Select the Event Type.
- Select the Delivery Delay.
- Select the number of Retry Attempts.
- Select the Delivery Method.
NOTE: For more information on locating the TikTok App ID, refer to their support documentation.

SKAdNetwork Details
- Update your MMP SDK to the latest version that supports SKAdNetwork API.
- Get familiar with changes in performance and measurement based on SKAdNetwork API.
- Review the new iOS 14 dedicated campaign creation flow in Ads Manager.
- Complete the conversion event configuration in the MMP interface.
- Map your events to TikTok’s event naming by configuring postbacks for each event to TikTok.
- Develop a consolidation strategy to operate with the 15 campaigns, 5 ad group limit per app for SKAN 4.0.
- SKAdNetwork reports can be pulled from the dashboard.

NOTE: For more information on SKAdNetwork reports, refer to our support documentation.
| Attribute | Format | Description |
|---|---|---|
| version | string | Version of install validation postback. Will be 1.0 if source app uses pre-iOS14 SDK and 2.0 for all apps running iOS14. |
| ad-network-id | string | Network ID registered with Apple. |
| campaign-id | string | Can be a value from 1 – 100. |
| transaction-id | string | Unique ID used for deduplication tied to a conversion. |
| app-id | string | ID for the advertised app. |
| attribution-signature | string | Snapchat-generated signature tied to an ad interaction, used to verify conversion using Apple’s public key. This will not be passed for Snapchat Audience Network conversions. Please see below table for more details. |
| redownload | boolean | Flag for a reinstall. |
| source-app-id | string | ID of app where ad was served. Snapchat’s App ID for Snap Ads inventory. This will not be passed for Audience Network conversions (which would cause validation of the postback to fail for conversions driven by Snapchat Audience Network). |
| conversion-value | string | 0-63, must be sent in incremental values by the advertised app. This will be null for v1 postbacks or v2 postbacks without a conversion value due to Apple’s privacy minimum threshold. |
| skad_ip | string | The header ip of the device where the attribution postback was generated from. |
| skad_ts | integer | The timestamp denoting when the media partner received the postback. |
| partner_campaign_name | string | TikTok’s campaign name. |
| partner_campaign_id | string | TikTok’s campaign ID. |
| sub_campaign_name | string | TikTok’s adgroup name. |
| sub_campaign_id | string | TikTok’s adgroup ID. |
